Tutorial: Valentines with Welded Words

I’ve been spending a lot of time on the Silhouette Blog and the Flickr group for Silhouette, and it’s obvious there are a lot of questions out there. I wish I could just spread all my knowledge I’ve learned about the Silhouette the past couple of years so everyone would know how to use it and love it as much as I do. I’m answering a lot of questions there because I know the answer and it’s keeping my knowledge fresh. I’d love to answer questions here, too, but I’m afraid not enough people know I’m here as a resource yet.
Someone asked how to create words within a shape for valentines, so here’s a tutorial I’ve made to help with that. I love that the Silhouette can weld words and shapes and can be fine-tuned to fractions of an inch! Seriously, what other die-cut machine can do that?
Keep in mind that the fonts and shapes you use will not necessarily work exactly the same as mine. I find it helpful to try a tutorial with the same shapes and fonts, or as close as possible, before trying my own designs.
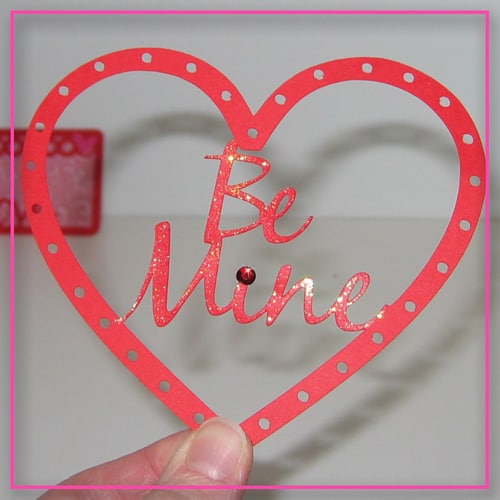
1- Select a heart shape (I used Pixie Princess Wand Project).
2- Select the heart outline and create an internal offset (you’ll probably want the corner option). When it looks good, click “apply.”
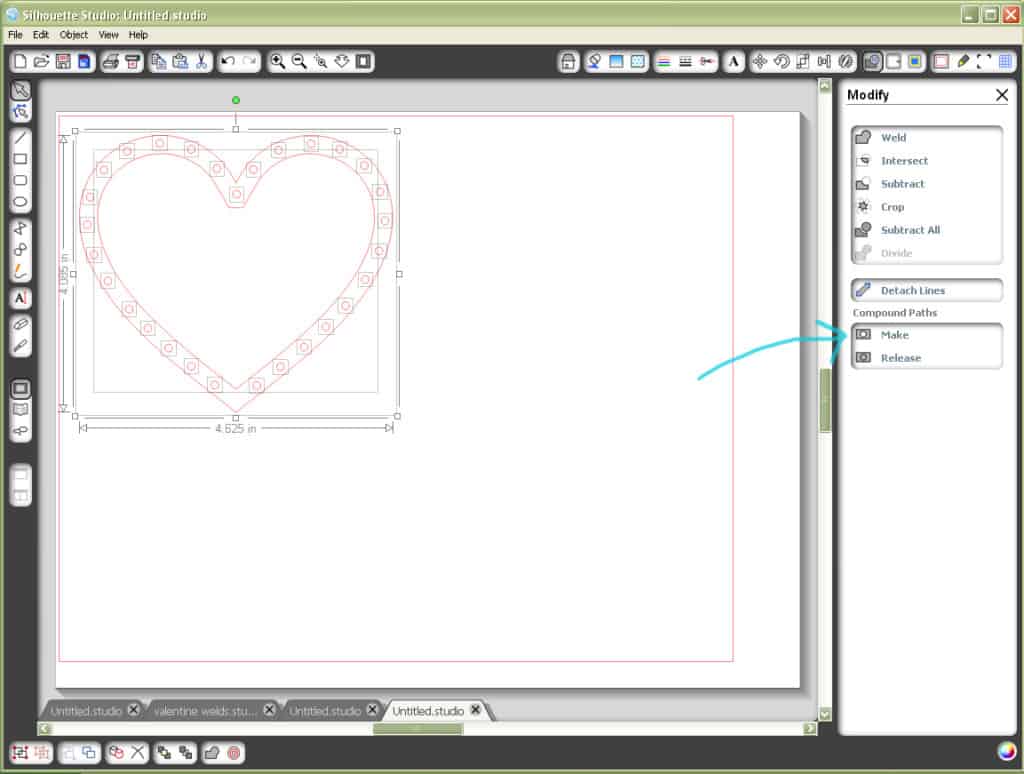
3- In the Modify window, select the heart (and dots) and offset, select “make compound path.”
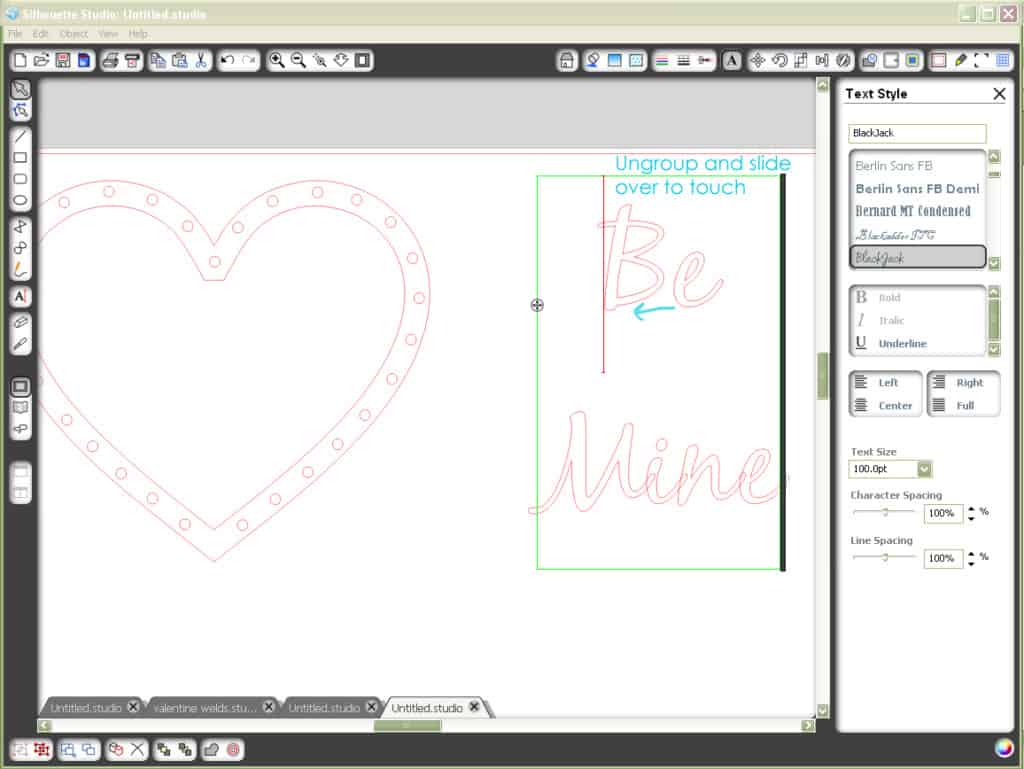
4- Create your text. You’ll want your letters to touch, so pick a font that allows you to do that. I chose Blackjack.
To get your letters to touch, there are a few options: You can (1) adjust the spacing. (2) “Ungroup” to be able to move/rotate/resize individual letters. (3) Create your own “connectors” with your drawing tools on the left.
5- When the word is as you want it, select that word and weld. Note that if you’re losing any centers or “holes” you’ll need to make compound paths with those shapes/letters before welding. Also, if two letters touch in more than one place you’ll lose the hole in between as well, so try to have individual letters touch their partners in only one place. Remember, the “undo” button is your friend!
6- Then “make compound path” for each word.
7- Arrange your words inside the heart shape so the edges just barely overlap the inner heart outline.
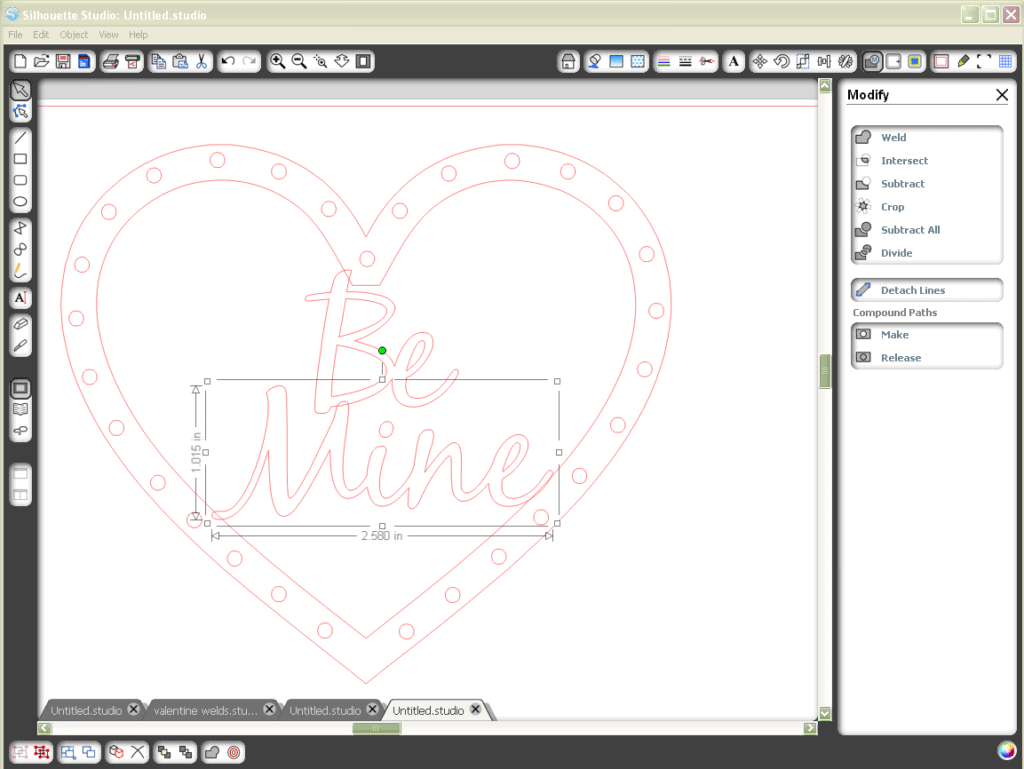
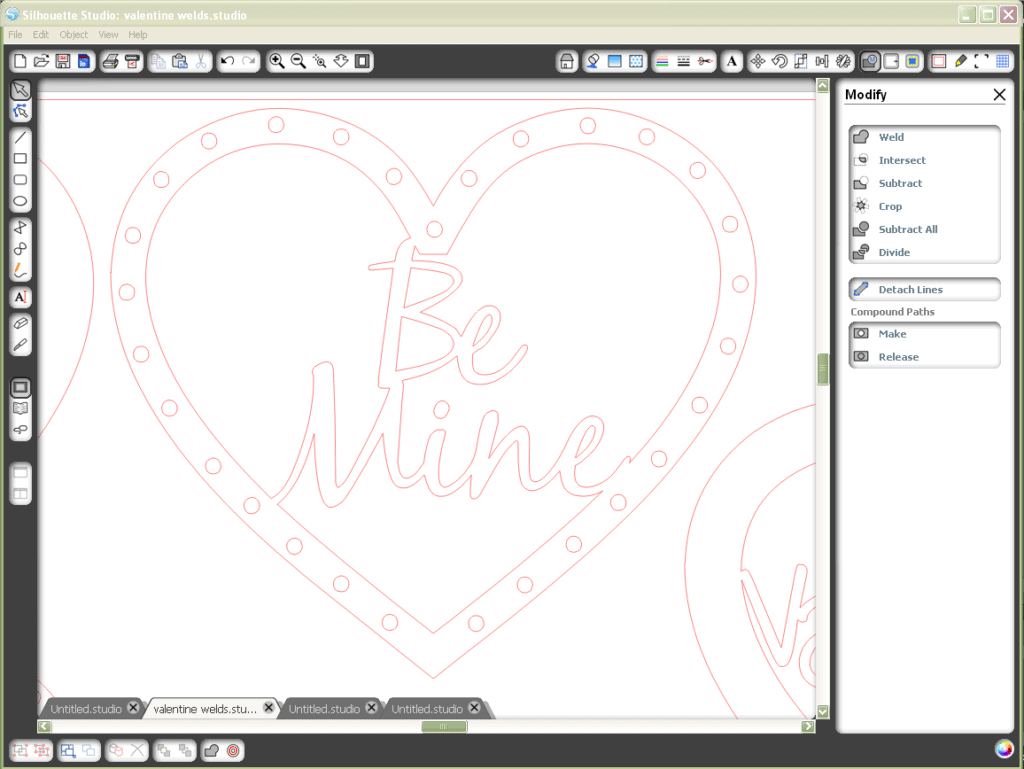
8- Select the words and the heart, then weld.
9- Group together, if necessary.
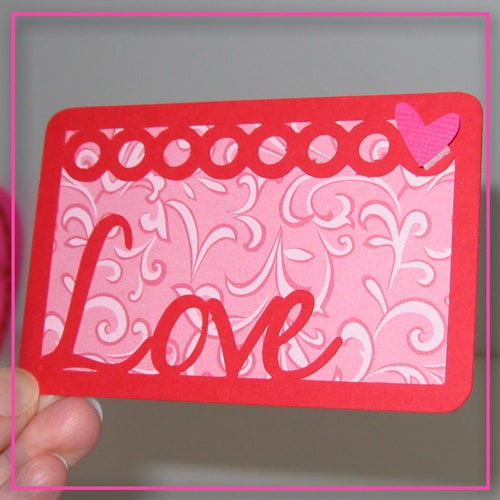
My “love” rectangle and “valentine” cutout (below) needed a little more manipulation. I had to use the “divide” function and pull away individual pieces, as in my previous tutorial.


Edit: I’m trying something new. I’m going to give you, for free, one of these valentine files to cut in Studio. You can download it here. I hope it works!

OHhhh my goodness I am so glad you commented on my tutu tutorial because your blog is just what I need! I got a silhouette for Christmas and I love it but still have a lot to learn and your tutorials are more explanatory. Yay, this has made my day!! Oh and I'm glad you can make tutu's now, they are way too expensive to buy already made for sure!
It is awesome that you know Silhouette Studio and are sharing. I just posted your blog on a big Silhouette forum so they can learn.
Today I'm going to sit on the couch with TWO laptops. I'll use one to see the tutorials I can find and the other to open up Silhouette Studio and LEARN.
I'm really struggling to learn it.
Thanks,
Susie
Thanks so much for the tutorial! I am going to practice today. I've had my original Sil for 2 years and love it but I'm just getting used to Sil Studio. I don't understand the "compound path" tool – so your tut will help me play with it.
Sally
These are simply perfect! TFS 🙂
I was doing fine until I got to step 8 & 9. When I went to weld, all of the words disappeared!Any ideas on what I did/didn't do?
Sally
Sally, on my "Valentine" heart that happened to me, too. I'm not sure why it happens, possibly because the ones that work touch the shape's edge in an odd number of places and the ones that disappear upon welding touch in an even number of places. Not sure though.
To fix that problem you’ll probably need to use the “divide” function. After step 7 of this tutorial, follow steps 4 and 5 of my previous tutorial. It takes some practice to know the order to use these steps, and exactly which objects to select. That’s why I like my unlimited “undo” button (the old Robo Master software only lets you undo once!).
If you still have problems, let me know.
Oh, and before using divide you probably need to select just the inner shape and the word (release compound path if you have to get the shape and its internal offset split back apart).
Sally, that's exactly what is happening to mine, too. I'm going to try Kelly's suggestion to see if it works. Keeping my fingers crossed.
Thank you SO MUCH for taking time to share your knowledge with us!!
You're welcome. I hope you can all get it to work. This is truly one of the many great features of the Silhouette, and it would be a shame not to be able to use it. Once you get the hang of these tools, the possibilities really open up! 🙂
Ah-ha! Stumbled across your blog via a yahoo group and am so glad I did! Excellent work and great tutorials. Looking forward to more posts!
Great tutorial! Can't wait to see what you come up with in the future.
Is there a button to subscribe to your blog updates via email?
Teryl,
It took me a while to figure it out (I'd much rather learn new things with the Silhouette than how to work Blogger) but I've added a "Subscribe via email" button on the left. I hope it works! Thanks for the suggestion. 🙂
Thanks for the file.
Thanks for the file!
Kelly,
Great tutorial thank you! Just got my silhouette 6 months ago. Have never know how to weld before. Came across you via the flickr silhouette group.
Love your creations. Have posted some of mine there too. Its such a talented creative group! Following you blog now.
Thanks
Sarah Martin
http://www.scrapbookhabit.com
Thank you for sharing your pretty valentine! I appreciate your generosity and your talent!
Thank You I just bookmarked this page so I can come back. Just got today my Silhouette and have been playing with it. Will play around later with this. I love the machine and once I figure it out look forward to doing all sorts of projects like welded words within a shape.
Hurray! Let me know if you have any questions as you explore your new machine. I'd love to help.