Valentines for 2011
I can’t bring myself to buy boxes of valentines from the store. I just can’t. Even with three kids in school this year, my crafty self just won’t allow it. So I had to plan for 60+ homemade valentines. Where do I start? The Silhouette, of course!
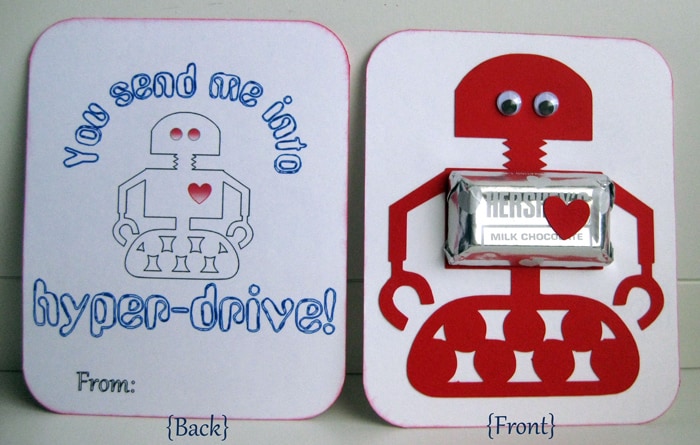
I saw while browsing through a card magazine a while ago a cute little robot valentine with a mini chocolate-bar torso. So I plugged “robot” into the Silhouette online store’s search box and it pulled up several very cute designs. By vote, this was our family’s favorite. The design came in “pieces,” and didn’t fit the candy bar exactly, so I had to modify it a bit.
Details: I first created a temporary rectangle the size of a Hershey’s “miniatures” candy, 1″x1.75″, then resized the robot to fit it well. Because this design came in pieces I had to weld the parts together (had to “make compound path” on the wheels so I wouldn’t lose the holes). I used the slice tool to cut a chunk out of the torso section and then welded it back together. There’s always a lot of grouping and ungrouping and making compound paths so I am only modifying the lines I want. I deleted the eyes in this design, but kept the adorable little heart. Turns out this size of robot was going to get me six to a page.
That made a perfect valentine to fit a rectangle of 3.5″x4.25″ (easy to cut a full letter-size sheet with a paper trimmer). Now for the back side. I couldn’t find a cute robot clip art so I wanted to use this robot again. I played with the design in Silhouette Studio and found a catchy saying I could put on a text path. I used a rounded rectangle for my text path. I love how many fine adjustments you can make to everything you create in Studio!
So, I liked what I had designed and used the sketch pen to see what it would look like on paper. Good, but not great. I wanted more than one color (which meant a trip to the store), it would have taken a long time even at top speed (we’re talking 11 sheets and the font I chose was time consuming), and most important–I couldn’t line it up perfectly on my carrier sheet to center it for trimming my exact rectangles. So no sketch pen.
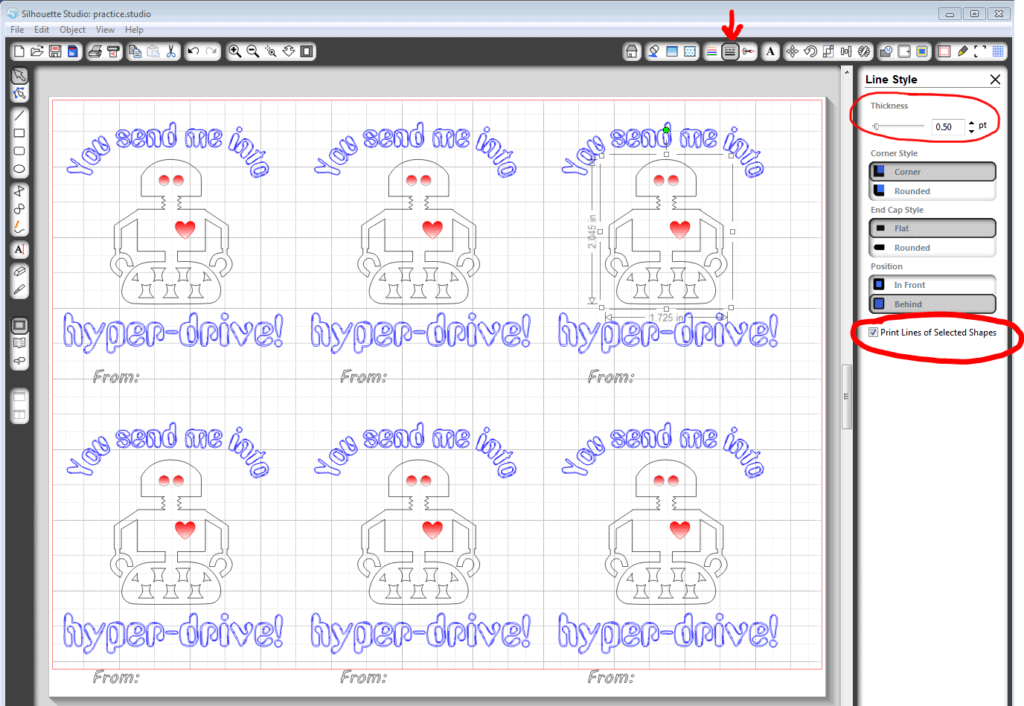
Try as I might, I couldn’t recreate the same text design or import the robot into other programs. I even played with screen capture. Then I remembered the magical print and cut feature of Silhouette! Turns out, your printable area is only limited by your printer, not by the cutting area outlined in red in the software. I made temporary rectangles of 3.5″x4.25″ so I could center my design and repeat it six times across the page and did NOT choose to show the registration marks. My printer printed it exactly as I had created it on screen, with no intent to cut.
After deleting the temporary placement rectangles, I used a gradient fill color for the eyes and heart, changed the line colors as I wanted them, then there were two important steps. In the Line Style window (after selecting all the shapes on the entire page with the nifty button at the bottom), I checked the box for “print lines of selected shape(s)”, and increased the line thickness to 0.50 so it would stand out more. The thin default line is too wimpy when the printed lines are the focus. And when I didn’t check that box, only the eyes and hearts showed up when printing.
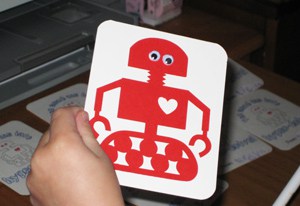
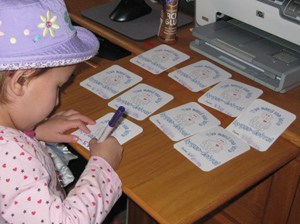
Once I had my printed page I cut it into my six perfect rectangles; flipped it over to glue on the robot, googly eyes, candy bar and extra heart; and rounded the corners with a heavy-duty punch that does six pages of cardstock at a time. And it’s the perfect kind of craft for the kids to make their own valentines by gluing on the robot, eyes, and candy.
Shape: Robot
Fonts: LDJ Sketchy Robot, Gabriola
This post may contain affiliate links. Your price is the same but I may get a small commission when you use my links. Thanks for your support! 🙂

Wow what an awesome tutorial. I didnt realize you could print things like that from the Silhouette. I was trying to make a tag shape with names and a date inside it for a wedding favor box but my printer wasnt printing out the registration marks so I couldnt get it to work. This is another awesome feature of the Silhouette.
Awesome. I love seeing what others are doing with their Silhouettes. I'm trying to learn it. 🙂
Hope to see more. I'm following.
Susie
This is sooooo cute!
Oh, I absolutely love it. Well done.
I love these!! What a darling and creative valentine!