Interactive Card Tutorial
This interactive card helped me win the most recent challenge in the Silhouette Plus forum.

Interactive Card Free File
Here is the Silhouette Studio cutting file for you.
Instructions
Here are the instructions for this interactive card. The front can be adapted to suit your needs (see another example at the end of the post).
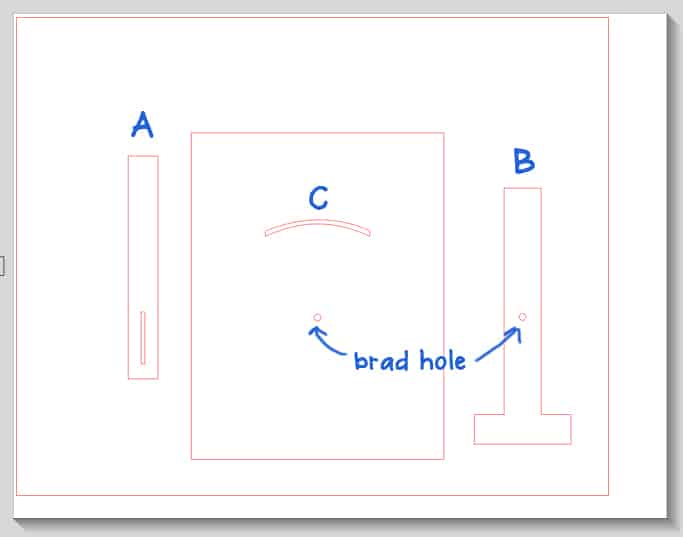
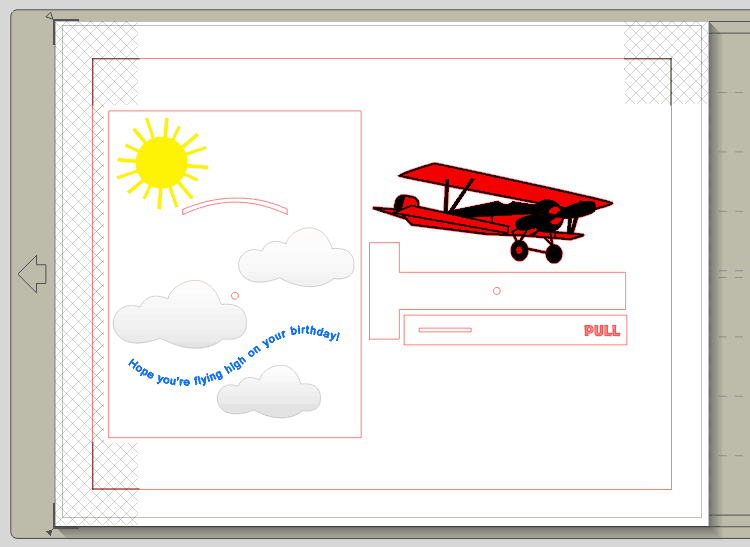
This is what the cutting file looks like. You can cut these pieces out of any paper and decorate the card as you choose. I made my airplane card a print and cut using the Silhouette and a single piece of white cardstock.
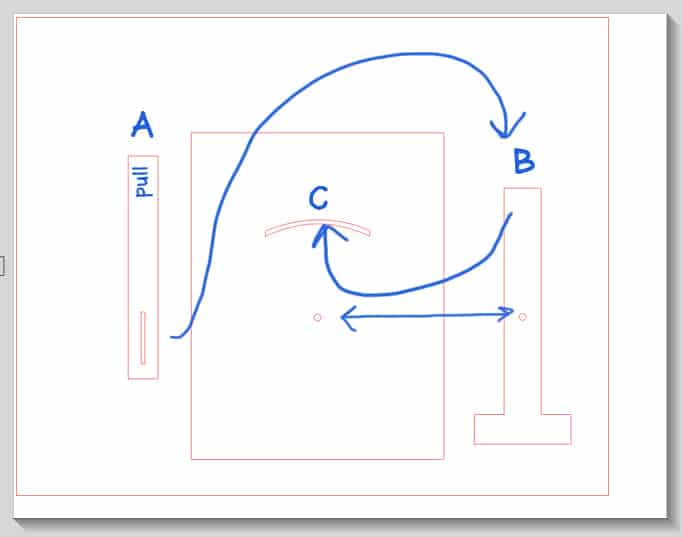
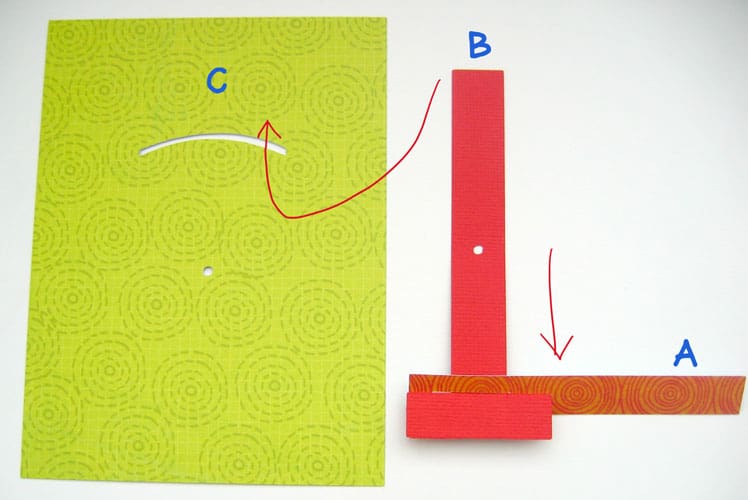
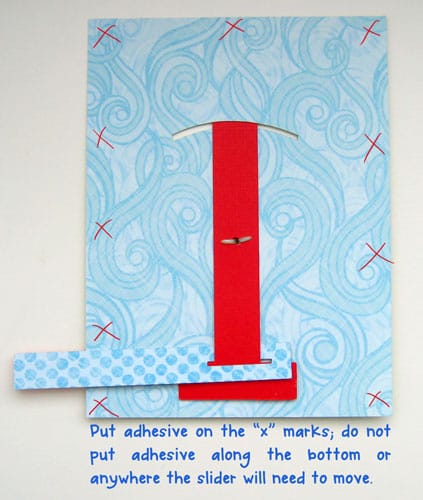
After cutting the pieces (remember, they can all be from different papers), take piece “A” and slide its slot over piece “B”. Then slide piece “B” up from behind and through the slot on piece “C”.
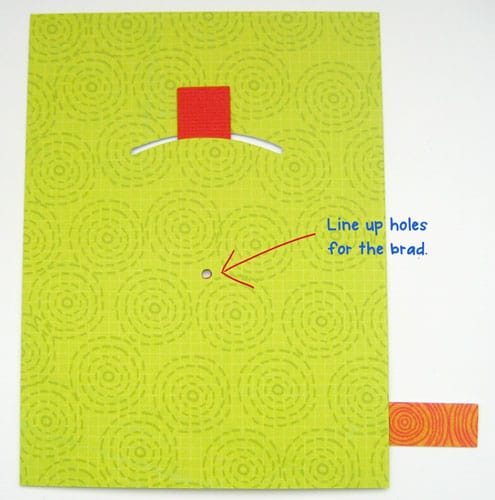
Put a brad through the holes. This is what it looks like from behind:
I adhere this to a plain card front (8.5″x5.5″, folded in half) to hide the mechanics.
Looking again at the front, you can now adhere any shape you want on the tip of piece “B” that’s poking out of the slot on piece “C” (your card front). I like to use foam pop dots to make it stand out and avoid too much rubbing on the card as it pivots. I’ve used stamped images, die cuts, and you could even use large pre-made embellishments.
This is what my cutting file looked like on the airplane card before I sent it to the printer:
Adapt It
This is another version of the card I made yesterday, just for fun.
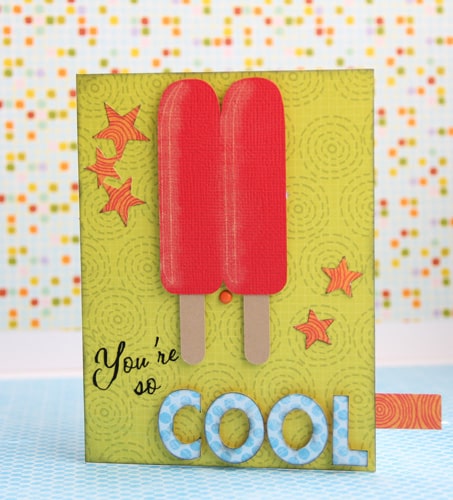
The popsicle shape is from Lettering Delights. The highlights on the popsicle are shapes I didn’t cut all the way through and then rubbed in chalk with a cotton swab. I popped the “COOL” word off the page with more foam dots, and the “you’re so” words are cut from black fuzzy vinyl. The stars are from basic Silhouette shapes and a Fiskars star punch. All the pattern papers are from the K&Company Citronella line.

Hi Kelly,
Who doesn't love a card you can play with???
Thanks for the toot…
Kelly, thank you so much for this terrific cuttting file and such a nice tutorial. It's going to be a fun card to make and even more fun to give. You are so sweet to do this.
Wow. So awesome.
You're welcome! Did you notice my bottom photo of the popsicle card? Thanks to my Candice Stringham photography class through JessicaSprague.com I can shoot in manual mode and get pictures like that! Yay!
Wow, you took the pic of that popsicle? How cool is that! You have to share this technique. It is just sooo…cool. Of course; photography is not my patient thing. Thanks again Kelly for sharing such neat projects, tutorials. and templates
Oooh! I'm in love with the aeroplane card! I definitely need to work on making some interactive cards with the silhouette…the gears are turning! Sounds like I should check out Silhouette Plus, too!
I love your cards Kelly! Thank you so much for offering the file for us. I went to download it and it gave me an error message though ;( I'll have to try again in a bit.
~Hugs~
Becky
http://www.squirlygirlcreations.blogspot.com
Thanks, Becky. I'm not showing any trouble on my end. Is anyone else getting an error message when they try to download the cut file?
Just wanted to say thank you for sharing! I have an awesome idea on how to use this for a rainbow birthday card for my daughter. Thanks again!
You're welcome, Brook! Sounds like a cute card; I'm glad this idea and template will help you.