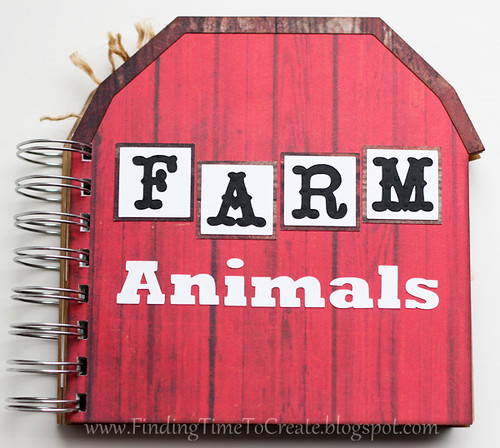
Farm Animals Book (Freebie!)
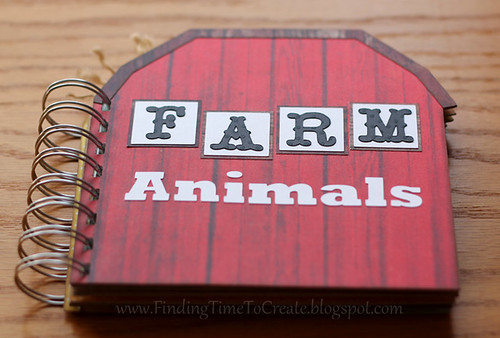
I created a book like this years ago, based on an idea from a friend. That was before my Silhouette, so I stamped, printed, and cut everything myself. I laminated my original book and my kids have all enjoyed it, so I decided to make a version to share with you that uses cutting files to make it all uniform and simple.
If you are going to download the free cutting files for this book, you may want to bookmark or pin this page so you can come back to see the assembly tips and pictures of the final product (there are written instructions with the download). This book is perfect for parents with small children, teenage babysitters, preschool teachers, grandparents, aunts and uncles giving gifts to young nieces and nephews…you get the idea.
All of the pages, words, and tags are designed to fit the Doodlebug Icons Cardstock Stickers–2392 Barnyard. You can buy these at Heartland Paper in Bountiful, Utah, or from your favorite scrapbook supplier. The non-PDF files already have binding holes that will fit both Bind-it-All binding wires and Cinch binding wires.
There are several variations so if you have a Silhouette, another cutter that uses SVG files, or if you own scissors, you can recreate this album! Did I cover everyone? (All versions do need a printer.)
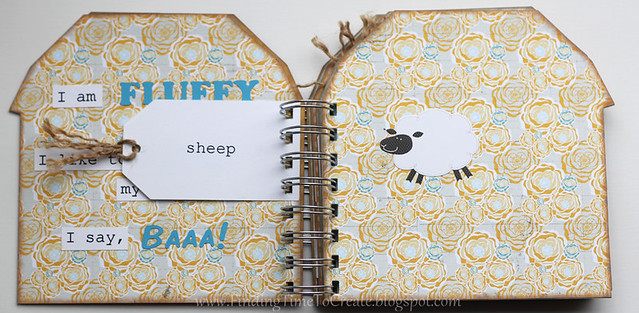
- Cut version (Silhouette Studio)–shown in my pictures (has some print & cut elements)
- Print and cut (Silhouette Studio)–all print & cut pages and tags
- SVG (for other digital cutters that can use SVG files)
- PDF (outline or full color)–print, then cut with scissors
The Farm Animals Book download includes all versions of the file, and cutting and/or printing instructions for all versions are also included.
Here are some assembly tips:
1- Cut and glue all the pages and tags as necessary. Ink the edges, if desired.
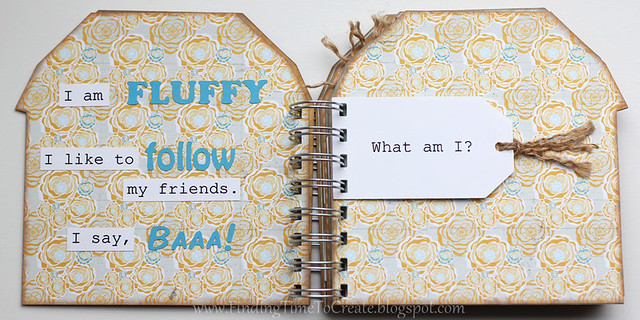
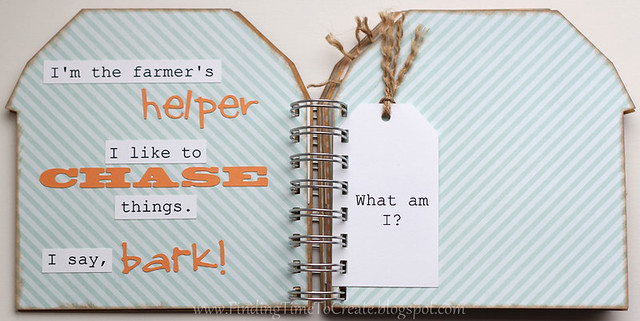
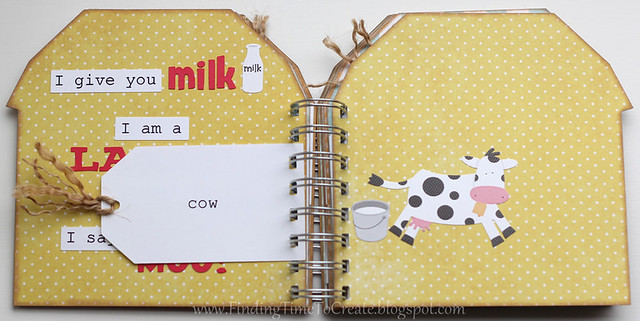
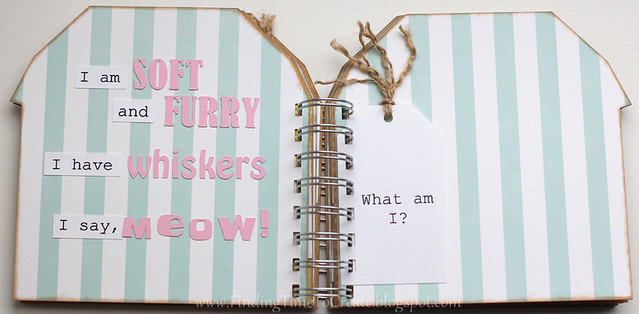
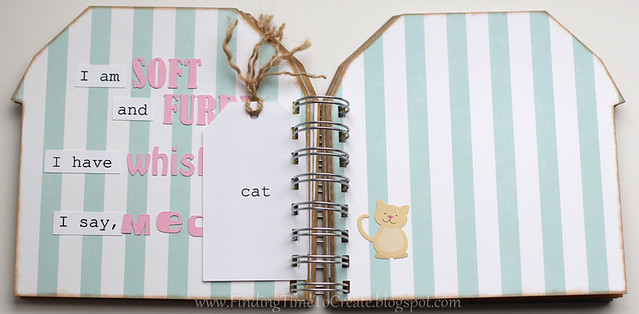
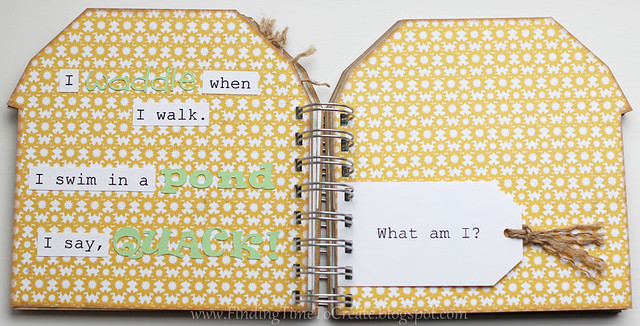
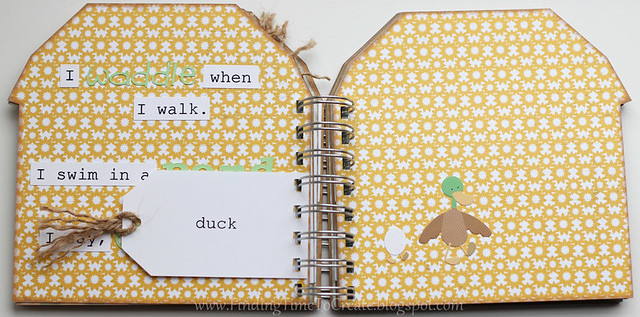
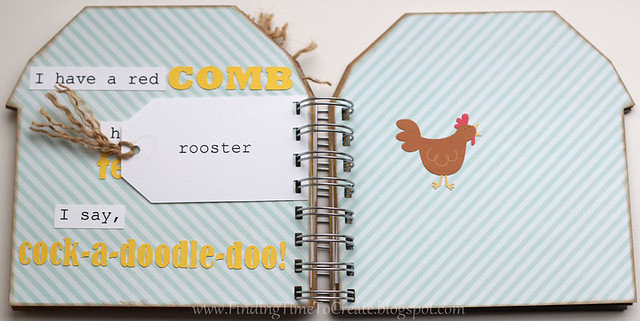
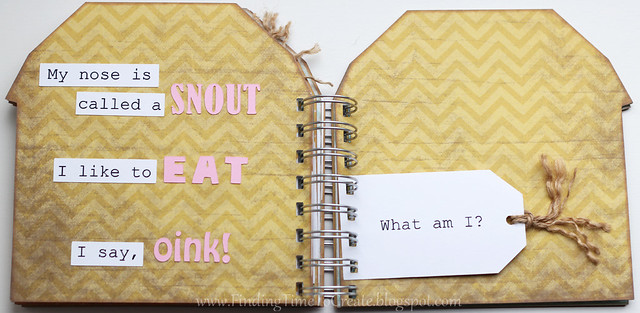
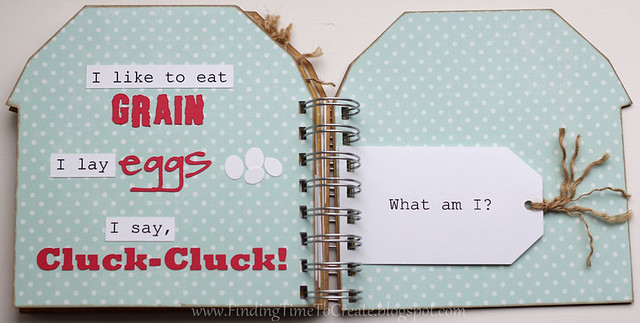
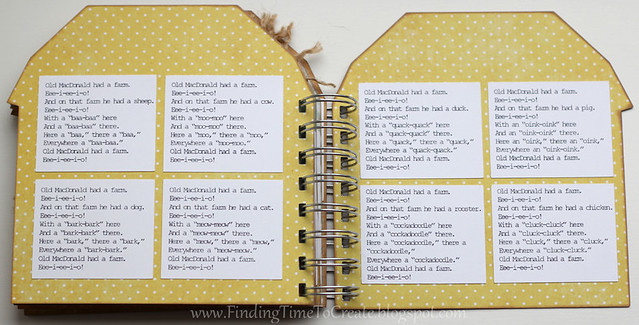
2- Place the appropriate “What am I?” tags between the correct pages. I distributed the tags in different spots for visual interest and so the album was not bulky in just the center.
3- Temporarily thread the binding wires through to make sure everything looks good, but don’t clamp it shut yet.
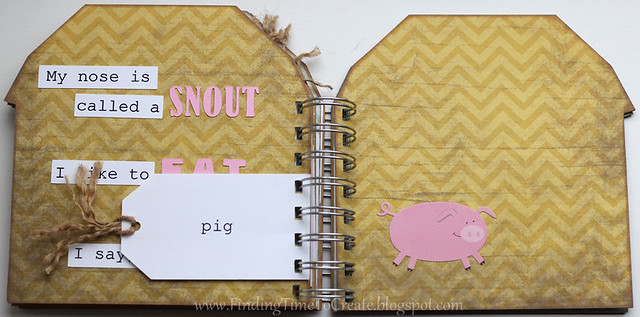
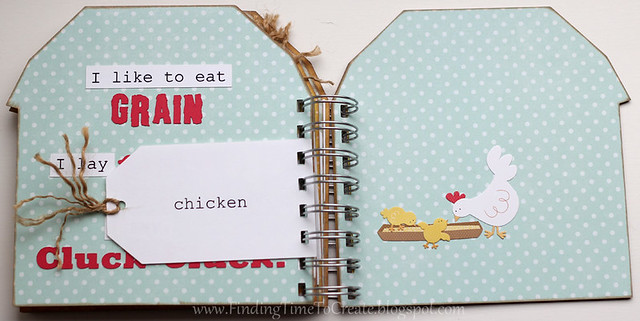
4- Place the appropriate animal stickers on each page so they will be hidden by the “What am I?” tag.
5- Add twine to the tags (I cut mine into 5″ strips).
6- Crimp the binding wires closed.
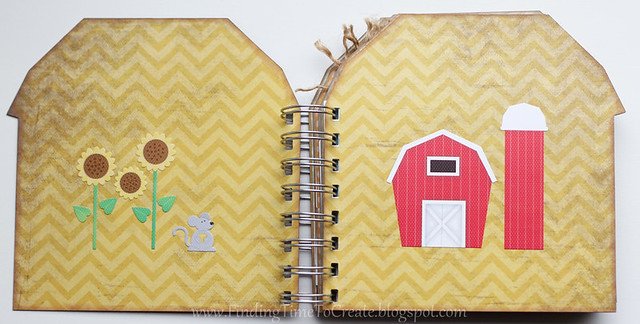


(I forgot to take a picture of the back cover before putting instructions on it for display at Heartland Paper, but you can see that the back cover is cut from the same red barn paper as the front cover.)
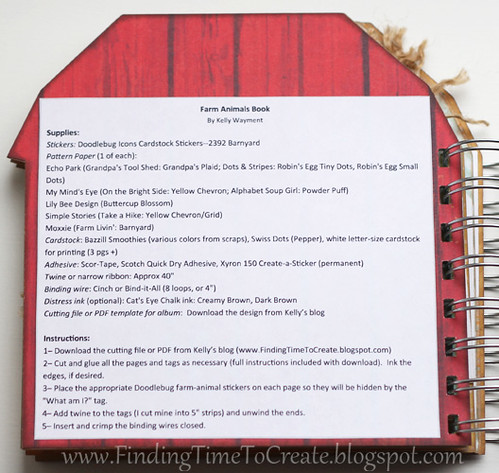
Supplies:
Stickers: Doodlebug Icons Cardstock Stickers–2392 Barnyard
Pattern Paper (1 of each):
Echo Park (Grandpa’s Tool Shed: Grandpa’s Plaid; Dots & Stripes: Robin’s Egg Tiny Dots, Robin’s Egg Small Dots)
My Mind’s Eye (On the Bright Side: Yellow Chevron; Alphabet Soup Girl: Powder Puff)
Lily Bee Design (Buttercup Blossom)
Simple Stories (Take a Hike: Yellow Chevron/Grid)
Moxxie (Farm Livin’: Barnyard)
Cardstock: Bazzill Smoothies (various colors from scraps), Swiss Dots (Pepper), white letter-size cardstock for printing (3 pgs +)
Adhesive: Scor-Tape, Scotch Quick Dry Adhesive, Xyron 150 Create-a-Sticker (permanent)
Twine or narrow ribbon: Approx 40″
Binding wire: Cinch or Bind-it-All (8 loops, or 4″)–I used 1″ size in my sample
Distress ink (optional): Cat’s Eye Chalk ink: Creamy Brown, Dark Brown
Cutting file or PDF template for album: Download my design HERE
Fonts used:
Courier New, Hobo Std, SNF Sketchy, Cafe Rojo, 2Peas Billboard, Baskerville Old Face, Rockwell Extra Bold, You Are Loved, Postino Std, Showcard Gothic, Blackoak Std, Pea Natalie, LD Red Hatter’s Hand, Ravie, QKZ Block Party, Cooper Black, Jivetalk, Hoedown, LD Little Fishie, Bernard MT Condensed, Berlin Sans FB Demi, Kristen ITC

How adorable is this! I'd love to make one for my granddaughter! I love my Bind-It-All and 3D projects like this one that let me use it, and I love giving Momo-made things to my grandchildren. Thank you for a stupendous project, Kelly!
That is so adorable and I can tell you put a lot of work into creating it. Thanks for generously sharing the files. I know my youngest grandchild would love looking through it.
So cute. Wish I still had young grandchildren to make one for. Excellent idea! You did such a great job, Kelly.
You never cease to amaze me… 🙂
Thanks, it's so very cute
hugs Linda
Kelly this is really very cute and nice. I have a binding machine that I like to use so this is a dust off the machine project. Thank you for sharing this.
A fabulous project, Kelly. My kids used to love this kind of interactive book when they were young. A brilliant idea to use your Silhouette to create your own unique version. Love it!
Tine 🙂
Kelly, your Farm book is adorable. Any little one would love to have one. You did such a fabulous job making it. My sis teaches little ones. I have to make sure to share this with her. Of course, she'll have me make it so I may as well get busy…lol. I'm already making word cards for her and our grandchildren. This book is going to be a hit for all of the little ones in our lives. Thank you so much for sharing. xxx- Debbie
thanks for sharing, I will translate everything into dutch, but the idea is wonderful!
Hi Kelly –
Haha, how ARE you "finding time to create" with your new job and all??? You amaze me.
This looks like SUCH a fun project. I have a "bind it all" or similar machine on my big fat WISH LIST. Let me know if you ever come across one super "on sale"???
So nice to have the time to come visit you and leave a BIG HUG!
Have a great week.
🙂 Barb
this is adorable, i love it! do you use a special glue to add the pieces to the pages? I worry that little hands playing with it would make the pieces fall off quickly?
You can laminate the book if you're really concerned about it, which is what I did with my original book 8 years ago that's still going strong. The stickers won't come off easily, of course, and I have a lot of confidence in Scotch Quick-Dry Adhesive (a strong liquid glue) for the lettering. I used Tombow Mono Adhesive Dots roller for the word strips, because it's really strong as well.
Thank you! This is a great idea.
This is great – what a lovely idea. My new little grandson will make good use of it. Thank you so much for your generosity. Hil
this is too stinkin cute!!!! Love it!
This is just too adorable!!! I'm loving all the projects on your blog. I'm new to the Silhouette world, I've bookmarked your site because I can see that I will be able to learn a lot from you.
Peace, Love and Joy,
Joyce
Thank you, Joyce! I'm so glad you found me. 🙂
Oh I want to make this but the svg files are missing. There are only two pages. Would be great if it could be done in color like the pdf version. Thank you.