Season’s Greetings Card
Originally posted on the Silhouette blog 12/22/2013
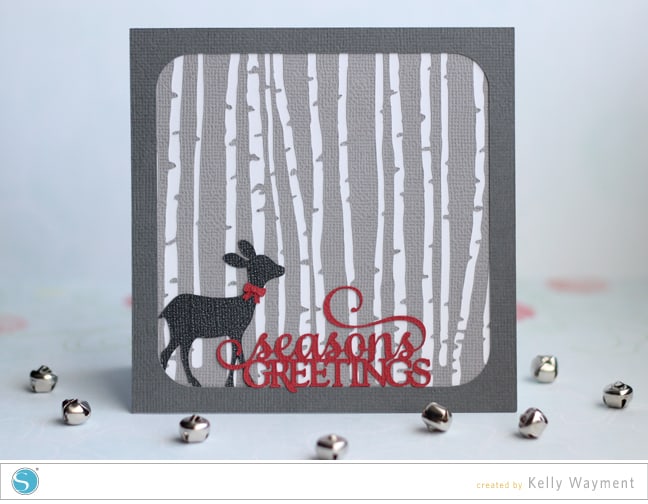
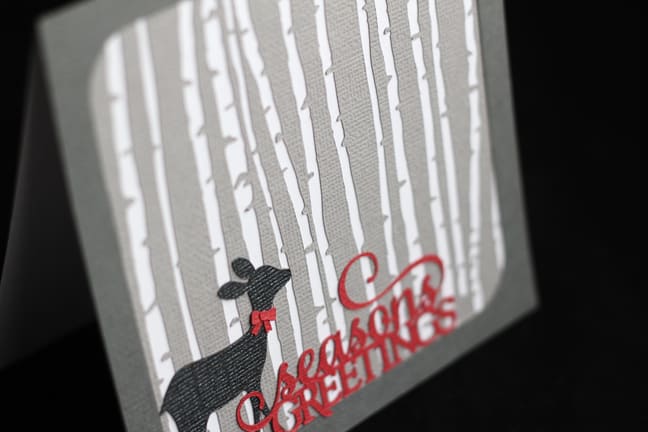
Today’s free shape is this group of birch trees. Doesn’t this make a beautiful winter scene?
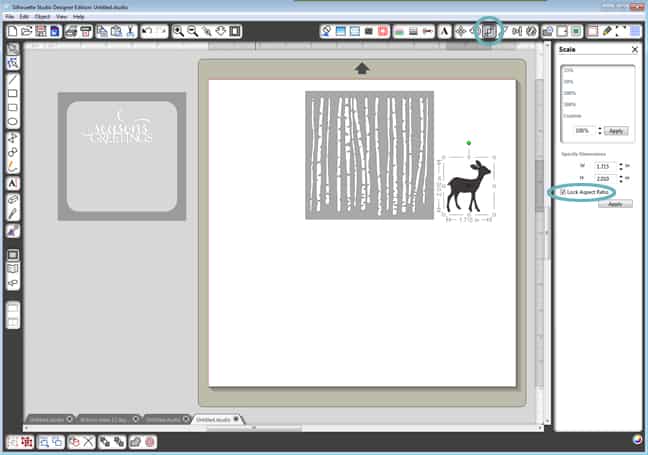
I’ll show you how to put this card together. First, open the birch trees shape and resize it to 5.0” x 5.0”. Resize the season’s greetings shape to approximately 2.80” wide. Resize this deer shape to 1.715” wide by 2.010” high. You can use any bow you like for the deer; I used one I had on hand from Christmas gift tags and resized it to 0.285” wide by 0.225” high.
Resizing to exact dimensions is really quick and precise if you use your Scale Window. Remember to check the box for Lock Aspect Ratio when entering dimensions for these shapes so everything stays proportionate.
Cut a 5” x 10” card base from white cardstock and fold it in half.
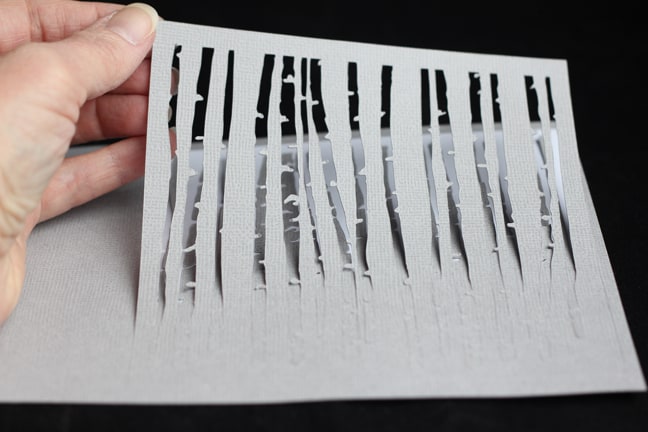
Cut the birch trees shape from “cool grey” Silhouette adhesive-backed cardstock and apply to the white card base. This shape comes as a negative image, and the adhesive cardstock is a great paper choice. It all comes up as one piece and you don’t have to worry about adding any adhesive yourself.
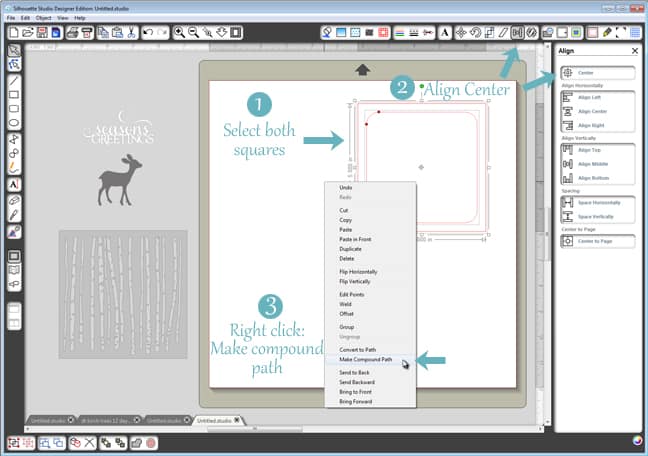
Make a frame by using the drawing tools to draw a 5” square (hold the Shift key while dragging out the shape with the rectangle drawing tool). Then draw a 4.325” square with the rounded rectangle drawing tool. Adjust the roundness of the corners by holding the Shift key while dragging one red dot away from the corner. (Holding the Shift key makes both dots move at the same time so the corner stays proportionately round.)
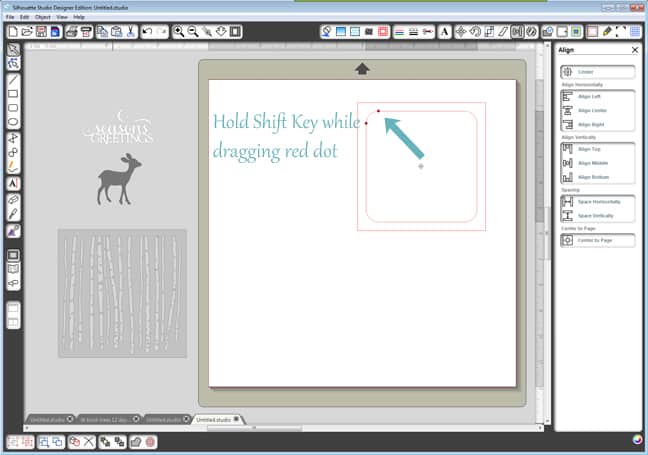
When satisfied with the corners, select both the square and the rounded square. Go to the Align Window and choose Center. While both are still selected, right click with your mouse and choose Make Compound Path. Cut this finished frame from a darker grey cardstock.
Cut the deer from a very dark grey cardstock.
Cut the seasons greetings welded sentiment portion and the bow from “rose” adhesive-backed cardstock. Place the bow layers onto the deer’s neck (no worrying about glue for those teeny-tiny pieces!).
Glue the deer to the lower left corner of the card, slightly tucked under the dark grey frame. Adhere the frame as well.
Place the red sentiment along the frame’s bottom edge, centered.
I hope you enjoy this birch tree shape as much as I did. Merry Christmas!
Silhouette Shapes:
Birch trees (free shape 12/22/2013)
Deer by Loni Stevens
Season’s Greetings – perfect flourish by Kolette Hall
Christmas gift tags

Your card is adorable! Merry Christmas.
Love what you have done with this freebie file from Silhouette. You are so very creative!!!