Custom Address Labels
Originally posted on the Silhouette Blog 1/2/2014
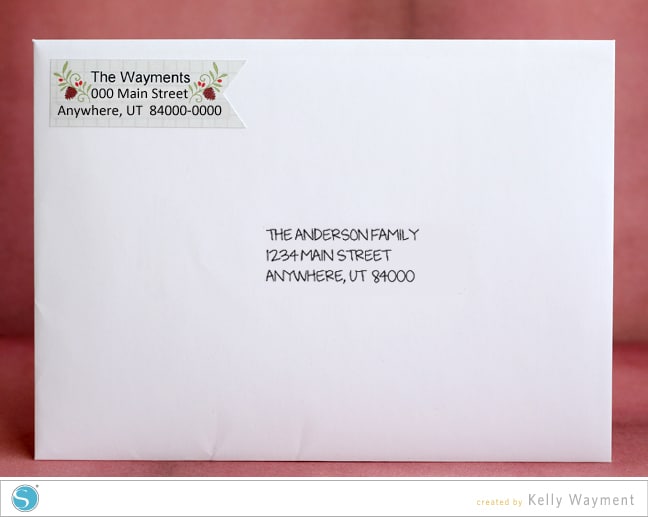
Happy New Year! January for me is a time for setting goals and getting things in order, like having cards ready to send. I made some custom address labels using Silhouette Studio to design them, and I used the Silhouette printable white sticker paper to print and cut them out so they are ready to go.
I made my own print & cut address labels with just a few easy steps.
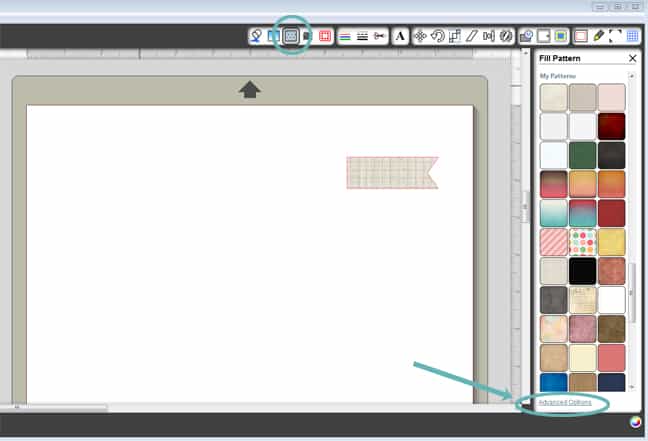
1- In Silhouette Studio, open a pretty label shape (why settle for plain rectangles on your envelopes when there are so many great shapes in the Silhouette store?). I used the flag shape from 5 label shapes and resized it to 0.845” high by 2.460” wide.
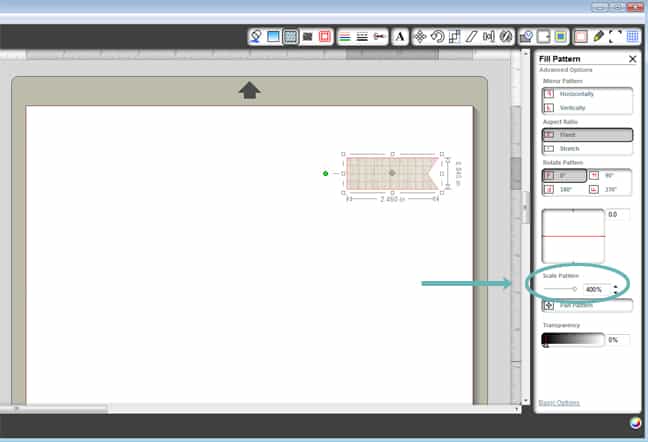
2- With the shape selected, fill it with a subtle pattern like grid pattern using your Fill Pattern Window. In the Advanced Options of the Fill Pattern Window, you can fine tune the amount of detail seen by adjusting the Scale Pattern slider. I chose 400% for this design.
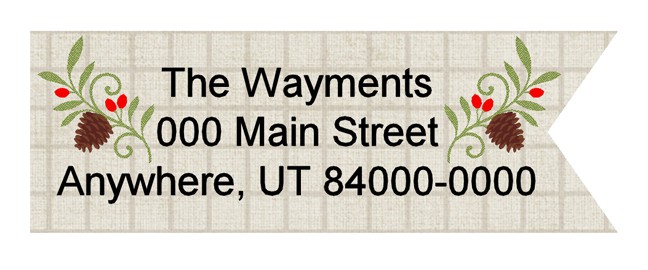
3- With your Text Tool, type out your address, fill it with a dark color using the Fill Color Window, and resize it to fit the label.
4- Choose an appropriate design element (I used Echo Park Winter Branch), fill the pieces with color and layer them appropriately, resize them to fit the space remaining on your label, and position them on the label. At any point in this process you can select all of your text and shapes and set the line color to blank (in the Line Color Window) so it looks on screen the way it will print.
5- When you are happy with the whole look of your address label, select all the pieces, Group them (Ctrl or Cmd G), and go to your Cut Style Window. Select Cut Edge, and the label’s outer edge should turn bold red. The bold cutting lines only show while you are in the Cut Style Window.
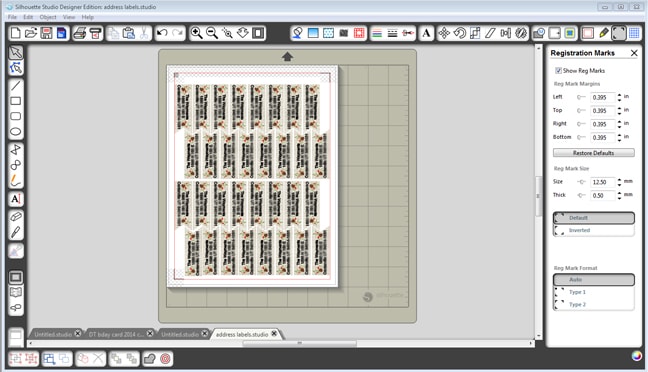
6- Next, set your page size to match your printer (in the Page Tools Window). Then go to the Registration Mark Settings Window.
7- Click on Show Reg Marks, and then you can adjust the marks to fit more labels on the page.
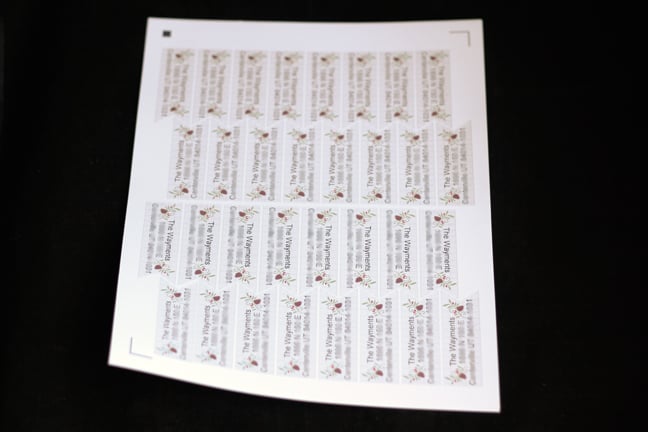
8- Using the Replicate Window, you can select Fill Page at the bottom, or you can take the time to duplicate the original label into rows and columns, rotating as necessary to pack it in. This is how my final page looked when ready to send it to the printer. Just be aware that a page this full of objects is likely to cause some lag in response time to your commands, so go with fewer shapes or just be patient.
9- Print it on the Silhouette white sticker paper, then send it to your Silhouette with sticker-paper settings. Now you have plenty of unique address labels ready to go!
Shapes Used:
5 Label Shapes
Echo Park Winter Branch
Grid Pattern

I just adore this idea! Clever, clever girl!
This is awesome.
Hi Kelly,
Is there a way to put labels right next to each other with no spacing and tell silhouette to just do one cut in between the two? Thanks for your help!
Hi Heather,
Using a shape is much easier, especially if you are doing color or pattern fills, and leave a little spacing in between.
However, there are a few (more tedious) options to get a single cut between adjacent shapes.
(1) Turn on the Grid ("Show Grid" in the Grid Window), set grid spacing to 8 divisions per 1.0 inch for fine control, and choose Snap to Grid. Then use your Line Tool to draw the lines you want. You're creating your own template of rectangles this way, which you can then fill with the text you want.
(2) If you have the Designer Edition, you can use your eraser tool to erase (use "outline" mode) to erase just the portion of the line that would otherwise be overlapping the other shape. The eraser will erase whatever it touches, so you'll have to move the shapes closer together after erasing the line off of one shape.
(3) If you don't have the designer edition, you can use the shape you want, but then you'll need to use your point editing tools (double-click an ungrouped shape to see all those little grey dots). If you bump two shapes up against each other and only want one line to cut, you would use those point-editing tools to delete ("delete point") the portion of line on the second shape that would otherwise cut on top of the first.
You still won't be able to use color or fill patterns with the shapes once you remove portions of the line.
I'm not sure where your skill level with Studio is, but those are the ways to do it. I can probably make a video tutorial if you need it. 🙂
Hi Kelly,
Thanks for your detailed response! With choice #1, once I drew all the template lines, would I then be able to insert different SVG files in each rectangle? I ask because, for example, I have 32 separate SVG files I'd like to print on one page. They are all the same size, just have different colors and text in them.
I do have designer edition, though not sure I can picture exactly what you mean in choice #2. I think I understand what you mean about choice #3,
Last question, how can I tell the two shapes are not overlapping and perfectly bumped together? Many thanks for your help! I very much appreciate it! 🙂
#1- Yes, you can put as many files in as you want. Just make sure only the lines you drew are set to cut, not the shapes inside. I know Studio version 2 got a little slow when adding a lot of text and shapes to a single page, but I haven't noticed that problem with version 3. Even if slow, it still works; you just have to be patient.
#2- If you just play with your eraser tool and some random shapes with the "outline" option selected, I think you'll see what I mean. #3 Gives the same end result as #2, just with more fine control. You're just erasing/deleting line segments.
I love my Align tools (turn off "Snap to Grid" if necessary) and my Zoom tools to make sure everything is touching exactly where I want. Good luck!