Owl Card | Text-to-Path Tutorial
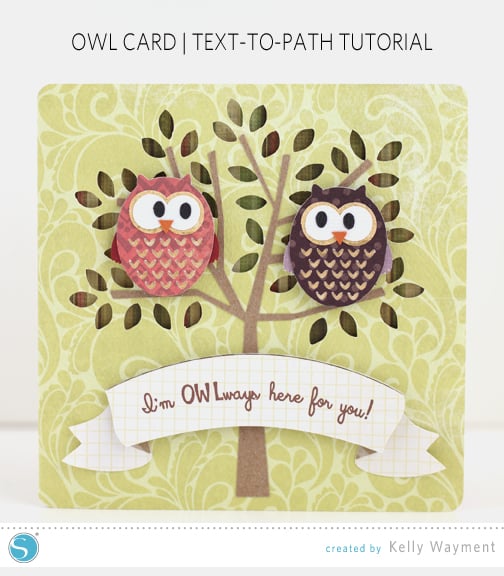
This week’s free design from Silhouette is an adorable owl. I decided to make a friendly little owl card with two of these owls and lots of layers. I wanted to create my own saying on a banner shape, so I used Silhouette Studio’s Text-To-Path function.
Here’s how I did it:
Setup and Resize
First I set up my card and sized everything appropriately.
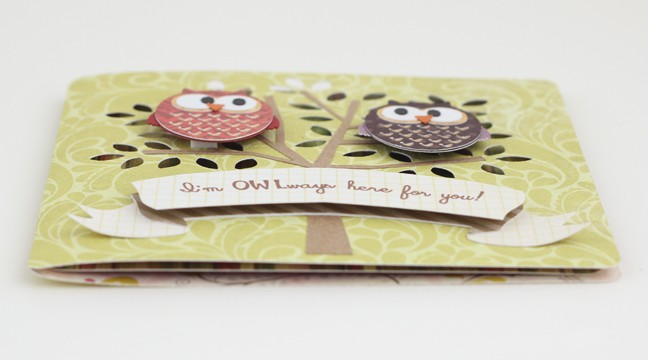
- The owl free design comes in layers, so I colored the pieces, arranged, and grouped them to look like this owl. Then I duplicated the owl to make a friend (Ctrl/Cmd + arrow key).
- I used this tree cutout card as a nice background for my owls and resized it to 5” tall for a 5” square card.
- I resized the owls to fit the tree (mine are about 1.425” tall).
- I used this wanted banner design for my sentiment. I ungrouped it to get the three banner pieces and resized them together to fit the card front (about 4.5” wide).
Add Curved Text
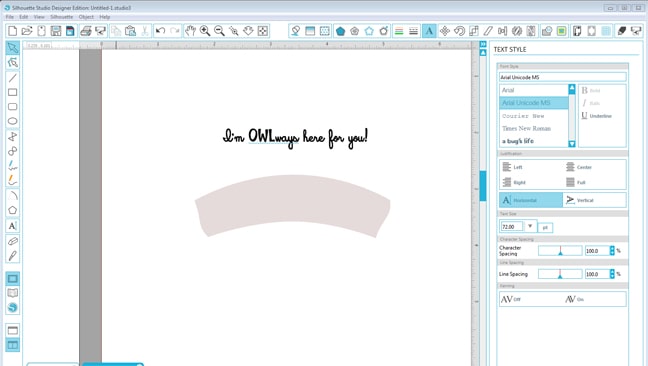
Now to add curved text to the banner*.
- With the Text Tool, type “I’m OWLways Here For You!” The OWL is LD Carefree, and the rest is SW Perfect Susan. I’ve filled the text and the top banner shape with color so it’s easier to see.
- Click away from the text to deselect.
- Click the text once to select it.
- Change the text size to about 28 pt, and choose Center justification. It should look something like this.
- Now double-click the text to enter text-edit mode. You will see a colored bounding box and a small four-pointed arrow. (You can also widen or narrow the text box by dragging the thick dark right edge.) See below.
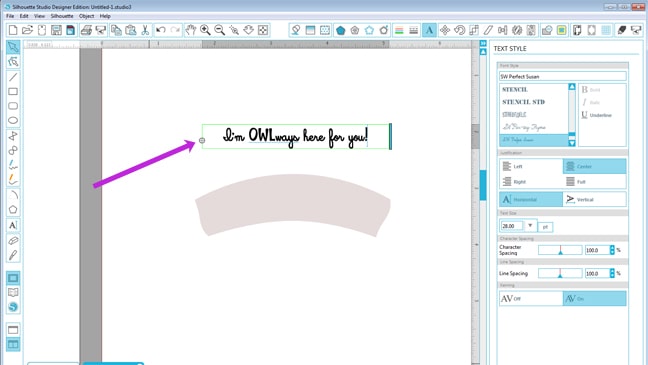
- Here’s the fun (and sometimes tricky) part. Zoom in closely for more control. Grab the four-pointed arrow and drag it to your banner shape. It will “snap” to the shape. I chose to drag it to the bottom edge of this curved banner. (If your text ever snaps to something you don’t want, just drag it away by the four-pointed arrow again.)
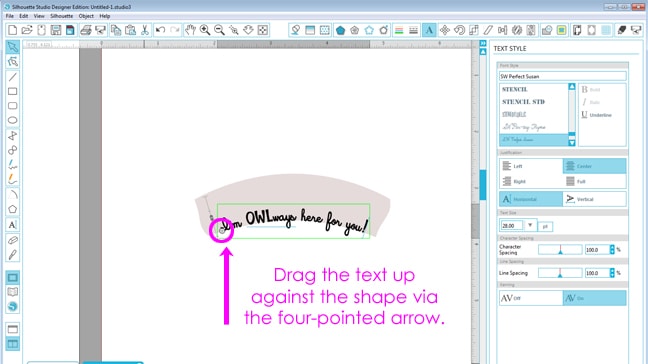
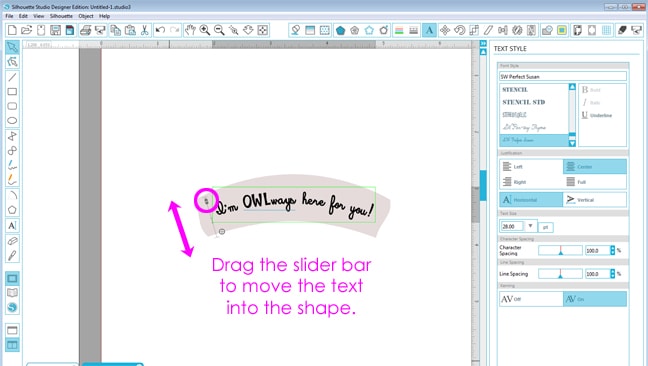
- Once the text has snapped to your shape in generally the right position, find the slider bar on the left with your mouse. The slider bar is a vertical double arrow. Hover your mouse over that double slider arrow or along the slider’s line until you see another four-pointed arrow.
- When that four-pointed arrow appears, drag upward with your mouse and the text will move up into the shape.
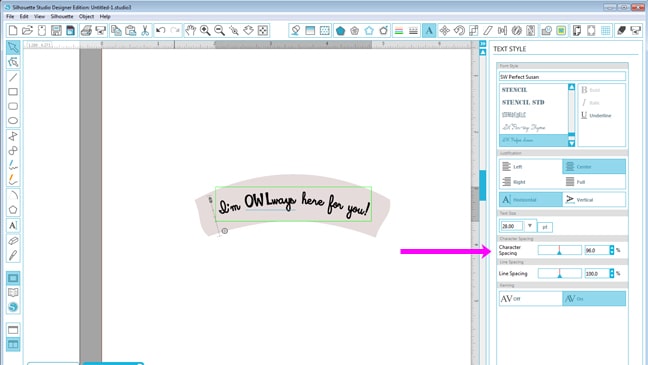
- At this time you can fine-tune the look of your text by adjusting the Character Spacing. You can still drag the text right and left along the shape’s curve by dragging the first four-pointed arrow we used.
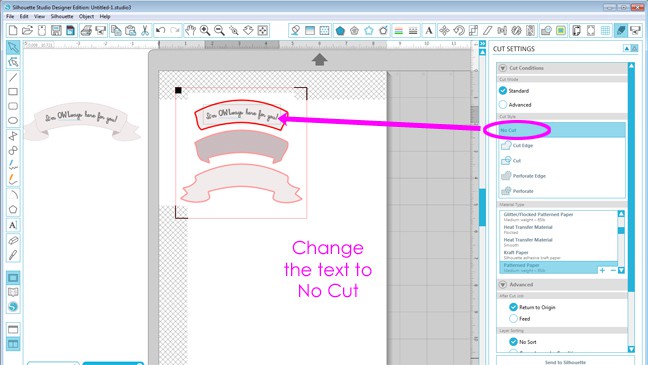
- When you like the way your text looks, you’re just about ready to print. Go to the Cut Settings Window and make sure the text is set to NO CUT. The text needs to be filled with color, and the banner pieces should be filled with colors or patterns as desired. (My example shows them ready to print fully colored, but on my actual card I printed and cut the layers on pattern paper and therefore removed the fill color from all but the text.)
Assemble Card
Once all the pieces for your owl card are cut, you’re ready to assemble the card. This was a great project to use scraps because of all the small pieces. I used adhesive cardstock for the eyes and beaks, and printable adhesive kraft paper for the tree trunk.
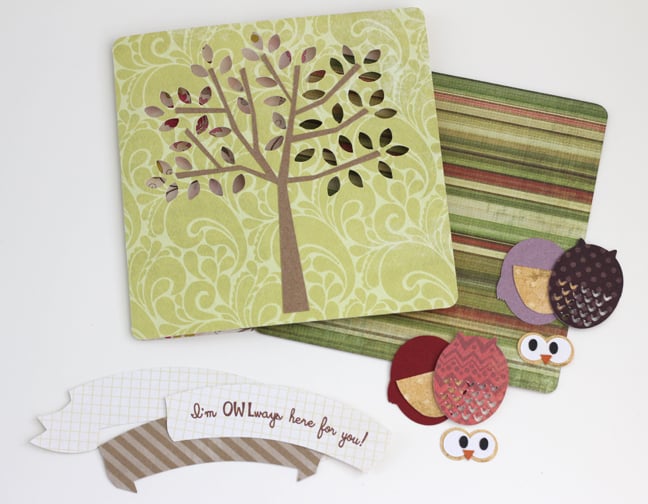
Foam adhesive squares give a lot of depth to the card.
I hope you consider using the fun Text-To-Path function to spice up your text, and have fun with this week’s free owl design!
Designs Used:
Halloween Owl (ID #67234)
Tree Cutout Card (ID #18345)
Wanted Banner (ID #29058)
LD Carefree font (ID #34444)
SW Perfect Susan font (ID #61056)
This post contains affiliate links. It won’t change your price, but it helps you by getting exactly the product I used, and it helps me by giving me a little kickback to help support this blog. Win-win. 🙂
