Spring Umbrella Mobile {Tutorial}

Thanks for being so patient while I put together the tutorial for this umbrella mobile featured on the Silhouette Blog last month.
The mechanics of a mobile are always the hardest part, but we’ll get to that in a minute. (And not to worry; I’ve done all that stuff for you.) First let me tell you how I covered the umbrella with fabric.
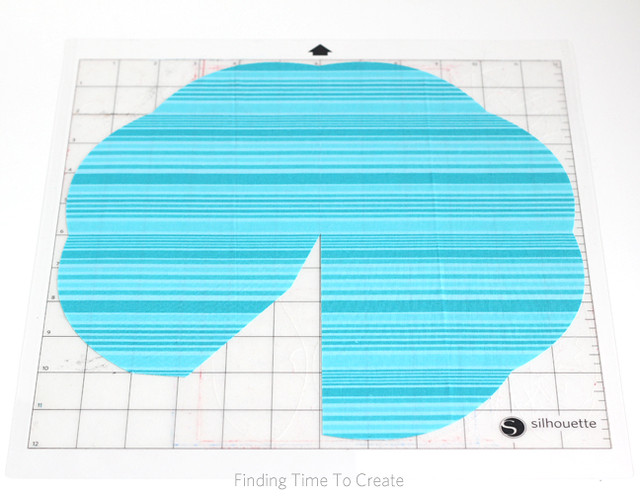
1- I enlarged this umbrella shape to just fit on my 12” mat. (Actual dimensions are 11.390″ x 12.178″, then rotated about 22 degrees.) I cut it once from pattern paper to give the umbrella stiffness and also to show a pretty underside when looking at the mobile from below. (Cut it with the pretty side against the mat.)
2- I then cut the same shape from fabric. I cut and ironed on a 12” square of sewable fabric interfacing to a 12” square of cotton fabric and cut the umbrella again.
These are the steps I always use for cutting fabric with interfacing on my Silhouette machine:
- Cut the interfacing exactly to size for the design on your mat (12″ x 12″ in this project, or see also this fabric owl pillow post).
- Lay the interfacing (rough side) against the wrong side of a piece of fabric that is slightly larger than the interfacing.
- Iron against the paper side of the interfacing for a few seconds so it sticks to the fabric.
- Trim the fabric (with scissors) to the paper edge.
- Pull off the paper backing.
- Place the fabric, interfacing-side-down on your mat and cut the fabric design. I use a dedicated fabric blade (can be blue or black, just make sure it’s only used for fabric) and a dedicated fabric mat (optional, but an extra sticky mat is helpful for me).
3- Once the umbrella was cut from fabric, I ironed the fabric directly to the identical paper base with the interfacing acting as the adhesive. I also stitched along the scalloped edge with a sewing machine just for a fun added detail. Don’t glue the flap that closes up the umbrella shape until step 8.
On to the other pieces…
4- I chose three shapes to use and repeat on the mobile.
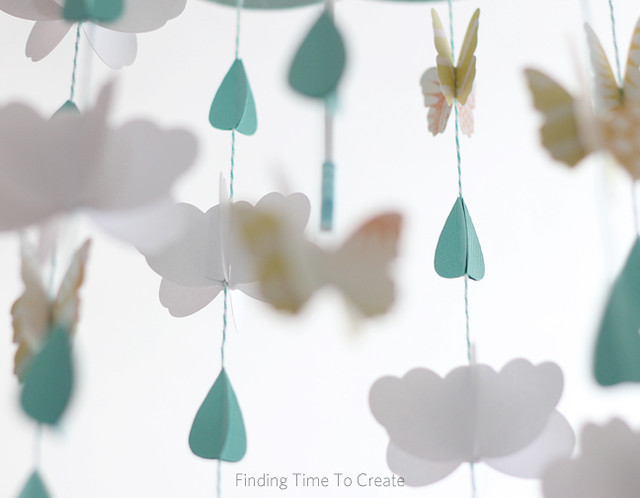
- Cloud. I deleted the tiny holes at the top of one of the pieces by releasing the compound path to access them. They are individually about 1.67″ tall and 3″ wide, and each cloud has three pieces with slots. I cut 7 clouds out of plain white cardstock (7 x 3 = 21 individual cloud cutouts).
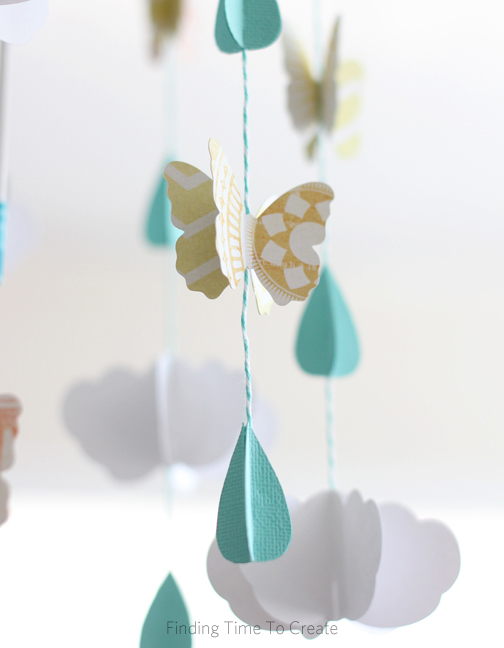
- Butterfly. These are resized to approximately 2″ wide. I used a pretty double-sided pattern paper and cut 14 identical butterflies (7 to hang x 2 pieces per butterfly).
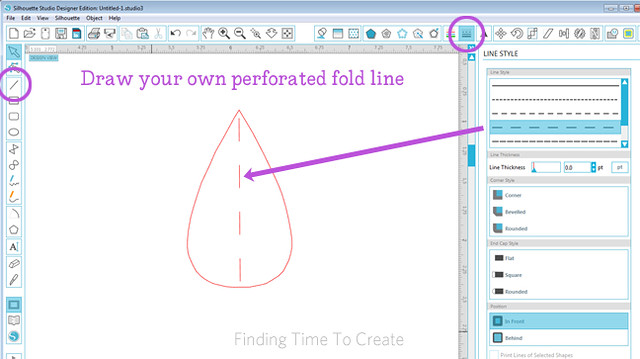
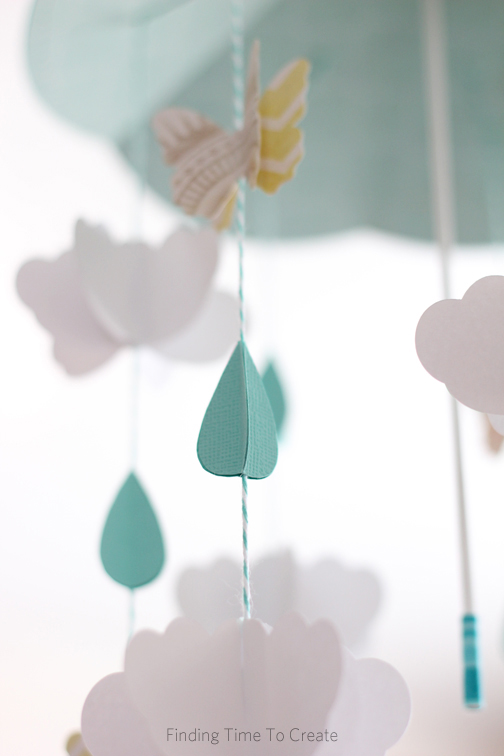
- Raindrop. I took one raindrop from this sun and cloud design and resized it proportionately to about 1.5″ tall. I created a perforated line so it would be easier to fold by using my Line Drawing Tool to add a line exactly down the center of the raindrop. (Hold the Shift key to get a line that goes straight up and down.) I changed that line to a dashed line in the Line Style Window. Rotate your raindrop a little if necessary (if you’re a perfectionist like me). Once the line is perfectly centered down the middle of the raindrop, group it together and duplicate the raindrop to make 42. (I used two raindrops per strand, so 14 raindrops x 3 pieces per raindrop = 42 to cut.) I cut these from mint adhesive cardstock.
5- Cut the strands of thread or baker’s twine and mark them. I needed 7 strands for the 7 sections of umbrella. I laid out my sample shapes and decided to go with 14.5″ per strand. I marked the strands every 3″ from the bottom, assuming that mark would lie in the center of each 3D shape, when assembled.
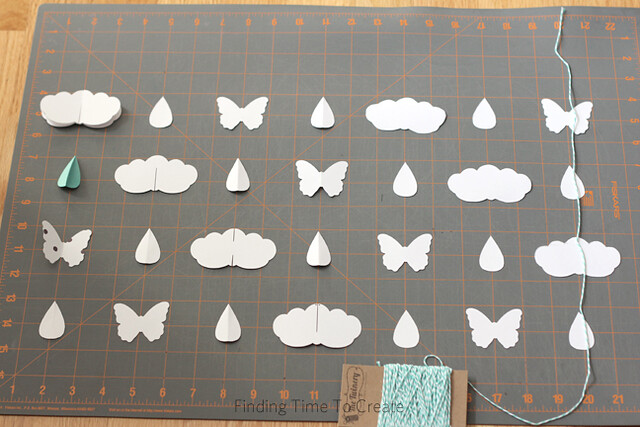
I used a black Sharpie marker here, but if I did it again I would use a less-obvious ink color because I had to hide the mark with an extra piece of white paper on each of the clouds. Basically, mark each strand with a dot at 5.5″, 8.5″, and 11.5″. The bottom shape will hang at 14.5″ (the end of the string).

6- Assemble and attach the shapes at the marks with a hot glue gun. I used scrap shapes (see the image with step 5) to determine where to mark my strings, but this layout was also very helpful in keeping my place so I knew which shape went where. One cloud, two raindrops, and one butterfly per strand. I shifted the cloud shape down one spot for each strand and kept the pattern the same.
- The clouds come in three parts and have slots to fit together. I laid the string along one of the creases and glued it in place. I also used some tiny dabs of hot glue to make the clouds hold their shape. As I mentioned above, I didn’t like the black mark showing so I attached a small rectangle of white cardstock to cover the string with the black mark.
- The butterflies are the easiest. Fold the wings out on the two butterfly pieces, and sandwich and hot glue the string in between with the mark centered inside. (The mark gets covered on this one.)
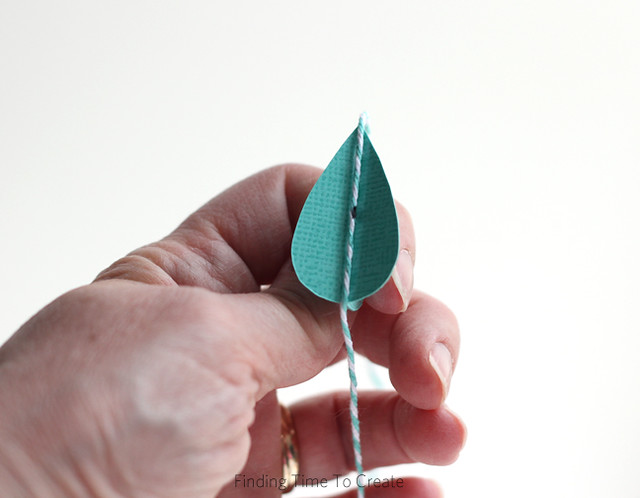
- I used adhesive cardstock for the raindrops so they were all ready to stick the three insides together. Press one half of each of two raindrops together, then lay the string inside on the crease and put a dab of hot glue before adding the third folded raindrop. (The mark gets covered here, too.)
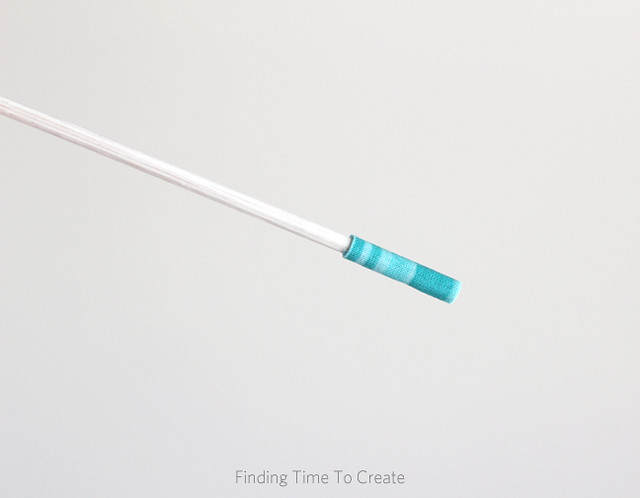
7- At this point there are 7 strands of 14.5″ twine with four shapes per strand. I also wanted my umbrella to actually look like an umbrella, so I made a handle for the center. I took an extra long bamboo skewer and snipped off the pointed tip. (A skinny dowel would work, too.) It’s about 11.5″ long. I painted the stick white (let it dry) and used a rectangular scrap of leftover interfacing-covered fabric to wrap around the bottom of the stick as a handle. This still has the interfacing on one side, so I used an iron to heat it as I wrapped it around so it would stick to itself. This worked surprisingly well.
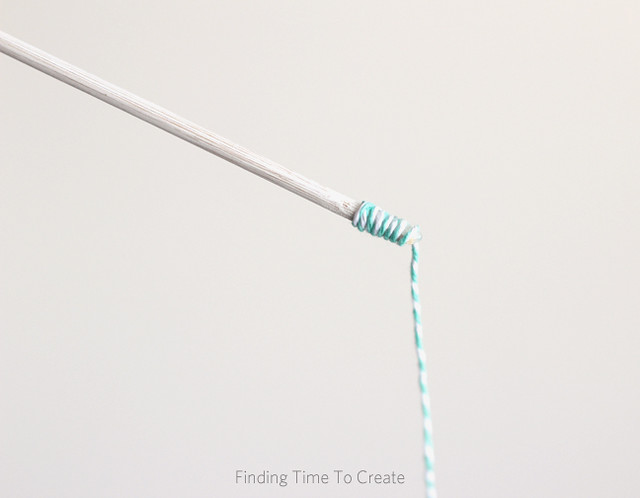
8- To attach the stick handle inside the umbrella, I attached the center hanging string (about 18″) to the handle (see below) and then placed it inside the umbrella center before closing the final flap to the umbrella.
I put hot glue on the narrow tip of the bamboo skewer stick and wrapped one end of the long center hanging string around several times.
Make sure the center hanging string is threaded through the center point of the umbrella before you hot glue the flap closed. Don’t let glue touch the string; you need to be able to slide it up and down just a bit once the umbrella is permanently sealed into its curved shape.
9- Finally, attach the strands with their shapes to the underside of the umbrella. You can try to hide the strings and glue with more pattern paper, but I didn’t. For extra security and so the strings don’t appear too long, I chose to hot glue the strands in two spots. Glue the end of the string right in the center of each triangular segment of umbrella, then attach it once more about 1.25″ closer to the edge. I actually marked these spots lightly with a pencil (marked with purple dots in the image below) before adding the glue. Work with one strand at a time.
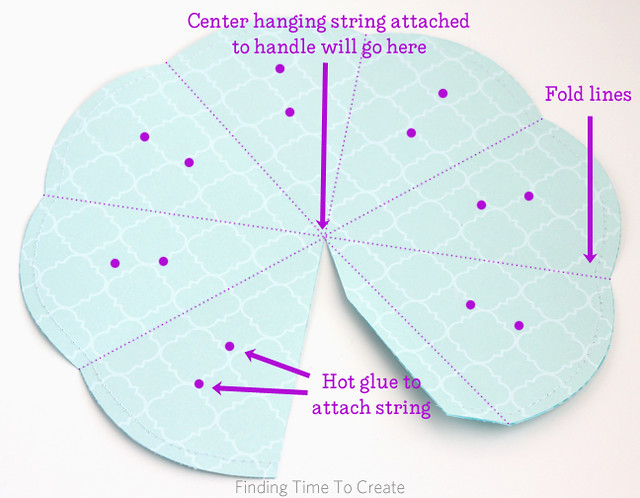
You can see the strings and center handle in this picture below. Again, you can try to hide the strings if you want but I think they look fine exposed.

If your stick doesn’t hang straight down, pull it slightly down away from the paper umbrella center so it can hang without being crammed against the paper.
That’s about it! I hope this tutorial is helpful to you. If you make a mobile like this or a variation of it, I’d love to see photos!

This post may contain affiliate links. Your price is the same, but I may get a small commission if you use my links. Thanks for your support!

That's just adorable, Kelly! I love it!
Thank you, Barbara!
Really adorable!
Thank you!