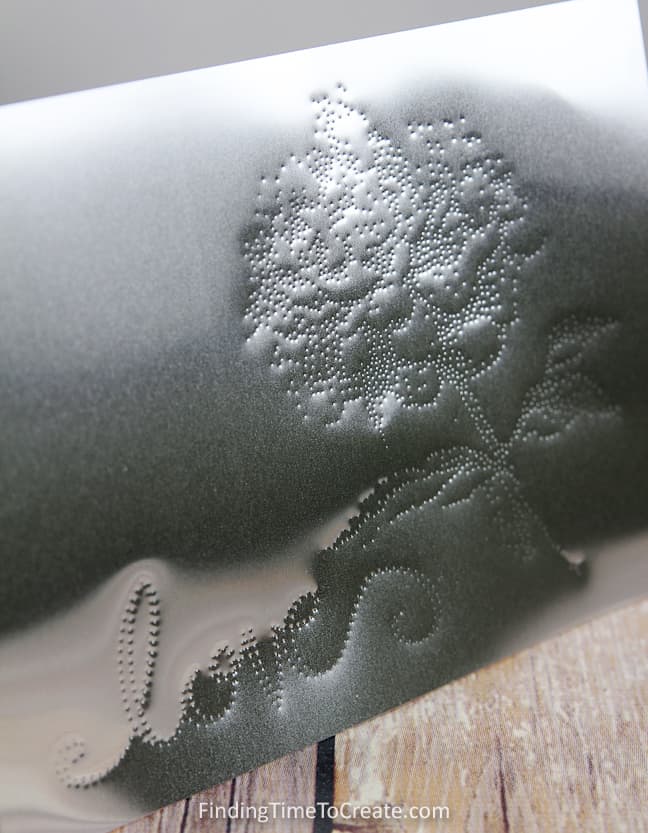
Stippled Metal Art

I’m still working my way through every feature the Silhouette Curio offers, and on the Silhouette America blog I’ve shared a tutorial for creating stippled metal art. In case you missed it, here’s the full tutorial:
Supplies and Tools needed for this project (some affiliate links):
- Curio
- Stippling & Etching tool
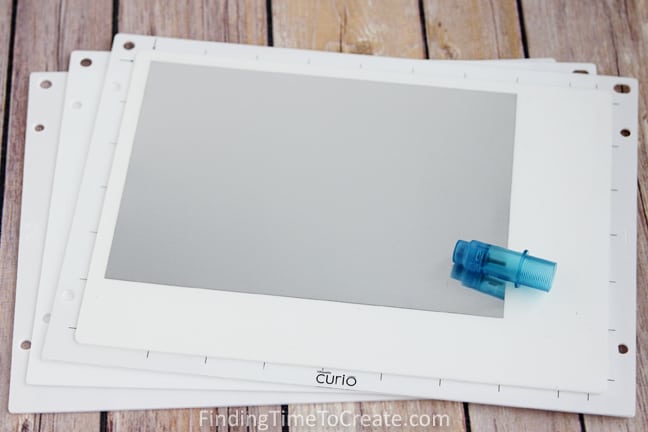
- Curio emboss mat and platforms 1 and 2
- Metal stippling sheet
- Rose design (ID #73159)
- Love design (this one came with the double-sided adhesive starter kit, but there are similar designs in the design store)
- 5” x 7” Frame
STEP ONE: Convert to Stipple Design
First, select a design for stippling. I chose two shapes from the design store, but because they are different types of files, I had to apply the stippling effect in two different ways.
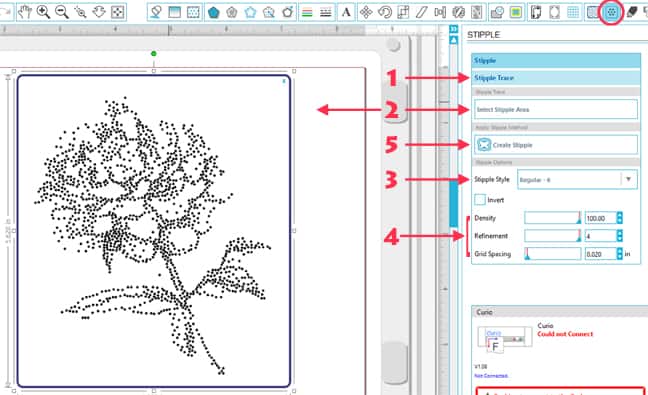
The rose is an image originally intended for print & cut. I removed the outer cut line and used Stipple Trace to assign a stipple effect to the image. The Stipple Trace function is for images that are not composed of cut lines.
- Select Stipple Trace in the Stipple Window
- Click on Select Stipple Area and drag a box around the image
- Choose a Stipple Style (I went with Regular – 6 on this one— what looks best will vary by design)
- Fine tune the settings (I almost always use Density 100, Refinement 4, Grid Spacing020)
- Click Create Stipple
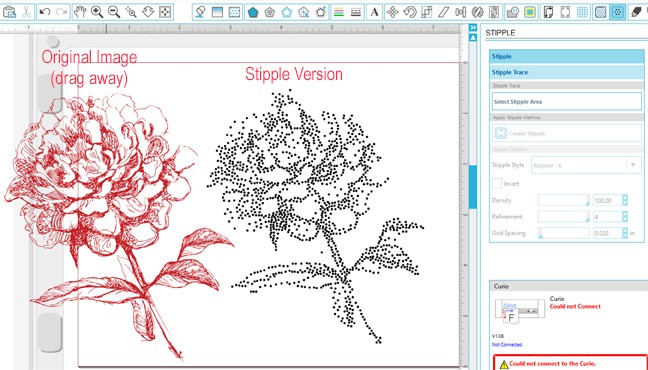
Now drag away the original image so you’re only left with the stipple design.
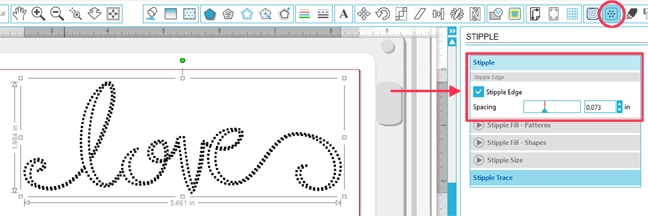
The word “love” is a cut file, so I applied a Stipple Edge. I reduced the spacing to 0.073 inches, but you can use whatever spacing looks good to you.
STEP TWO: Prepare Layout
Now that we have our stipple design, next we need to get the design ready for the metal stippling sheet.
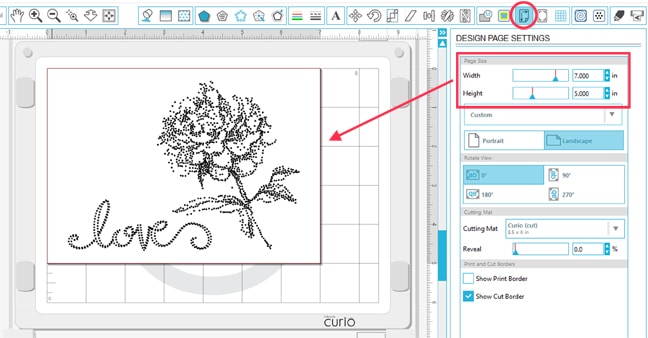
Place the two parts of the design so they look nice in relation to each other. (Group together, if you wish.) Set your Page Size to match the 5 x 7” metal stippling sheet in the Design Page Window. (Reduce the size of your design to fit, if necessary, by dragging a corner handle.)
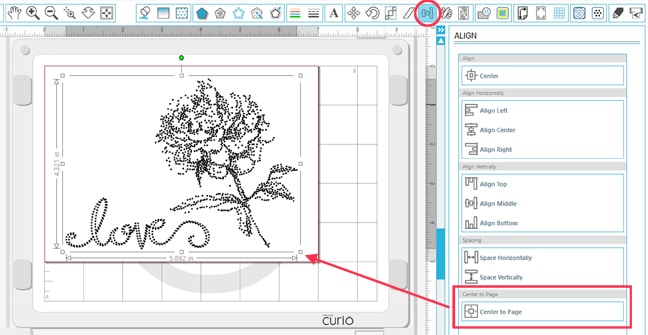
Because you’re stippling on the entire sheet, a quick way to center the design on the sheet is to use the Align Window and select Center to Page. (Be sure to select the full design first.)
STEP THREE: Prepare to Cut/Stipple
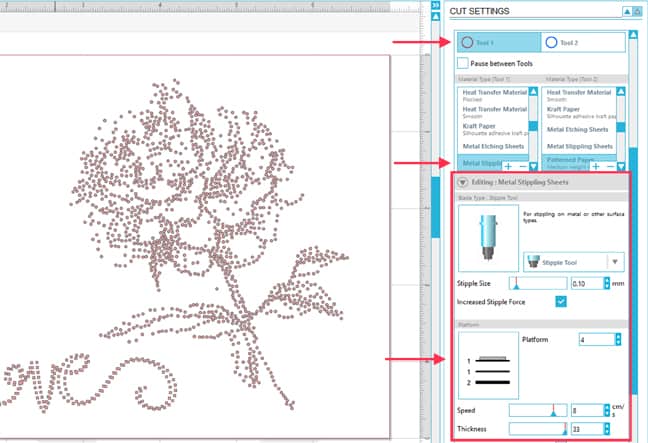
It’s almost time to send the design to the Curio. Go to the Cut Settings Window and choose Metal Stippling Sheets for the Material Type under Tool 1.
This tells you to use your Stippling Tool in tool holder 1 (the left/red side) and has you use Platforms 2, 1, and the Embossing Curio mat. (If you use the cut mat it won’t imprint as deeply.) You can leave the rest of the settings at their default, and perhaps check the box for a Double Cut. (I sent my design through a second time for a slightly stronger stipple effect, which has the same result as a double cut.)
STEP FOUR: Load the Material and Cut
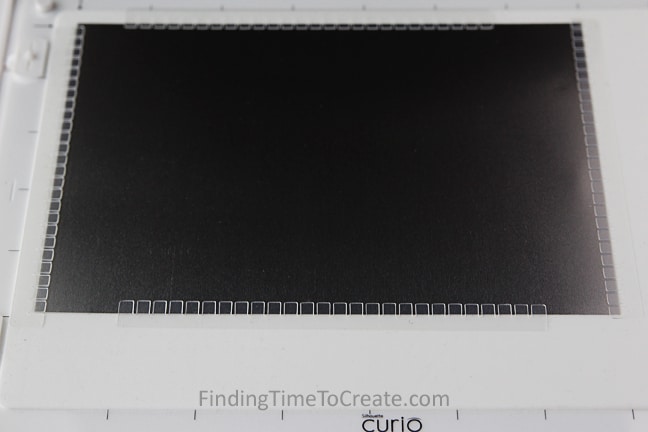
Be sure to place your metal sheet on the embossing mat as shown on your screen (use the tiny corner arrows as a guide to leave a border of the mat around the metal sheet). I also like to use the clear Curio material fasteners whenever I use the embossing mat.
Load the base into the Curio and select Send to Silhouette. Watch it stipple (it may take a while, depending on the complexity of your chosen design), then remove and frame as desired.
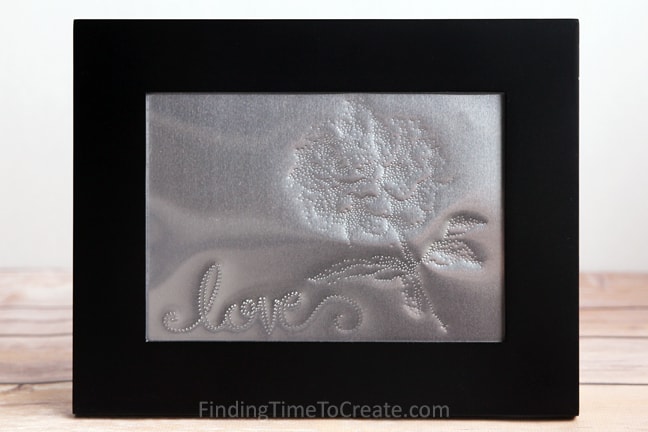
I hope this project inspires you to give metal stippling a try!
Check out the Curio section of my Tutorials Page for more Curio tutorials.
This post contains affiliate links. It won’t change your price, but it helps you by getting exactly the product I used, and it helps me by giving me a little kickback. Win-win. 🙂

Beautiful! Thanks for the tutorial 🙂
Just stippling this as I write. Love it. Thank you
Wonderful!