Nesting in Silhouette Studio®
Are you curious how to use Nesting in Silhouette Studio® version 4? I’ve got video tutorials for Nesting in both Designer Edition and Business Edition.
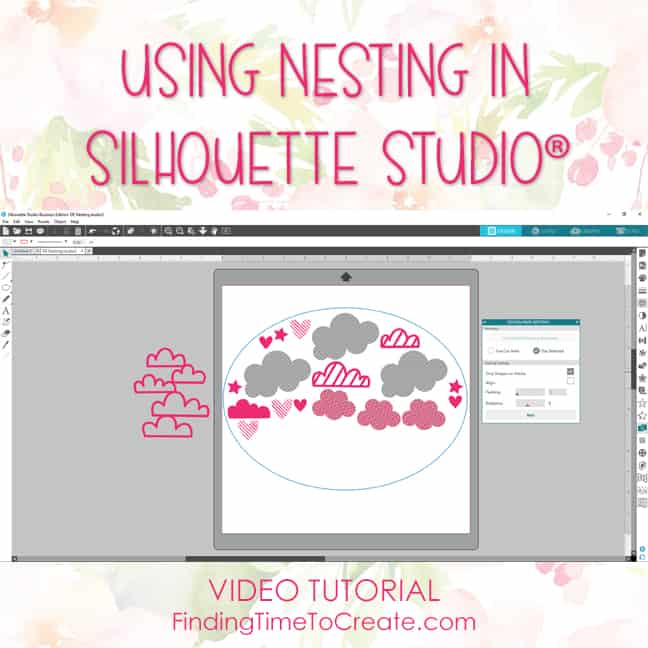
Here’s my video tutorial (below) on using the Nesting Feature in the Designer Edition of Silhouette Studio®.
Note: If you have Silhouette Studio® Business Edition, you can do both “regular” Nesting as shown in the video above, or “Automated Nesting” as shown in the video below.
My opinion is you have more customization options available with “regular” Nesting, while the Business Edition Media Layout Mode’s “Automated Nesting” is meant to speed up the process and take out much of the effort. I like having the option for either type of Nesting, and honestly either Nesting choice is much faster than dragging each individual object on your page into the most efficient placement.
Here’s an explanation of Automated Nesting in Business Edition:
If you have questions, please let me know!

This video was helpful! Thanks for this explanation.
I’m glad you found it helpful, Bertha! Thanks for saying so. 🙂
I have a question! On V3, when I would try nesting more than would fit, those shapes that didn’t fit got highlighted so I could easily remove them or delete them, I just changed to V4 and this does not happen anymore, so I can’t really tell when some shapes didn’t fit properly (some will hide behind others), is there any way to make it work like that again?
Hi Pamela. You’re right that v4 doesn’t highlight those, and I agree it’s difficult to find them. I suggest sending an email to feedback_software@silhouetteamerica.com to let them know you’d like to see it work the same way as in v3. They are always open to feedback like that to consider for future updates.