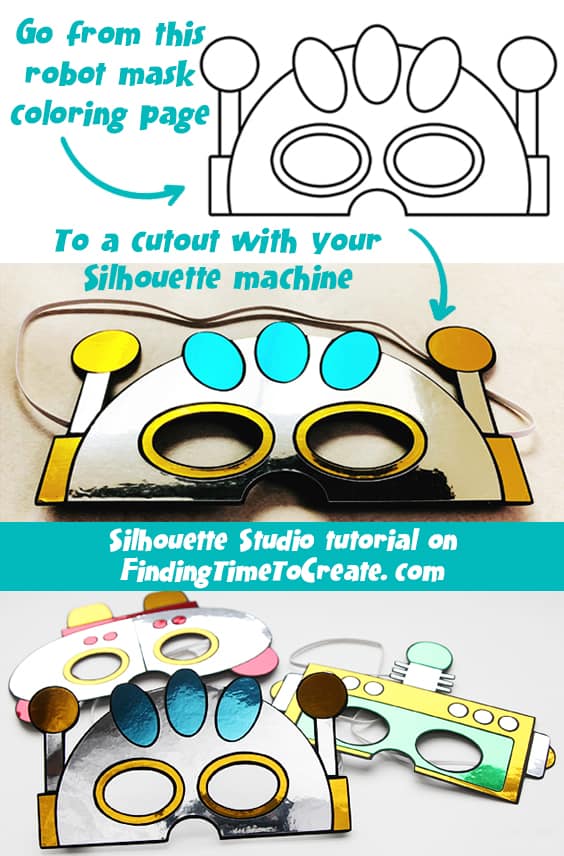
Robot Mask How-To in Silhouette Studio
Today I want to share how I turned a robot mask coloring page into a design I could cut with my Silhouette Cameo.
One of my favorite uses for my Silhouette machines over the years has been the opportunity to be creative with my children’s school projects. I’m willing to help them figure out their math and proofread their papers, but if it’s a project or presentation, then I get a little excited!
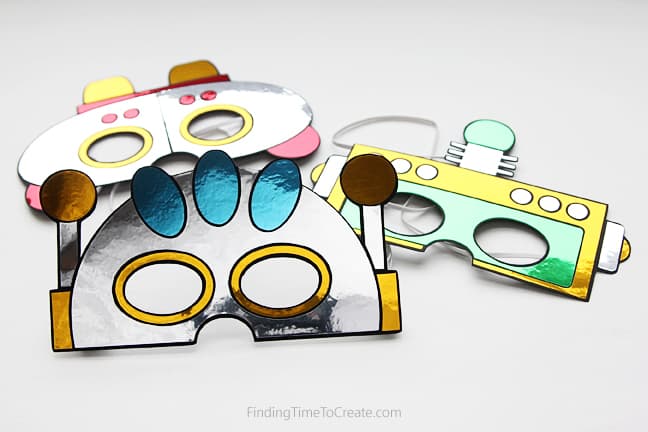
My daughter has been taking a dance class and needed something to represent a robot costume for her dance-group trio’s final dance presentation. We brainstormed some ideas considering plastic or cardboard helmets, but her dad found these cute printable robot masks here and we jumped on this idea.

These were a great start, and could have been easily traced to create a Print & Cut with the colors shown. However, when I saw the coloring-page version, I realized how easy it would be to cut this in layers to assemble with whatever colors I chose.
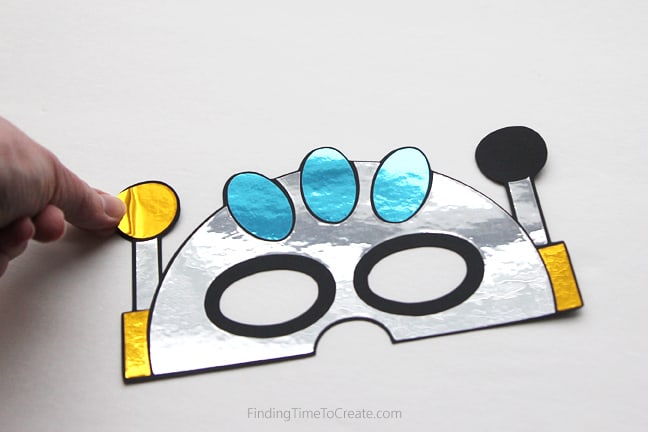
Metallic vinyl was a fun choice! The process just requires a little magic manipulation in Silhouette Studio®, which is what I’m going to show you now.
You will need:
- Silhouette Cameo® 4 or other Silhouette cutting machine
- Silhouette Studio® (any version 4.1 or higher, any edition)
- Black cardstock
- Silhouette metallic vinyl in silver, gold, and teal
- Hook tool for weeding
- 1/8 in. wide elastic
Video Tutorial:
Basic Steps:
(See the video tutorial above for more detailed explanations.)
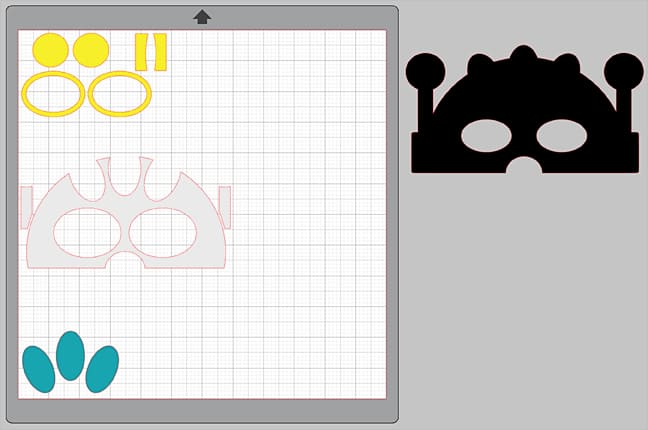
- Open the coloring-page design in Silhouette Studio, resize it, and Trace it.
- Open the Modify Panel and Release the Compound Path to separate the design into multiple layers.
- Working in logical groups, make copies of the pieces that need holes and use the Subtract function to cut holes in lower layers with the appropriate upper layers.
- The design in this example needs the following pieces altered:
- Main background cardstock piece
- Largest main colored layer
- Rings around eyes
Note: Each new design you work with will be different. You’ll have to decide which pieces are needed to cut holes in other pieces to get the look you want. That’s why I work from copies and leave the original intact.
- Once the design is complete, cut the various pieces from cardstock, vinyl, or your preferred medium with your Silhouette machine.
Tip 1: My preferred settings for cutting Silhouette metallic vinyl are as follows:
- Blade = 2
- Force = 11
- Speed = 7
- Passes = 2
- Line Overcut = On
- Remember to test a sample cut first and adjust as necessary. I find the metallic vinyl cuts and behaves slightly differently from traditional adhesive vinyl.
Tip 2: With a design like this it’s easy to cut more than one piece of vinyl at a time. That’s why I had you turn on your grid in the video.

Assembly of Robot Mask:
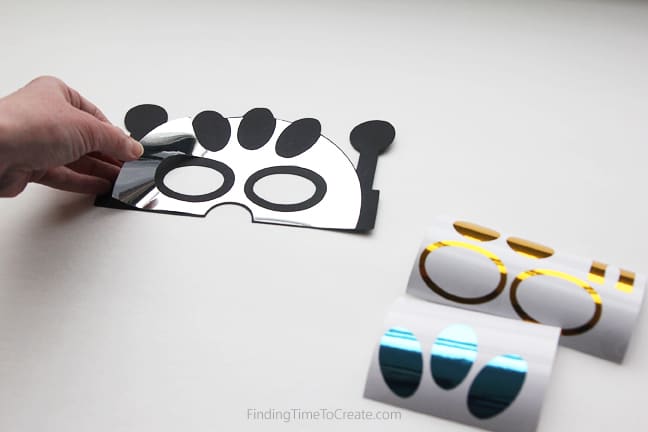
- Weed your vinyl to prepare it for application to the cardstock base.
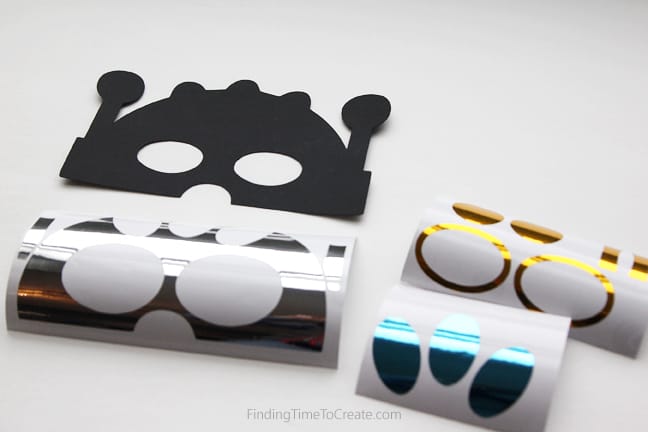
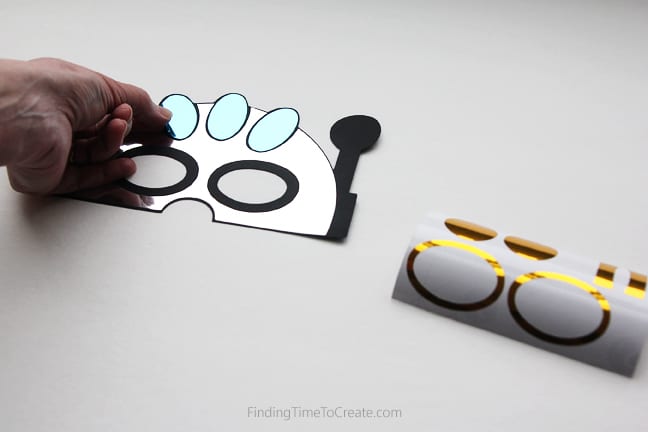
- Apply the vinyl to the cardstock base. You can simply treat the vinyl like stickers and don’t worry about transfer tape.
- Trim a piece of narrow elastic to fit the wearer’s head and attach each end to the back of the black-cardstock mask piece with tape or other strong adhesive.

Tip 3: I found that hot glue was too hot for the metallic vinyl and it discolored the vinyl on front. You could probably get away with attaching the hot glue first before applying the vinyl layers, but then it won’t lay as flat during assembly.
I hope this tutorial helps you know how to use the Subtract tool in Silhouette Studio® to manipulate more designs for clever projects like this robot mask! Single layer designs can be manipulated in lots of ways. You might want to check out this post on using dingbat fonts in a similar way.
Think outside the box!
This post may contain affiliate links. Your price is the same, but I may receive a small commission when you use my links. Thanks for your support!

Genius!
Thank you! 🙂
What a fun and creative project! You inspired me to try something similar for my grandkids. Thanks for the great tutorial!
Glad you like it, Lycia! Can’t wait to see your version for your grandkids!