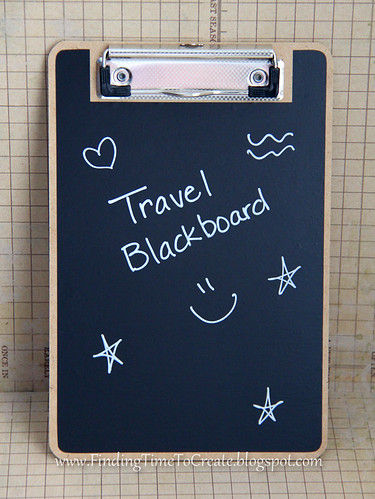
Travel Chalkboard
For our summer vacation we went to visit my parents in Oregon. It’s an 800-mile drive that we make in a single day, with four children between ages 4-13 in tow. This was a pretty good traveling year for us with wonderful technology available to every person in the car, but in our preparations for the trip I wasn’t sure how well the iPads and iPhones would keep them occupied. I made an effort to prepare a few other things for the kids to do in case Plan A didn’t work too well.
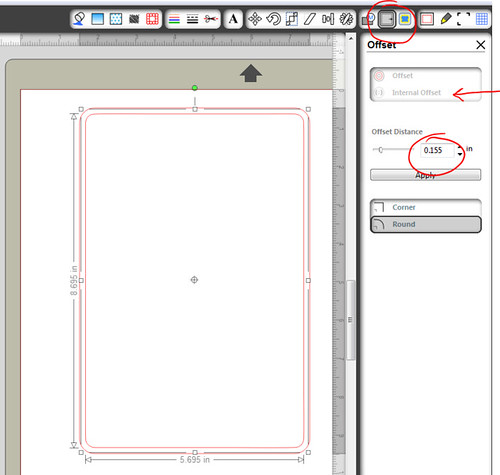
This clipboard was one of those extras. I bought some small (6″x9″) clipboards at Walmart and covered them with black chalkboard vinyl cut with my Silhouette. To create the shape I measured the clipboard with a ruler, then drew a rounded rectangle that same size in Silhouette Studio (just guessing on the corner size). I made an internal offset of 0.155″ so it wouldn’t go edge-to-edge (this leaves some room for error in case you don’t apply the vinyl exactly straight or if your measurements are off slightly). The original rounded rectangle is no longer needed.
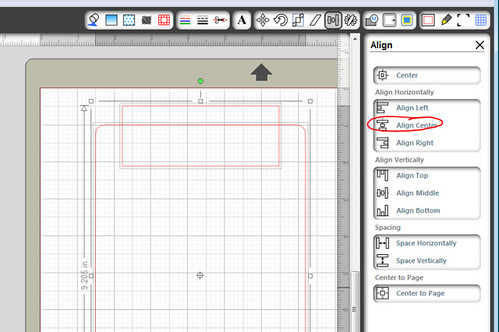
Then I measured the cutout area for the hardware and created a tall rectangle, slightly wider than the hardware to leave room for variance again (the set of four clipboards each had their hardware mounted a little off center and different from clipboard to clipboard). I placed this rectangle in Studio over the rounded rectangle I had already created and used Align: Align Center for even placement after making sure the bottom edge was where it needed to be.
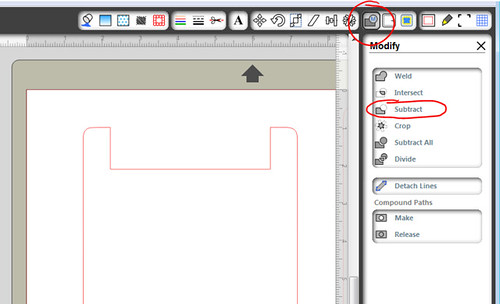
A click of Modify: Subtract finished off the shape to leave my rounded rectangle with its cutout.
I cut four of these from black chalkboard vinyl and placed them on my clipboards. I made sure to include a piece of chalk for each child’s art pouch for the trip.
Covering a flat object with a custom-made piece of vinyl is about as easy as it gets, folks! Even my four-year old spent a good 20-30 minutes drawing and erasing and drawing on his travel chalkboard. My older kids used the clipboard function, too.

This is such a great idea – love it!! Thanks!
Hi Kelly,
What a terrific project, so practical too. Thanks for sharing.
Oregon is so beautiful, we love it.
Blessings,
Barb
Oops; misspelled word! What I said was, this was a wonderful project for keeping kids occupied in a car! Sometimes chalk and a blackboard are more fun than an ithing, and no batteries are required!
So true!
Kelly, love this idea. Thanks for the description of how you made it. I have a couple of chalkboards and this is perfect. Chalkboard on the front and zebra stripes on the back. That is my vision. ggg
hugs, rose
Sounds very cute, Rose!
Such a cute and clever idea to keep kids busy…I remember when we took a 36 hour each way trip with my nieces several years ago. Their mom and I had something "new" for them to do every couple of hours (although they didn't know it!)
How would chalkboard vinyl compare to painting it with chalkboard paint? I've never used either so I'm just curious when you would use one material over the other?
I'm brand new to your blog and amazed at your blog!!! You are such an incredibly talented lady!!! I love looking through all your projects…..Thank you so much for your detailed tutorials.
Thank you! I haven't used chalkboard paint myself, but I would imagine the final effect would be about the same. This vinyl is a little more glossy, and I'm guessing the paint would have a more matte finish (and would be messier to apply). Either one should work with regular chalk (the brand of chalk adds variation to how well it works) or a chalkboard marker.