Scraplifting with Silhouette Studio
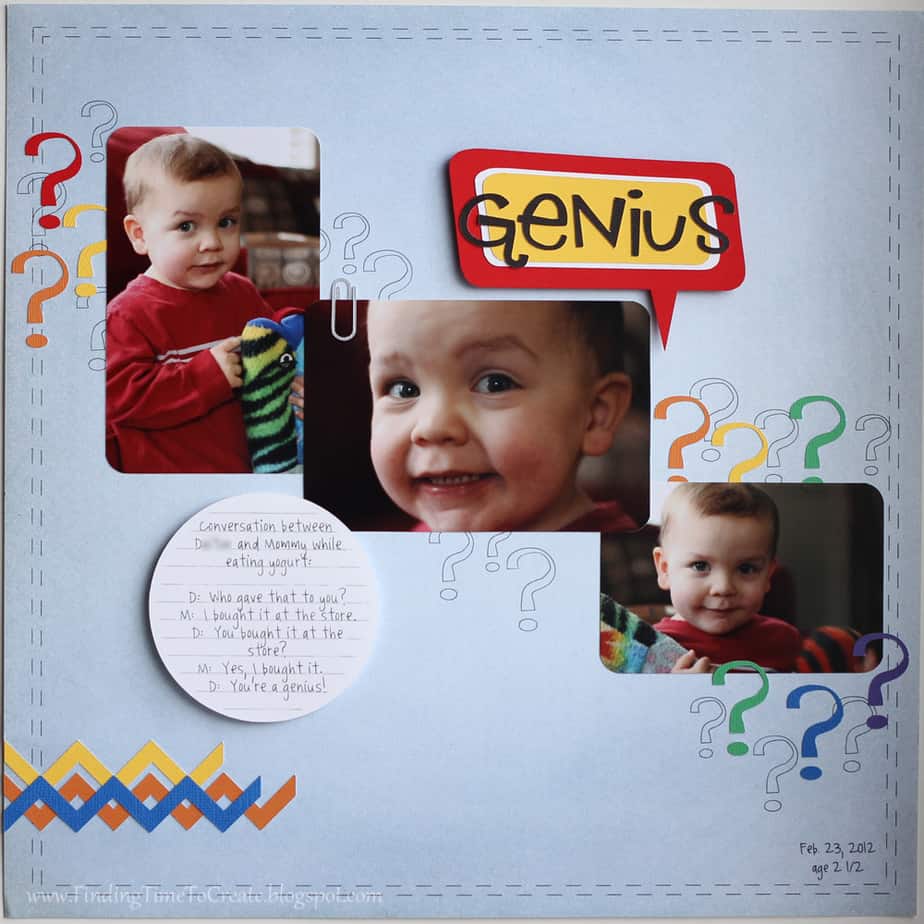
Ahhh…it feels good to scrapbook again. I decided to take on the sketch challenge from the Silhouette Blog and scrapbook a funny conversation I had this week with my two-year old, who has quite an advanced vocabulary for his age. He’s constantly asking questions, but his remark at the end still has me chuckling.
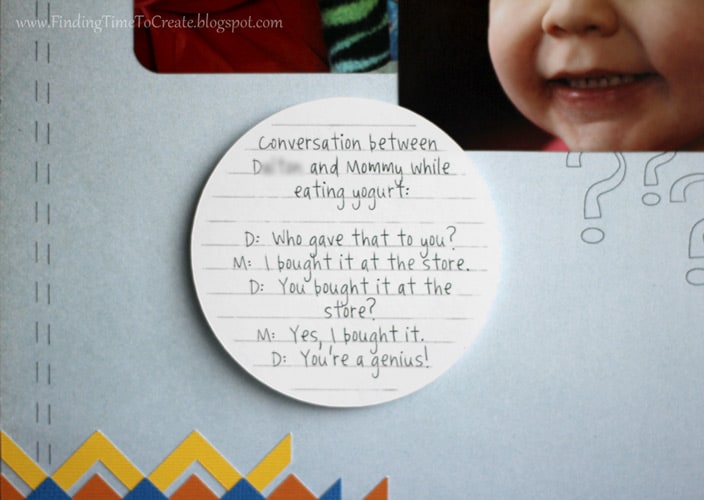
The journaling reads:
“Conversation between D– and Mommy while eating yogurt:
D: Who gave that to you?
M: I bought it at the store.
D: You bought it at the store?
M: Yes, I bought it.
D: You’re a genius!”
I started out by making a copy of the sketch image from the Silhouette Blog and pasting it directly into my Studio workpage. I resized it to a full 12×12 (the newest Studio update gave me a poor-resolution warning, but it doesn’t matter for this since I’m not printing anything), then started to draw my shapes right over the top of the sketch. (You could probably do this with any image you want to scraplift.)
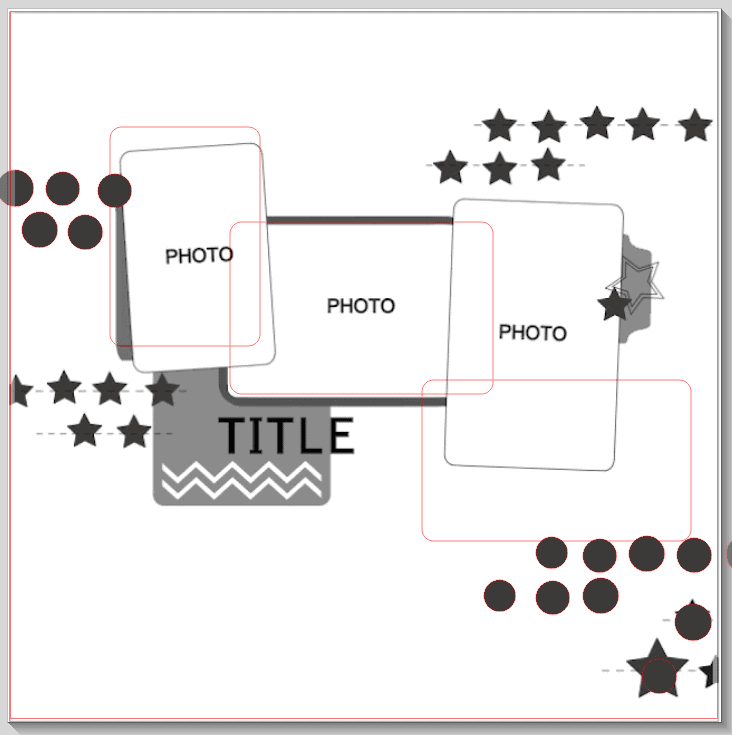
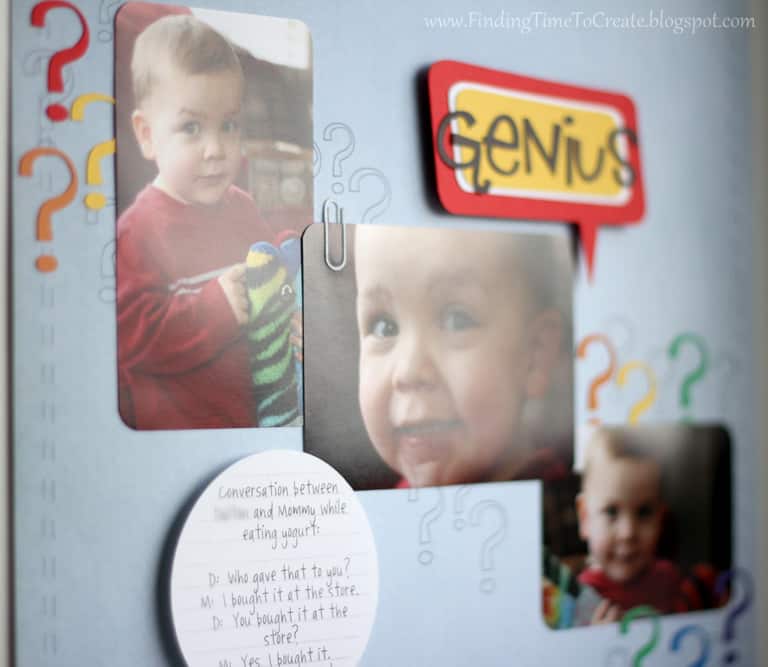
You can’t get much more copycat than that, right? I rotated one rectangle to match the orientation of the photo I wanted to use, then moved my extra elements I had drawn to go with the flow.
Then I just started to create. I didn’t buy any new shapes; just used the designs that were already in my Library. I moved the sketch off to the side so I could use it as a general guide, but just put what I wanted to on my page.
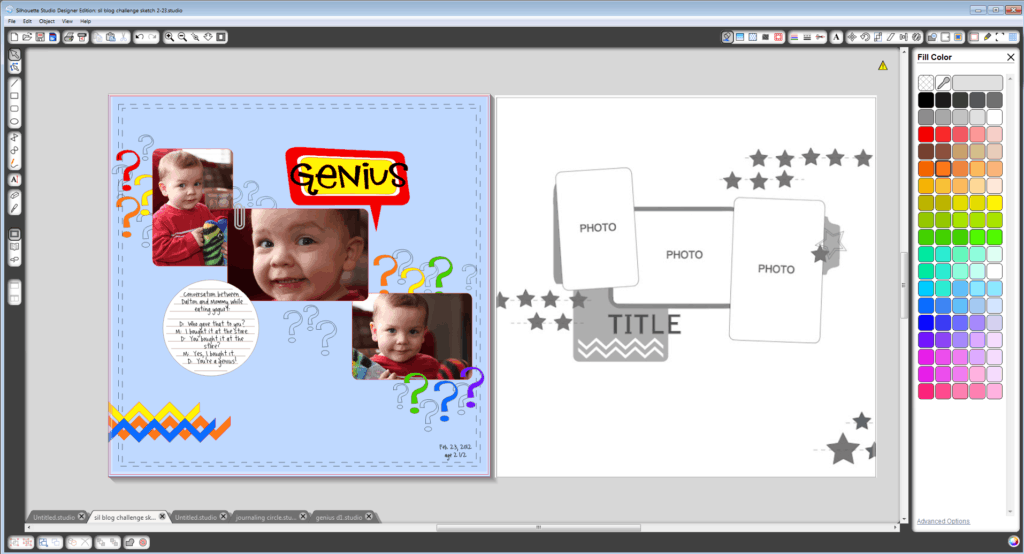
I even dragged the photo images from a folder on my computer into the rectangle shapes in my Studio workspace to make sure I liked the look of it all. Did you know you can do that? Once the rectangle was filled with the photo I could use the advanced options in the Pattern Fill window to scale and pan the photos for a great fit. I could have even print and cut the photos straight from Studio, but I don’t like printing my own photos so Costco did it for me. 🙂 If you want your photos to take on a certain shape, it’s a cool trick.
Once I had everything the way I wanted, I opened a new document and copied and pasted each element by color from my original layout page onto the new document just to be sure I didn’t miss anything or mess up my layout the way I had it arranged. Organizing cuts by color makes it so easy.
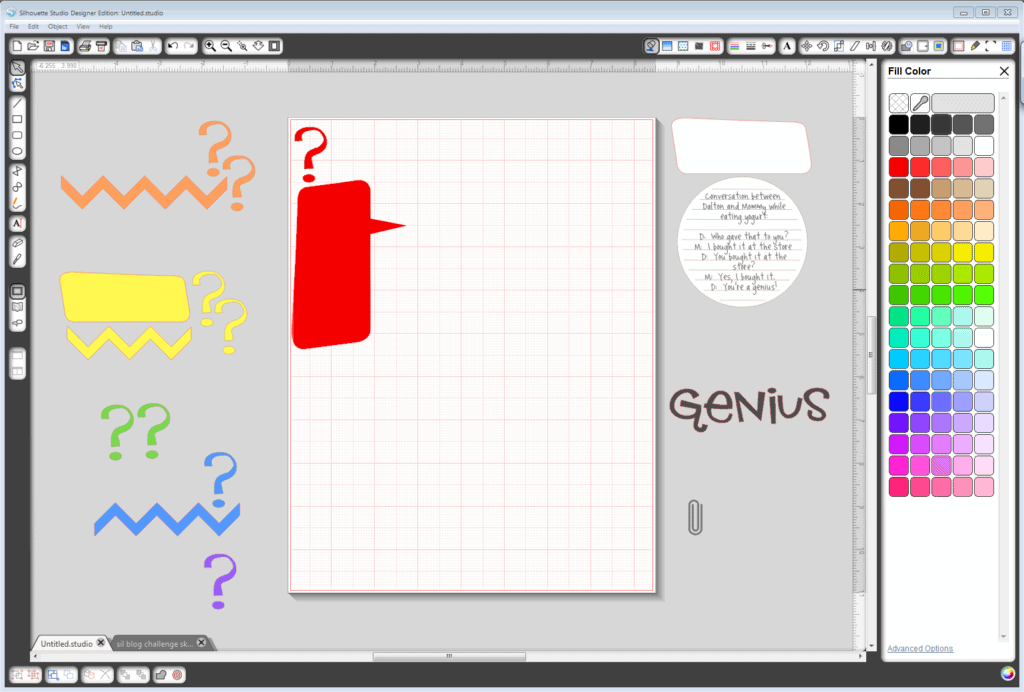
Then came the good part: I cut almost all of it from my new stash of Silhouette adhesive-backed cardstock. Wow, that made attaching everything easy! I recently bought four packages of the cardstock, and I’m so glad I did! It gave me all the perfect colors for this layout except red and blue, which I had scraps of anyways. I cut it at a blade setting of 3 (a.k.a. pink), speed of 3, and thickness of 27. That was perfect. It was sooo nice not to have to add glue to all those question marks, the title, and that tiny little paperclip which is cut out of silver adhesive cardstock.
The journaling block is sketched and cut using Amy Chomas’ freebie journaling circle, a silver sketch pen for the lines, and a black American Crafts “Ultimate Gel Pen” that actually fit in my original Silhouette pen holder using the “Aunt Jana Sketch” font from the Silhouette store.
Then I used the same black pen to sketch the lines and remaining question marks onto a 12×12″ blue pattern paper. I am so happy with this effect! To get those marks in the perfect position without disrupting my layout, I just copied the whole layout with all its elements selected and pasted them to another new document. Then I moved everything except the sketch marks off the page.
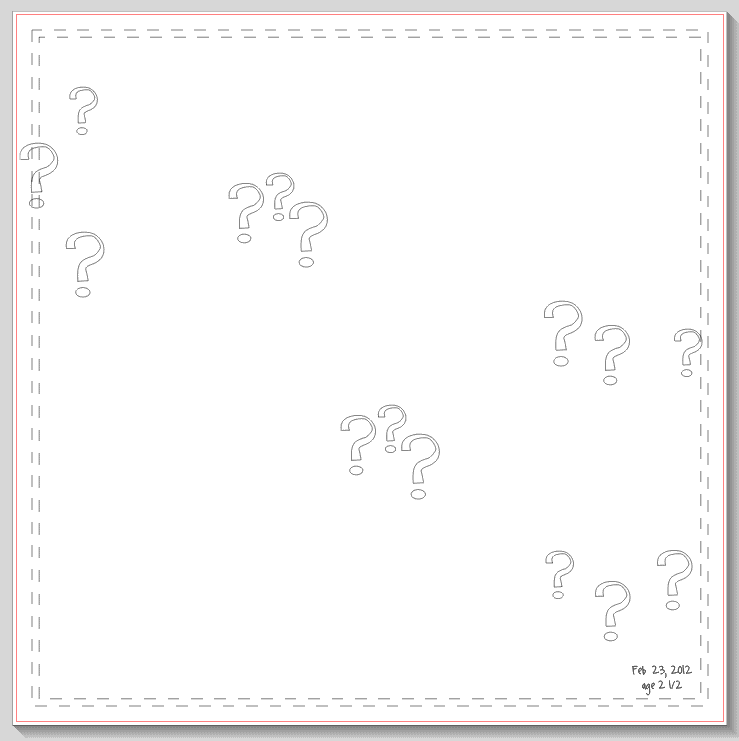
It drew the background “stitches” and question marks perfectly placed on my page, then I was able to attach all the photos and elements quickly using my Studio layout as a guide. I can’t believe how enjoyable this was to make a page so quickly using the Silhouette Blog’s sketch challenge in Studio. It was the best of both worlds for scrapbooking, using my computer to design it all but still getting to cut and assemble with real paper and photos.
Fonts:
- LD Red Hatter’s Hand (Design ID #111976)
- Aunt Jana Sketch (Design ID #12912)
Shapes:
- Retro Speech Bubbles (ID #12420)
- Chevron Border (ID #16664)
- Paper Clip (ID #16941)
This post may contain affiliate links. Your price is the same, but I may receive a small commission when you use my links. Thanks for your support!

Love the tutorial and the page is so adorable! Great Job!!
Very cool. Once again, great tutorial!
TFS the tutorial:)
Oh my gosh Kelly… You are a genius… Cute layout.
LOL! I hope everyone knows that I'm not calling myself a genius on this page, but am using the word provided by my son to describe him. I'm allowed to think that since I'm his mom, right? 🙂
Of course, when he's a teenager and thinks I don't know anything, I'm going to pull out this page to show him he once thought I was a genius. 😀
I love that conversation! I think the word bubble effectively shows that the word was coming from him–which you can point out some day during that teenage conversation.
Great tutorial! But how did you get Costco to print the exact size and shape of your photos? I've had a problem with this for a while. The sizes I use on my pages aren't usually standard sizes so I'm always challanged with ordering the right size.
To get the exact size for my photos in Photoshop Elements:
1- Edit the photo as necessary. "Save As" a different name.
2- Use your Crop tool and input the custom size you want the finished photo to be (4.5"x2.75" was one of mine here). Just type in the dimensions for width and height, and 300 ppi. Resize the corner handles and move the crop area around as necessary, then click the green arrow to apply.
3- Create a new document that's a standard Costco photo size (4×6, 5×7, etc.) in 300 ppi.
4- Go back to the photo (flatten first if it has layers) and drag it to the new document you just created.
5- Now you can see exactly how that photo will print on a standard size. Save this file as a JPG and submit to Costco. Leave the white space and just trim it off after you get your print back from Costco.
I hope that helps!
Very cute Kelly! I am a newbie, and followed your welcome to your blog. Please tell me how you put the stitch marks and question marks on the page. Were they hand drawn? They all look so perfect. Or were they printed onto your paper? A little confused here.. LOL.
Thank you!
Jessica, these were drawn with a black pen in the Silhouette pen holder. The machine doesn't care whether you have a pen or a blade in there, so I put those on the page as cut lines (in the Cut Style window) and put the pen in the machine instead of the blade for those lines. No hand drawing, no printing. You might want to check out my sketch pen posts (see the label on the right) to get a feel for how to do it and what's possible with the sketch pens.