Card with Sketch Pen Tutorial
Originally posted on the Silhouette blog 11/28/2013
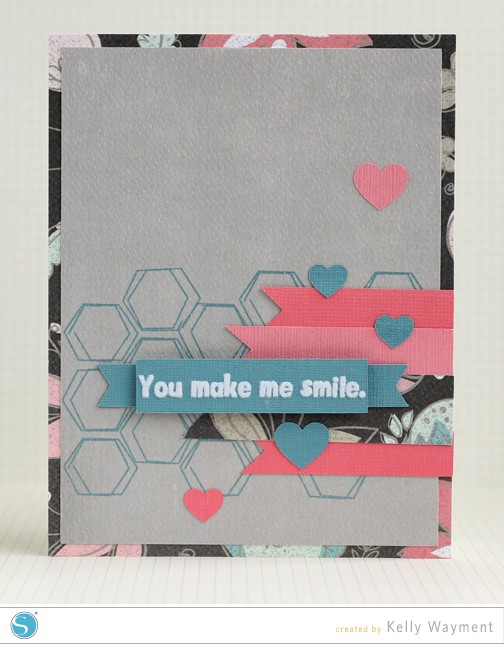
Kelly here! I’m happy to be here with you again, this time for a Thursday Sketch project. Stamped backgrounds have caught my eye lately in cards, and I think a lot of sketched shapes would make great backgrounds in place of stamping. This sketch lends itself well to a little something in the background.
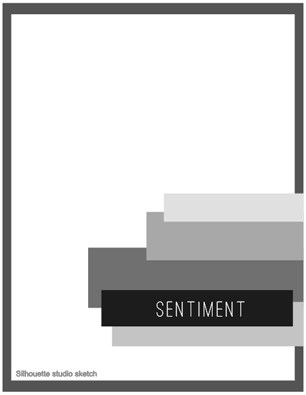
I first chose my background pattern paper (MME Cut & Paste: Flair “Forever” Splendor Paper) and picked teal and coral cardstock colors to match. I chose flags to resemble the rectangles in the sketch from 5 Label Shapes, and a banner from Banner Label Set for my sentiment. A neutral grey was the best choice to show off the sketching.
Here’s a tutorial on adding sketched designs to a card background.
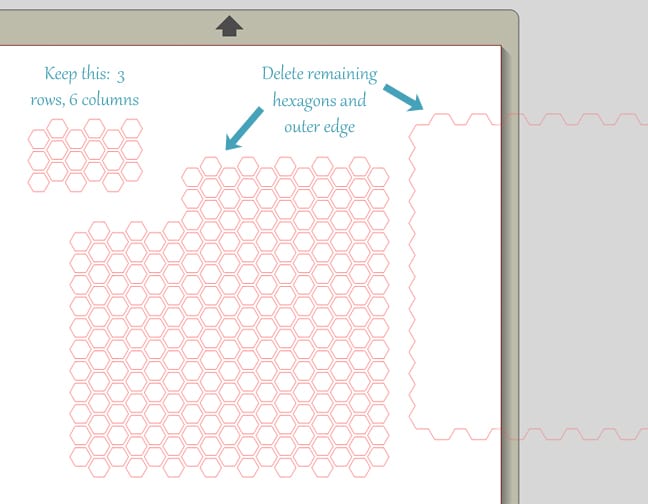
1- For this card, open the shape Honeycomb Background (med) in Silhouette Studio.
2- Ungroup (Ctrl/Cmd U).
3- Drag away and delete the outer edge.
4- Select 6 columns and 3 rows of hexagons and Group them (Ctrl/Cmd G). Delete the rest.
5- For a standard A2 card (4.25″ x 5.5″), resize this group of hexagons to approximately 3.75″ wide by dragging a corner handle of the bounding box. (The height should be about 2.370″.)
6- You could leave these as-is for sketching if you don’t have the Designer Edition of Studio (skip to Step 9), but if you do have the Designer Edition, let’s play a little more…
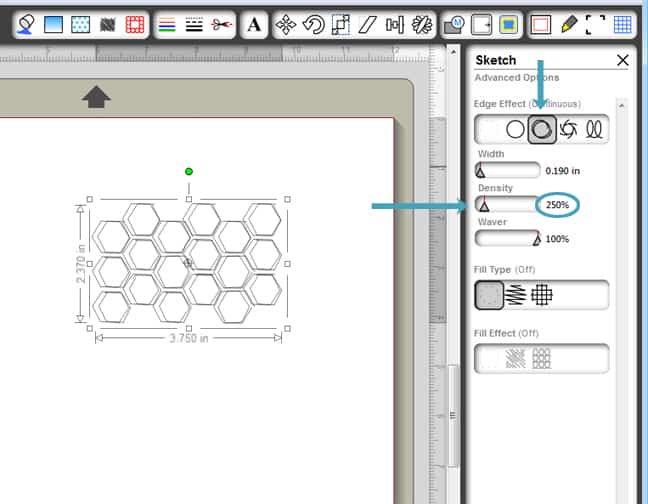
7- Open the Sketch Window and choose Edge Sketch: Continuous. Then click on Advanced Options at the bottom.
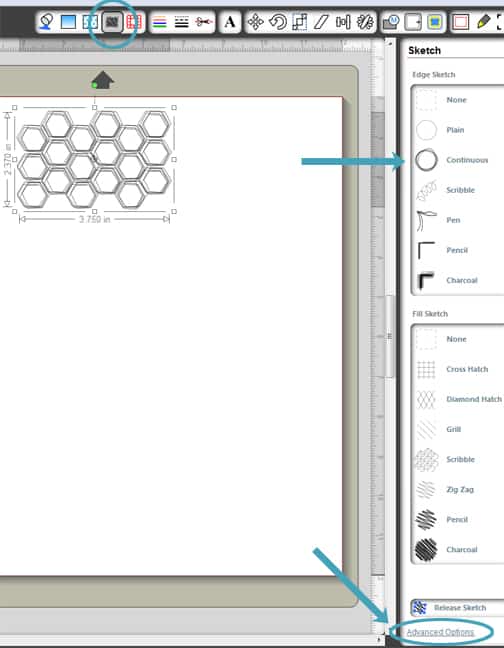
8- In your Sketch Advanced Options you can fine tune the sketch details. I find myself decreasing the Density most often. To make your hexagons look like mine, leave Width at 0.190 inches, choose Density of 250%, and leave Waver at 100%. (Keep fill type off and fill effect off.) Feel free to play around with these options to get your design the way you like it. FYI, if you resize your sketch shape after tweaking these settings, the overall look will change.
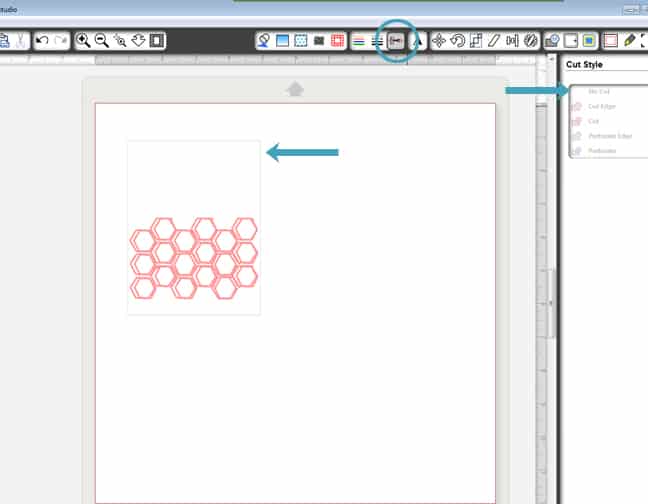
9- Now draw a rectangle 3.975″ wide and 5.225″ high with the rectangle drawing tool. This will be the base to be sketched on. Arrange the hexagon sketch design in the lower third of the rectangle.
10- Go to the Cut Style Window, select the rectangle, and choose No Cut. The hexagons should remain bold red so your Silhouette knows to cut (sketch) those lines.
11- In your Silhouette Cut Settings Window, choose “Silhouette Sketch Pen” at the bottom of the list of presets. This should adjust your speed and thickness and remind you to swap out the blade for a sketch pen.
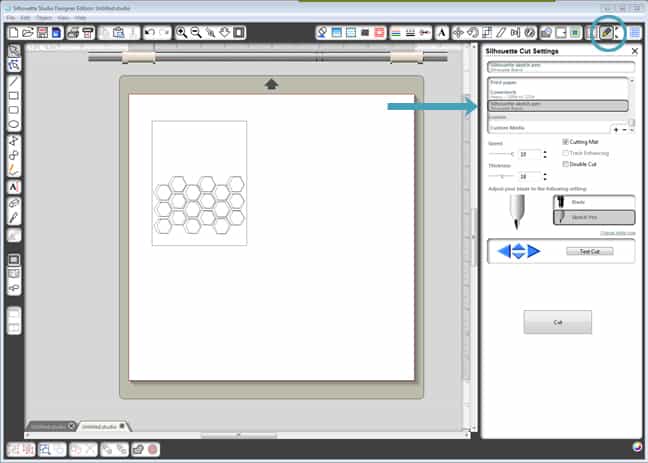
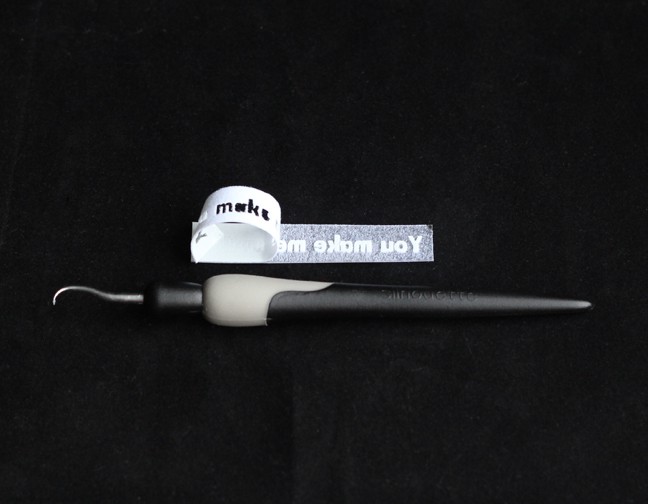
12- At this time, load your paper into the Silhouette and take out the blade. Insert a sketch pen directly into the blade holder and lock it. I chose the dusty blue sketch pen from the sketch pen starter kit.
13- When you’re ready, choose Cut. This is fun to watch!
14- When it’s done sketching, do not unload your mat! Remove the pen and replace it with your blade, set for the correct paper type.
15- Go back to the Cut Style Window. Choose Cut for the paper layer and choose No Cut for the sketch layer.
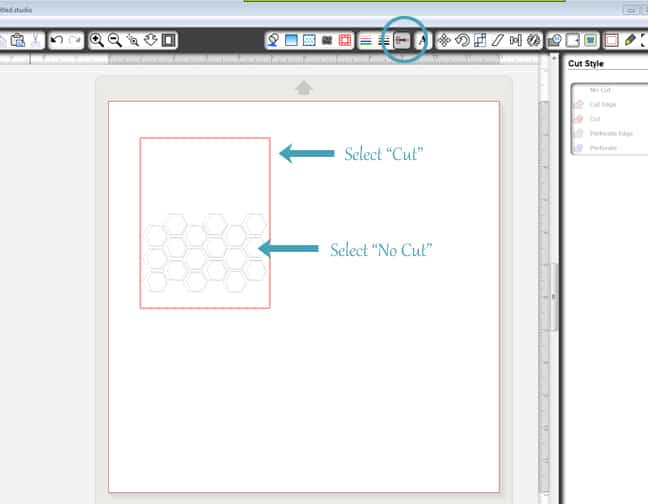
16- Return to the Silhouette Cut Settings Window, choose your paper type, and click the Cut button once again.
I want to show you one more little detail I used for my card. I love white writing on a dark background, and you can achieve that with sketch pens or print & cut, but for a little extra texture I used Silhouette white flocked heat transfer vinyl and ironed it onto my teal paper banner. I adore the fuzzy texture, and all forms of vinyl cut so well for intricate designs like this text. The tallest letters here are 0.25″ tall! Yup, a quarter of an inch.
I just followed the instructions that come with the heat transfer vinyl, remembering to mirror the text.

We’d love to see what you create with this Thursday Sketch! (And Happy Thanksgiving to our U.S. friends!)
Silhouette Shapes:
Banner Label Set by Lori Whitlock
5 Label Shapes by Lori Whitlock
Honeycomb Background – Medium by Silhouette
11 Hearts by Lori Whitlock
Font: LD Little Fishie

Thank you Kelly, for more inspiration!! Happy Thanksgiving! hugs, Patty