Framed Fall Flowers
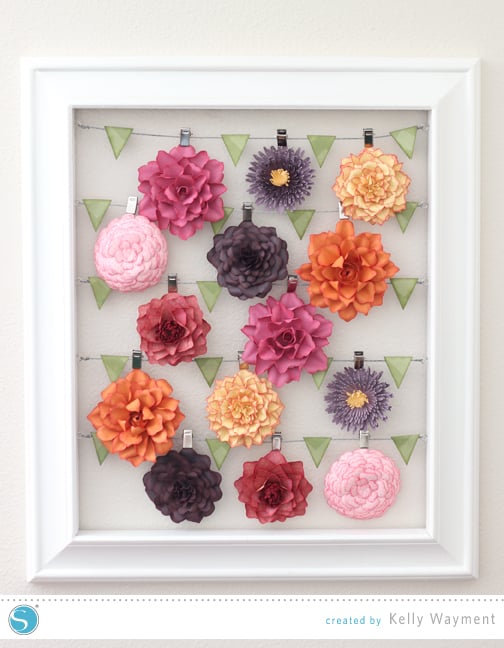
Fall is just around the corner, which is my favorite time of year. I’m happy to say goodbye to the summer heat and welcome the cool nights. But there are still gorgeous flowers all around! I wanted to fill my 2012 Advent Frame with beautiful paper fall flowers to celebrate the oncoming season.
I chose seven different flowers from the Silhouette online store and made each flower twice. For all of these flowers except the spider mum with its bazillion layers, two flowers fit perfectly on a single 12×12” page. I used my Nesting Tool in the Studio software to make this a quick and easy process with virtually no piece-by-piece manipulation.
Here is how to use the Nesting Tool, which was introduced in Studio version 3 (Designer Edition).
- Ungroup the flower pieces.
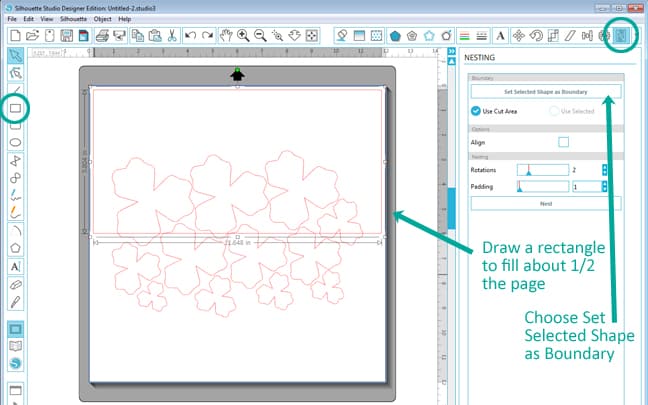
- Draw a rectangle. For CAMEO users who want to fit two of these flowers on a single page, draw a rectangle that fills about half of the page (get close to the top, the left, and the right edges and stop about 6” down).
- In the Nesting Window with your rectangle selected, choose Set Selected Shape as Boundary. (The rectangle will turn blue and will disappear when you leave this window.)
- Set the Rotations to 8 (this allows the nesting function to rotate each shape quite a bit—if the pattern of your paper matters, leave Rotations at 1 or 2).
- Set Padding at 10 to 20 (this is how close your shapes get to each other—the higher the number, the bigger the spacing between shapes).

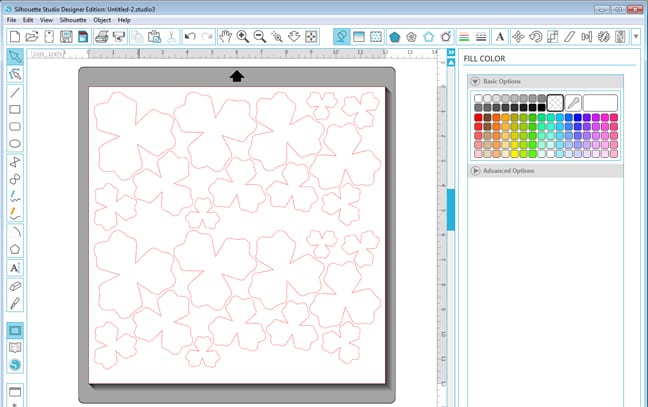
- Select all the flower pieces you want to fit in the rectangle, then click Nest. Now all the shapes will go into that rectangle you drew, nestled nicely together.
- If you have some pieces that don’t fit, they will be obvious and usually sit on top of another shape. Often you can still move a few individual pieces and still get everything to fit overall. Moving a few pieces is better than manipulating them all one by one. You can also try changing the shape you want to fit them into, or adjust the rotation and padding numbers.

- Now to quickly get a duplicate set of those flower pieces directly below the existing set, select them all and hold your Ctrl or Command key and hit your down arrow. Super-fast duplication! Now you’re ready to cut two full flowers from a single page.
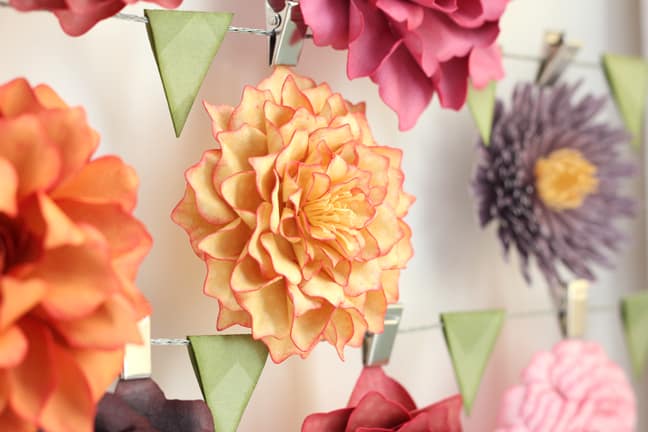
As you can see in these detail shots below, I used an inkpad with a makeup sponge to add color to the edges of all my flower pieces before gluing them together. That adds a lot of time to this many flowers, but I think it’s worth it!

I also added a little green to the arrangement by wrapping flags directly on to the wires of the frame. I love this cheerful set of flowers now hanging on my wall! My paper flowers will long outlast the summer and fall blooms outside.
Shapes Used (and links to the designer’s assembly tutorials):
- 3d spider mum #58681 (light purple with yellow center—tutorial here)
- 3d medallion tea rose #59224 (orange—tutorial here)
- 3d flower #59717 (dark purple—tutorial here)
- 3d flower #59718 (soft red with dark red center—tutorial here)
- 3d catalina tea rose #59220 (yellow—tutorial here)
- 3d sunblest tea rose #59227 (darker pink/mauve—tutorial here)
- 3d zinnia flower #49637 (light pink)
This project was originally featured on the Silhouette Blog 8/21/2014.
This post contains affiliate links. It won’t change your price, but it helps you by getting exactly the product I used, and it helps me by giving me a little kickback to help support this blog. Win-win. 🙂

This is absolutely stunning! I love 3D flowers so much and this is a fabulous way to display them!
Oh, thank you, Beth!
Kelly, that looks like all your beautiful treasures from your garden that you picked, dried and now have displayed. Just gorgeous! I love this idea. hugs, Patty
Thanks, Patty! I wish I could grow flowers this pretty, but I'm afraid I have a paper thumb instead of a green thumb. 😉
Hi Kelly
Love this project what weight if paper did you use
Lisa
I would like to make the flowers but I don’t know what kind of paper you used or what weight?
Bazzill textured cardstock. It’s a medium-to-slightly-heavy weight and cuts great.
Thank you Kelly
Is there any way to view the 8-21-14 blog for the tutorial for these flowers?
Kelley, I sent you an email. The designers’ tutorials for indivdual flowers are linked at the bottom of the post with each flower.
Thank you so much for all the info. One last question: Does the Zinnia not
have a tutorial? Thanks again.
There is not a full tutorial for the zinnia that I could find, but the description in the design store gives some instructions. That one is easy because you’re basically just stacking the circular pieces from largest to smallest after curling the edges a bit. 🙂