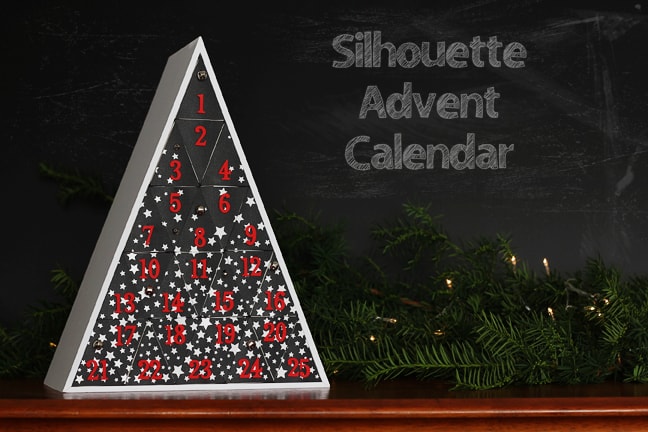
Silhouette Advent Calendar 2018
Can you believe Christmas is only 73 days away? I know it’s only October, but it’s amazing how fast time goes this time of year as the holidays approach. So it’s time to make a new Advent Calendar!
This Advent Calendar was available only in Black Friday bundles last year, but now you can buy it solo. In fact, this month in October you can buy it for only $24.99 with my code TIME2 through THIS LINK. Want to see how I created mine?
Supplies/Tools Needed
- Silhouette CAMEO, Silhouette Portrait, or Silhouette Curio (you need these newer models if using the deep cut blade and craft foam)
- Deep cut blade
- Craft foam
- Black cardstock
- White vinyl
- Transfer tape
- Mini jingle bells
- Advent Calendar
- Adhesive
Open the Advent Calendar and Designs
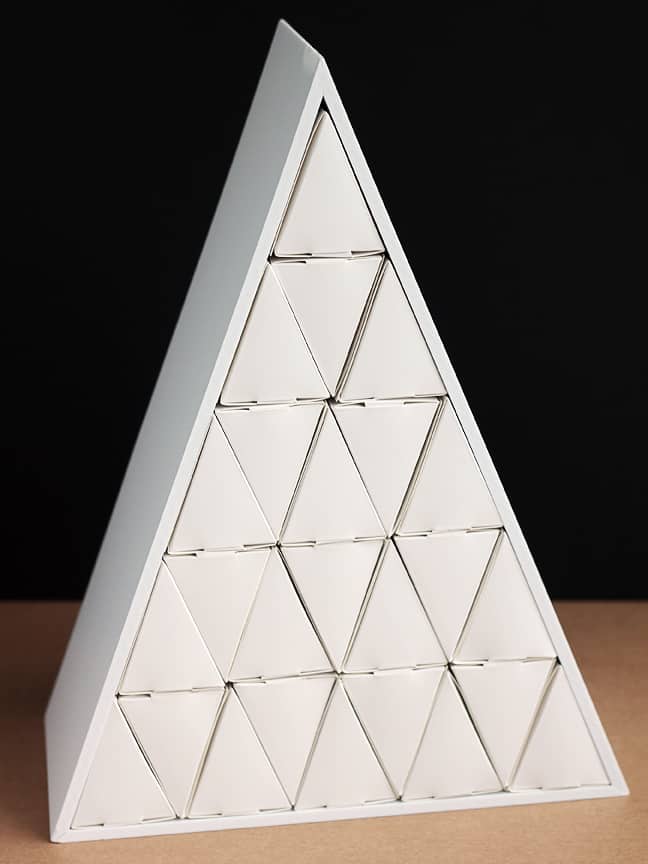
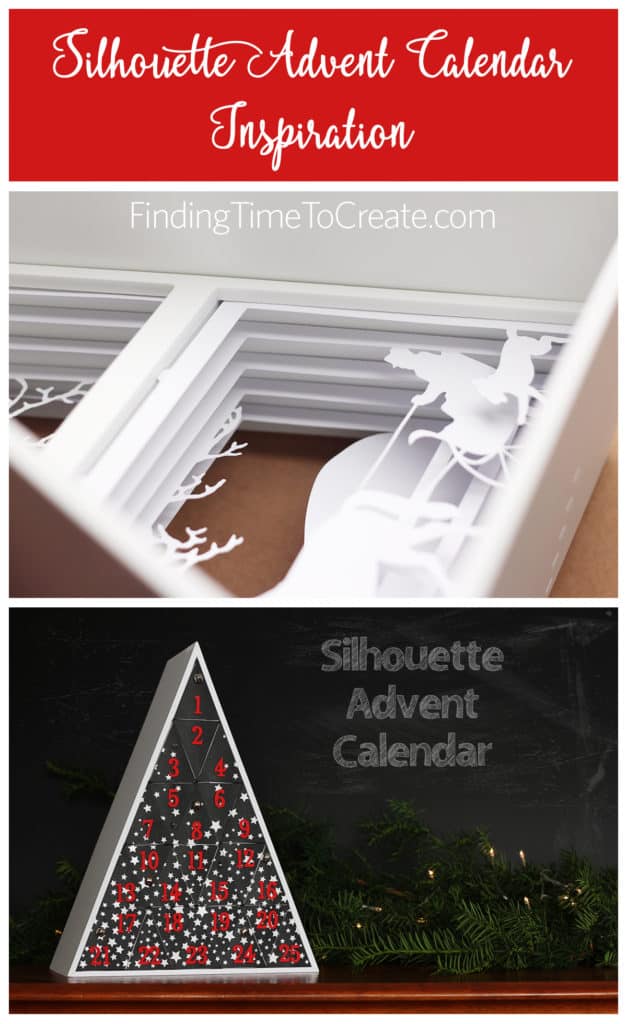
This is what the Advent Calendar looks like when you get it. It’s a white triangular wood frame filled with pre-made white paper boxes. It’s completely blank, ready to be decorated in any way you choose.
Included in the package is a card with a code for the designs that are made specifically to go with this calendar. The designs include:
- Advent box faces, so you can cover the existing white boxes with either triangles or tabbed triangles to decorate the main face of the entire calendar.
- Advent calendar box, so you can cut your own boxes if you don’t want to use the white ones already provided.
- A choice of four different scenes that will be revealed as the boxes are removed day by day.
It’s easy to access these designs with the code. Simply go into the Design Store, click on your name under the profile icon in the upper right corner (or click Account Tools), then click on “Redeem a Promotional Download Code”.
Enter the 16-digit code found under the scratch-off area of your card that came in the Advent Calendar kit, and click “Apply Card”. The files will load into your Cloud Library in the Recent Downloads folder, and then you can use them like any other library design!
I’ve got a video HERE that shows how to redeem a promotional download code.
Box Faces
I have quite a few advent calendars at this point, so it’s always a challenge coming up with something a little different. But I like a challenge when it comes to Silhouette projects. 🙂
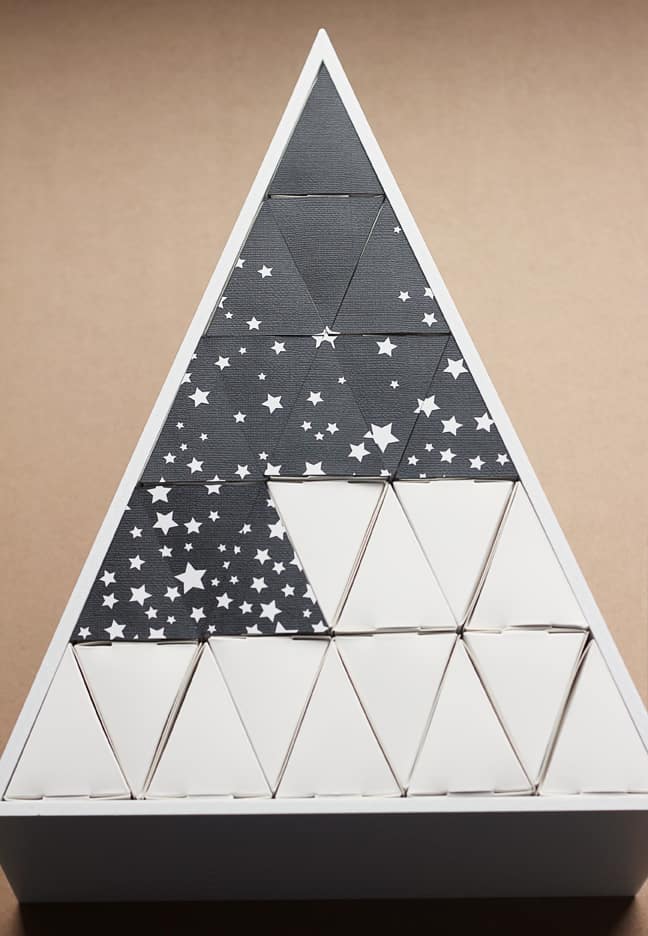
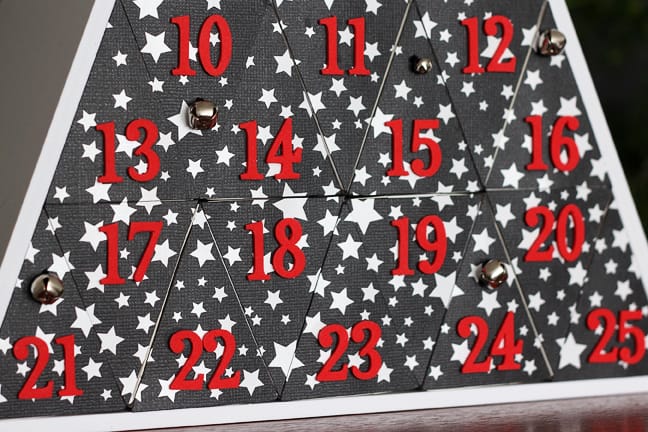
I decided to go with a black/white theme, with a little red thrown in as the only bit of color to tie it to Christmas.
I used the non-tabbed version of the triangles because I think the boxes are easy enough to pull out without the tabs. I wanted white stars on a black background, and I found the easiest way to do that was to apply the white stars in vinyl to the black cardstock before cutting the black cardstock.
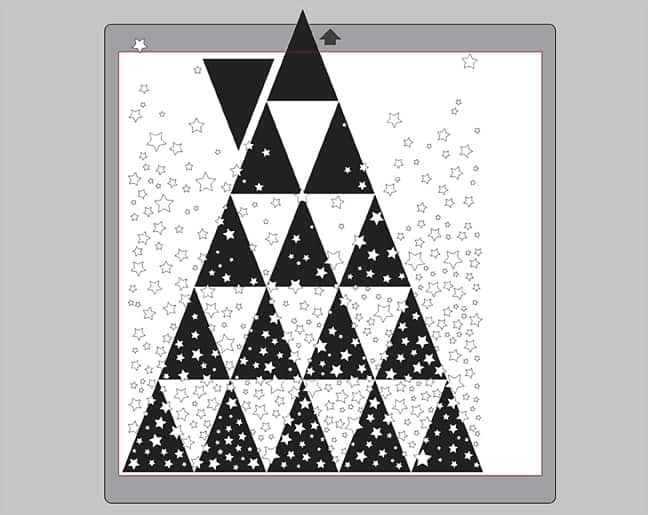
I used the design Star Stencil (Design ID #161653) and rotated it 180 degrees so the bulk of the stars were at the bottom. Then I resized the stars to go edge-to-edge at the base of my triangle faces. (Do NOT resize the triangle faces.)
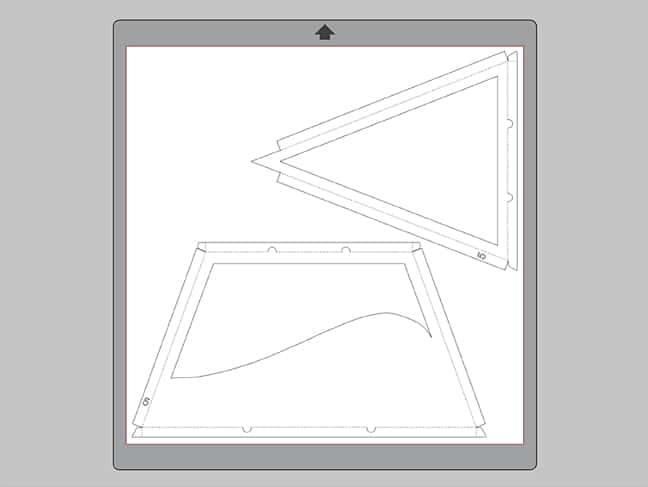
Here’s what it looked like on my design page before cutting the stars and triangles (I’ve filled the stars with a white fill color and the triangles with a black fill color just for visibility when designing).
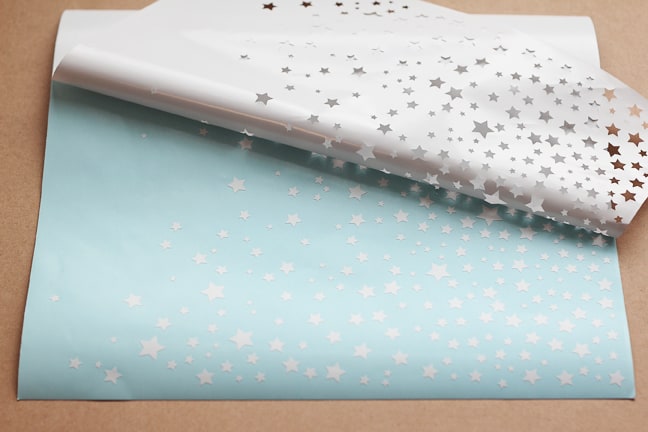
I cut the stars from white vinyl then used transfer tape to apply it to a piece of 12 x 12 in. black textured cardstock.
![]()
Then I put my cardstock on the mat and cut it with a little deeper settings to make sure it cut through, even though the vinyl is very thin.
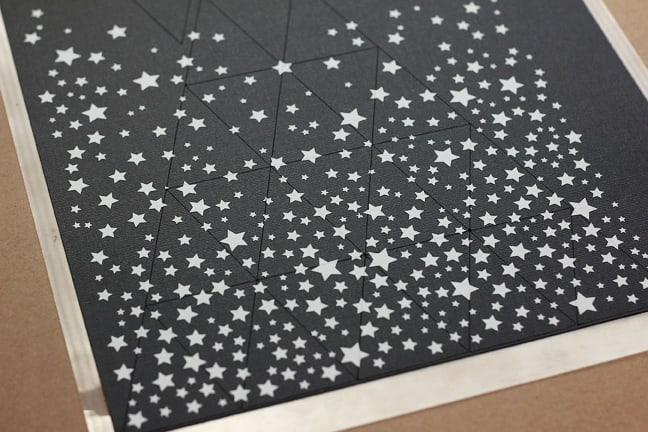
In case you’re wondering about the top triangle extending beyond the mat on the screenshot image above, the blade lifts up at the top of the mat, so it only cuts the portion of the triangle that’s on the sticky area of the mat. That’s why I made a copy of the top triangle off to the side; so I’d get a complete cutout of that top triangle.
I lost a few bits of the stars when cutting the cardstock, but they don’t match up perfectly across the design anyway, so it’s not a big deal to me. I still get the spray effect overall.
With the full design cut, I glued the pieces to the box faces.
Numbers
The numbers I used are included in the Box Faces design, but I resized them to be about 0.75 in. tall.
The numbers were the most difficult decision for me. I wanted them to show up against the black, and I wanted them to have some depth. In the end, I decided on bright red numbers cut out of craft foam with my deep cut blade.

The deep cut blade default settings worked OK, but I added a little force so my final settings for cutting my particular craft foam were:
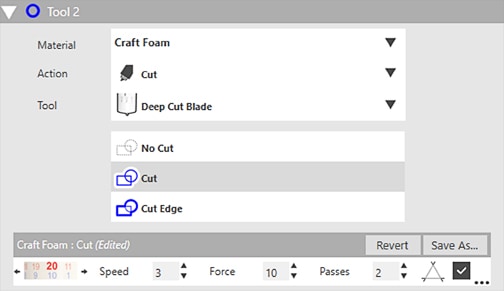
- Blade 20 (make sure to manually adjust it yourself as described in this tutorial)
- Speed 3
- Force 10
- Passes 2
- Overcut enabled
(It doesn’t matter which tool holder you use, but make sure if you’re using Tool 2 in the CAMEO 3 or Curio, that you select the designs and choose “Cut” in the Tool 2 section so the outlines turn blue instead of red.)
This was a sheet of 2mm Darice Foamies craft foam (no sticky back) that I picked up at JoAnn’s or Michael’s. You may need to test cut and adjust your settings based on the craft foam you use, if you decide to use craft foam.
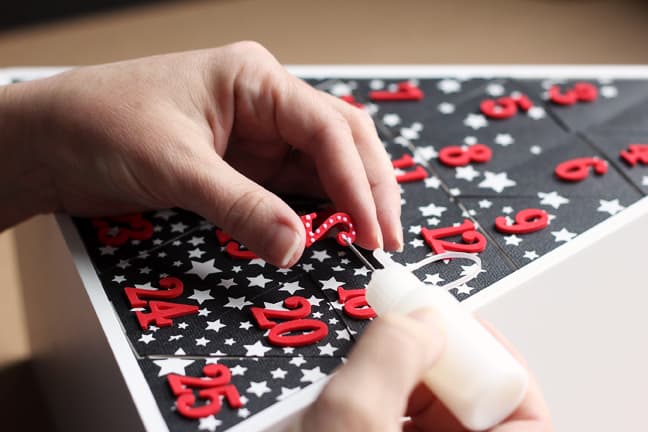
I just used liquid glue in a needle-nose bottle applicator to apply the numbers to the box faces, and they are holding nicely.
Jingle Bells
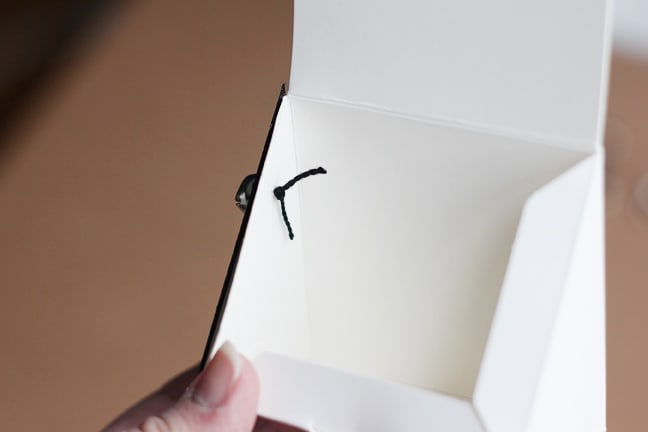
Once the boxes were finished with the faces and numbers, I added a few jingle bells to add one more layer of interest. I found this easiest to do with a needle and heavy thread, tied inside the box.
I used both 6 mm bells and 10 mm bells.

Holiday Scene
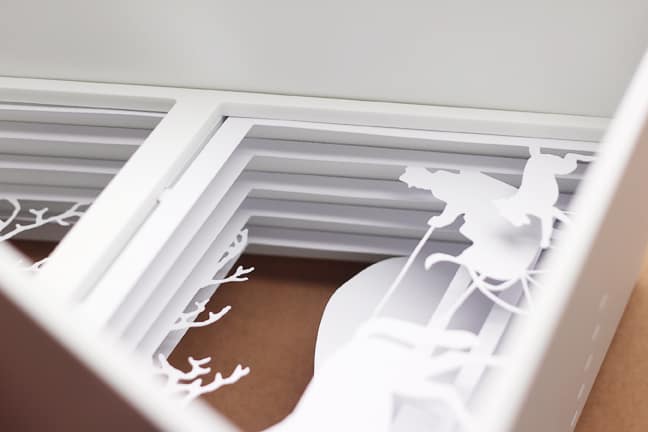
You can choose from four different holiday scenes that give a layered shadow-box effect as the boxes are removed. The layered scene fits into the back half of the advent frame.
![]()
I chose the sleigh scene.
Tip: Don’t try to change the fill colors on these scenes; they have broken paths that will fill with color in odd ways, so you’re better off leaving them in their original colors or changing them all to a blank fill color. The fill colors and broken paths have no effect on the design when simply cutting from paper, so it’s not an issue.
You can fit both pieces on a single piece of 12 x 12 in. cardstock for the CAMEO if you rotate the top section 90 degrees to the left. Or you can use two pieces of letter-size paper (for the CAMEO 3, Portrait, or Curio with large base).
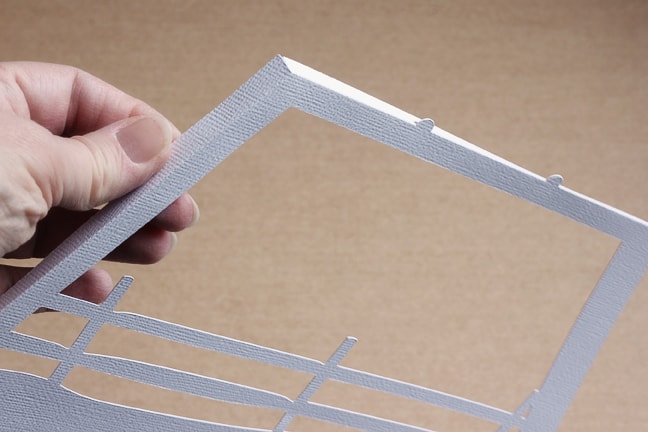
Cut and carefully remove each set in the scene (they are numbered so you can easily match the top and bottom sections).
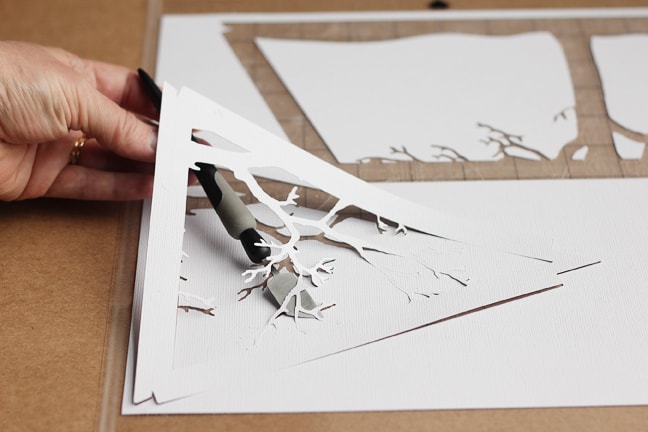
Fold the tabs away from you when viewing from the front. I didn’t use any glue for my layered scene.
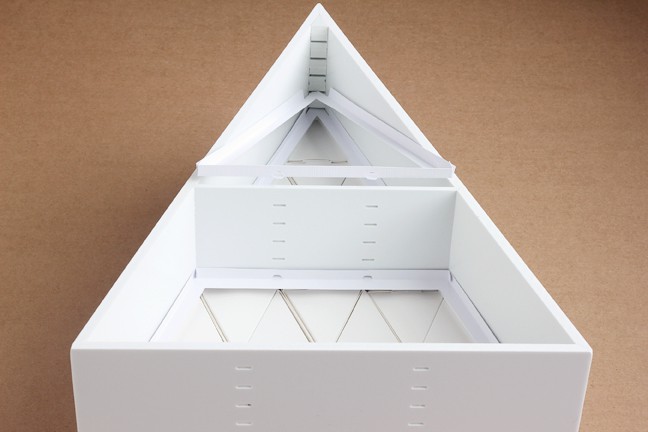
Insert the layers 1 through 5 in order, facing towards the center of the wooden frame. You can see in the image below how the top triangle peak slips into a notch at the top. Then the tiny tabs fit into slots in the wooden frame to fit perfectly in place.
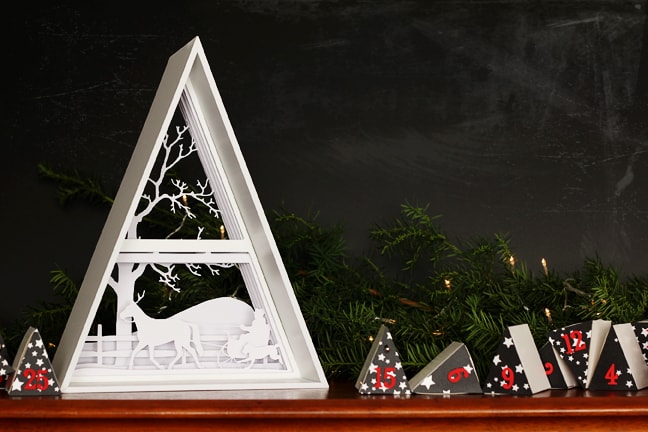
That’s it! I love how the scene is revealed as the boxes are removed. I’ll be filling my boxes with little treats, holiday-themed temporary tattoos, and printed magnets with family activities to add to our December calendar.
Don’t forget, during October only, you can purchase this Advent Calendar with THIS LINK and my code TIME2 at checkout for a discounted price of $24.99! (And if this puts you in the mood to do a little Christmas shopping, make sure to check out the new Silhouette products like glitter vinyl and textured translucent vinyl.)
Please let me know if you have any questions, and happy crafting!
Advent Calendar sale ends October 31st, 2018 at 11:59 p.m. Mountain Time (MST). Discount only available with valid promo code at point of checkout. Use code “TIME2”
This post contains affiliate links. When you use my links, I may get a small commission which I use to help support this blog. Your price is the same. Thanks for your support!

Thank you so much for posting the instructions, I purchased my cameo that came with the advent calendar in 2017 and could not figure out what I needed to do. I really appreciate this!!!
You’re very welcome!
What are the dimensions of this?
Hi Jany. It’s 11″ wide at the base, 14.25″ tall, and 6″ deep.
Thank you so much’