Wooden Standing Deer
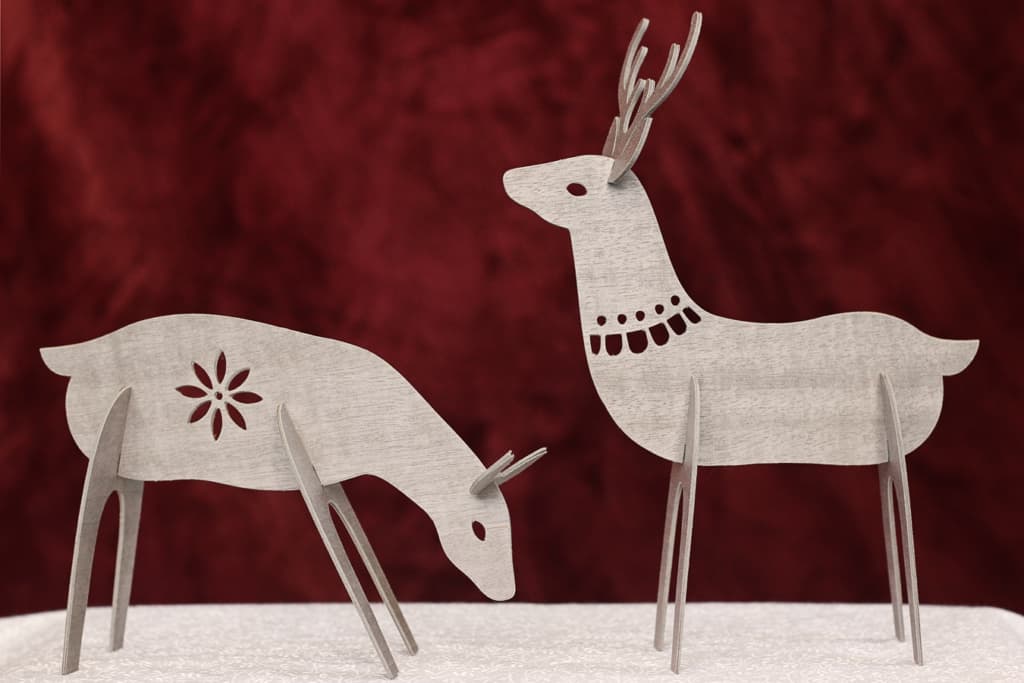
I’m just popping in quickly today to share these Scandinavian wooden standing deer from Lia Griffith.
This design is one of Lia Griffith’s monthly member designs with a tutorial available for members. While I can’t share the file or her full instructions, I will tell you how I had great success with these using my Silhouette Cameo, Silhouette wood sheets, and Silhouette chipboard. (Lia’s instructions use Cricut machines and materials, but I wanted to use Silhouette products.)
How-To:
- Cut the deer pieces twice with chipboard. Because Silhouette chipboard is so thin (0.4 mm), it cuts really well but needs the extra thickness for the slots to be a snug fit.
- My chipboard settings are as follows with my Cameo 4 Autoblade. (Do a trial cut first and adjust as necessary based on your own blade and machine.)
- Blade 6, Force 25, Speed 4, Passes 2, Line Segment Overcut ON
- Glue the chipboard pieces together with a small amount of liquid glue and press under a heavy book so they dry flat.
- Cut the deer pieces next with wood sheets. This product is basically a super-thin veneer that has a strong adhesive. That means the detail cuts beautifully, and there’s no sanding or glue involved. I used the grey wood sheets on these deer, but the package also comes with walnut and maple.
- My wood paper settings are as follows with my Cameo 4 Autoblade. (Again, do a trial cut on an area you won’t use in order to fine-tune your own settings.)
- Blade 6, Force 32, Speed 4, Passes 2, Line Segment Overcut ON
- Carefully peel the wood cutout pieces off their backing. Apply them like stickers to the front and back sides of the corresponding chipboard shapes.
Additional Notes:
- You need Silhouette Studio Designer Edition or higher to open SVG files like those from Lia Griffith.
- These two deer used both sheets of grey wood in the package. You can get two full deer from each color when cut at their default size.
- Any Silhouette cutting machine can cut the Silhouette chipboard and Silhouette wood sheets. Use your favorite blade.
That’s about it! I am thrilled this came together so easily. I’m excited to see what else looks good as wood cutouts now that I know I really like these wood sheets on chipboard!
This post may contain affiliate links. Your price is the same, but I may receive a small commission when you use my links. Thanks for your support!
