Lori Whitlock Chipboard Village
I’ve been working on Christmas projects since August, and I’m not done sharing them yet! These are the chipboard houses I made for Lori Whitlock for her 2-part Silhouette class on Creating a Christmas Village. I used my Silhouette Cameo 4, but any Silhouette cutting machine can be used for this project.
How to Assemble:
Watch Part 1 here. (Updated to include screenshare.)
Watch Part 2 here.
Designs Used:
Here are the designs Lori used in this Chipboard Christmas Village. You can buy them individually (50% off this week!), or buy the bundle. The bundle will only be available for a limited time, and it is not included in the 50% off Lori’s designs this week.
- 3D House Chipboard Village Cottage – Design ID #389192
- 3D House Chipboard Village General Store – Design ID #389191
- 3D House Chipboard Village Church School – Design ID #389189
- 3D House Chipboard Village Farmhouse – Design ID #389193
- 3D House Chipboard Village Manor – Design ID #389190
- Chipboard Village Christmas Add-On – Design ID #389188
OR choose the Christmas Village Bundle – Design ID #B-1610
My Houses:
![]()
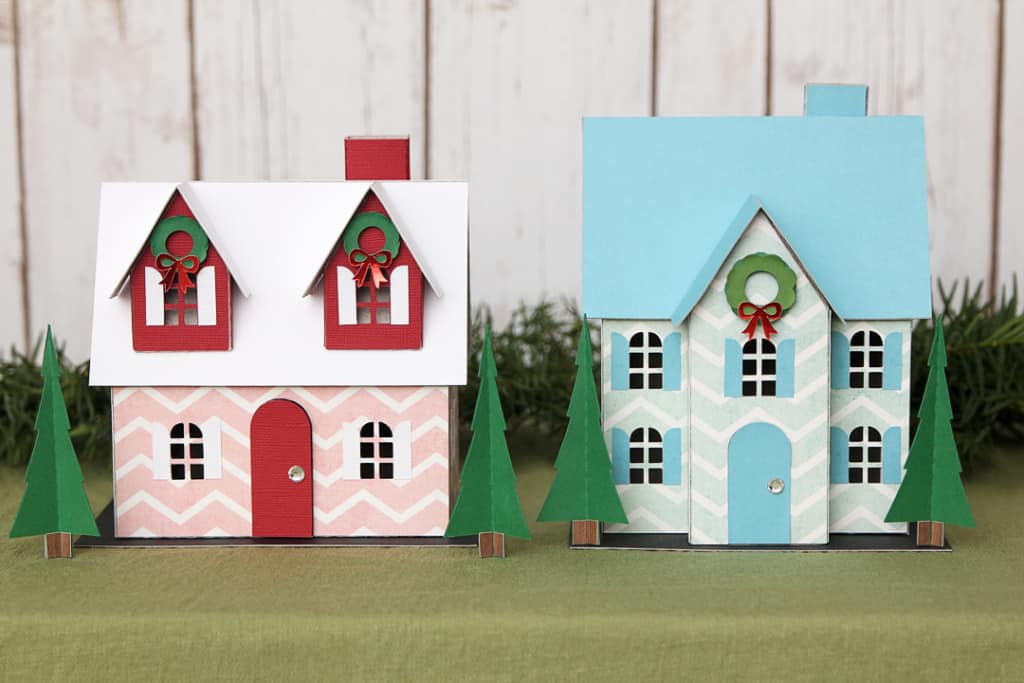
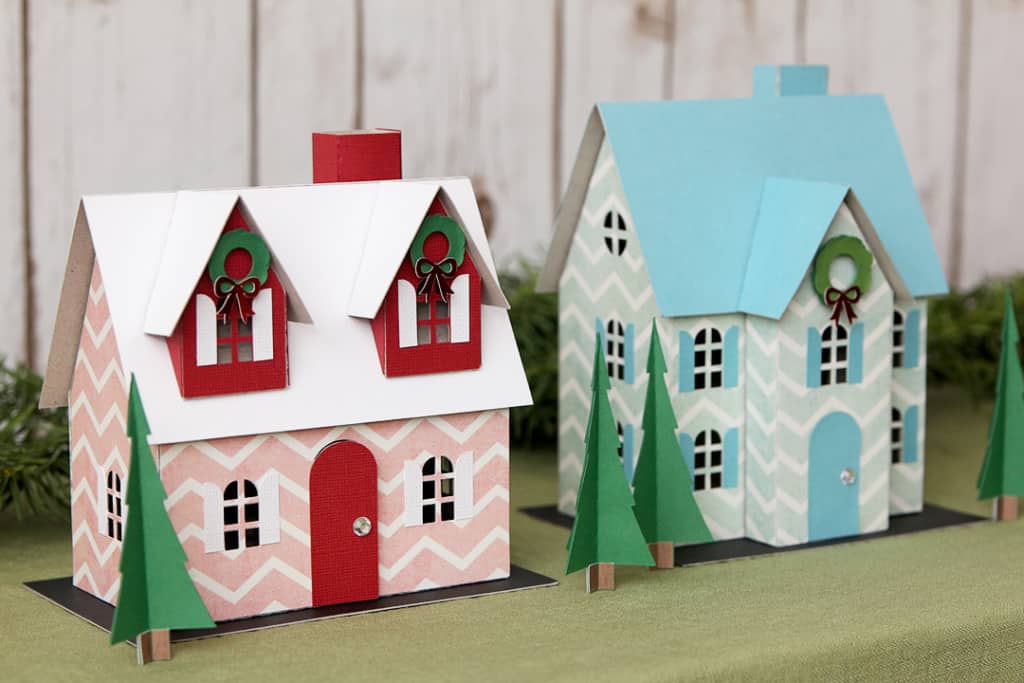
Here’s my red house, which is Design ID #389193. (The Farmhouse.) The house is built with one layer of chipboard, but then I used pattern paper and textured cardstock for the cover panels on the sides, door, and roof. My house includes the optional chimney and shutters, which Lori didn’t use in her examples.
I added wreaths, bows, and trees — which I borrowed from Lori’s 3D Camper Christmas design #282192. I love to mix and match files!
You can buy the Silhouette chipboard here. It’s soft and thin and smooth, and my Silhouette Cameo loves to cut it! It’s thin enough to cut with a normal 1 mm blade, but thick enough to be sturdy for projects like this.
![]()
Here’s my blue house, which is Design ID #389190. (The Manor.) I built this the same way as my red farmhouse, with blue pattern paper and blue cardstock for the cover panels.
I love how sturdy these chipboard houses are! I hope to make more houses from the collection. Maybe I’ll add one house per holiday as I change the seasonal embellishments this year.
This post contains affiliate links. Your price is the same, but I may receive a small commission when you use my links. Thanks for your support!
