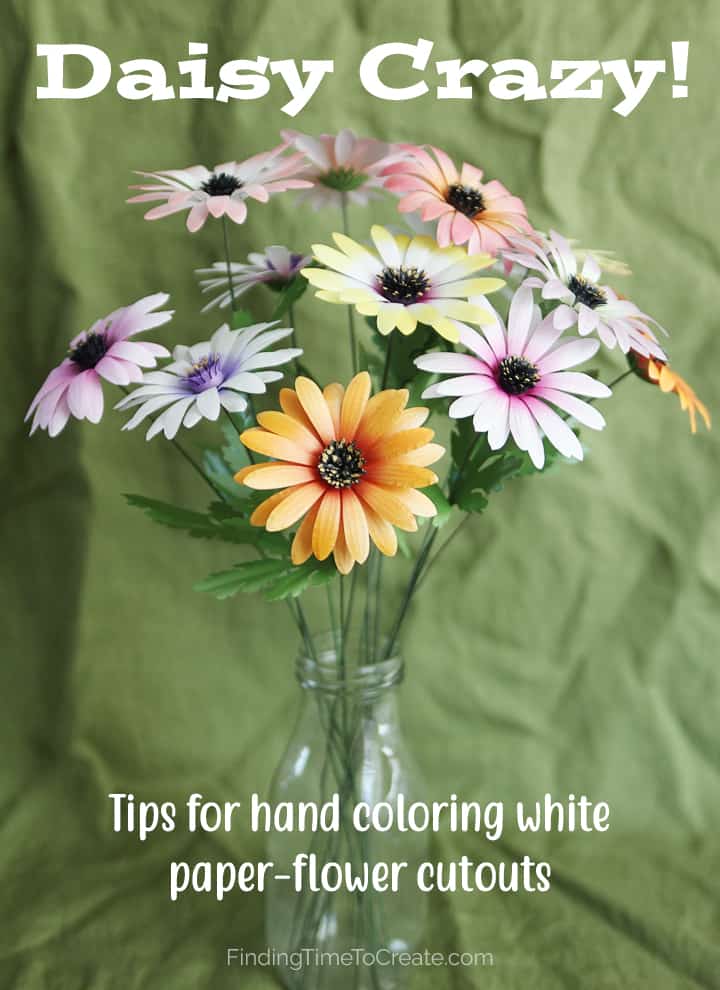
Daisy Crazy: Hand-Colored Paper Daisies
Daisy Crazy
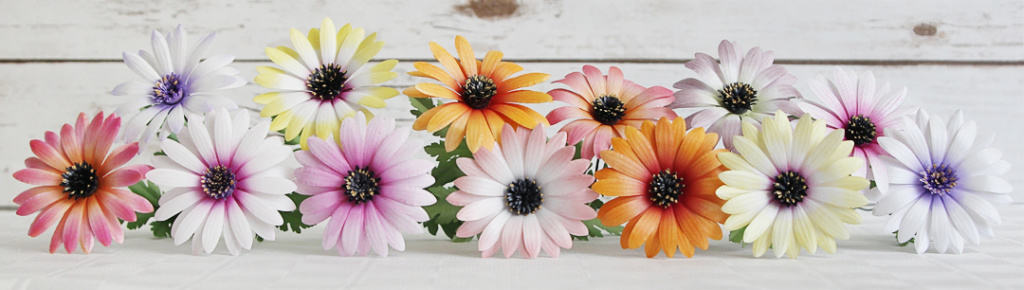
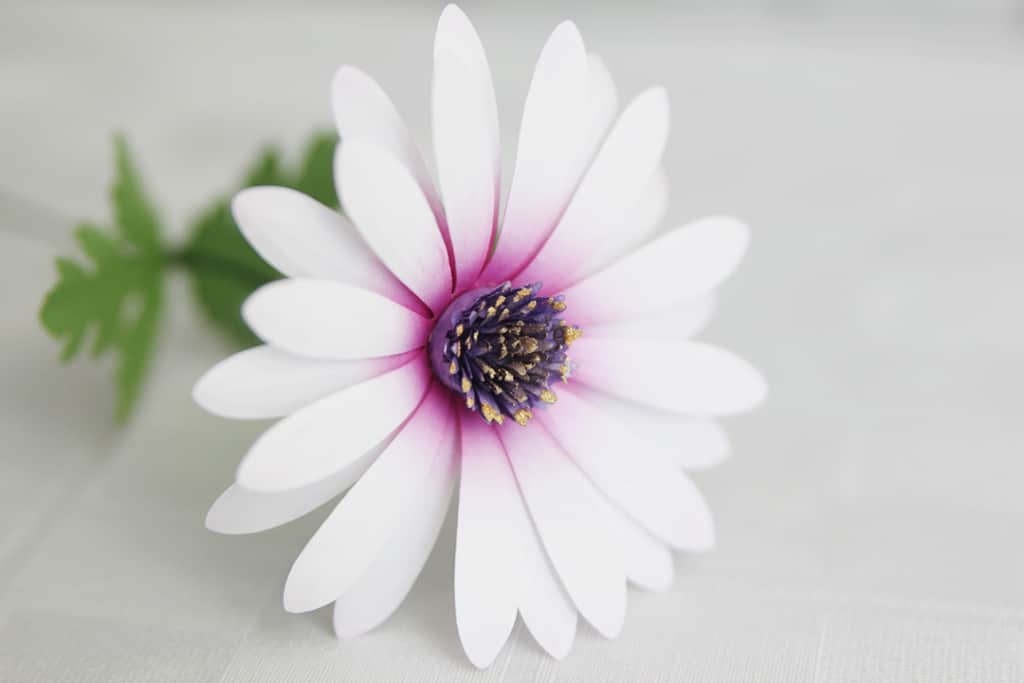
I love making paper flowers. I always have. You’ll find plenty of paper flower projects here on my blog over the years. Today, I want to share some details with you about my latest project. I went a little “daisy crazy” by making a bunch of African daisies with a simple Maison Gregoria daisy design.
This post is not a full tutorial (the artist has provided her own tutorial upon purchase of the design), but I do want to share what supplies I used and some tips and tricks I used along the way.
Tools & Supplies
(Includes some affiliate links)
- Daisy cut file (Design ID #324816)
- Silhouette Cameo (I used the Cameo Pro with a 12″ Cameo mat, but any Cameo model will work)
- Silhouette blade — the intricate details in parts of this design work best with a newer sharp blade
- Cutting mat — needs to be quite sticky with no debris (you can get away with a used or light-tack mat as long as there is no debris to interfere with the cuts)
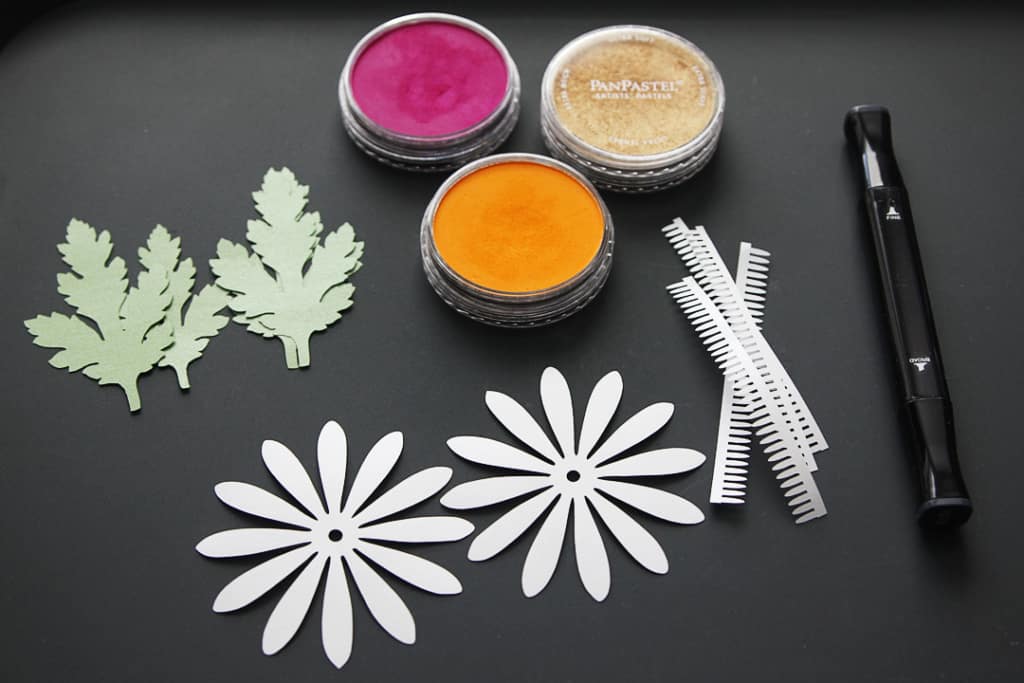
- Stardream Metallic – 12X12 Paper – 32/81lb Text (120gsm) in CRYSTAL and FAIRWAY
- Dark grey alcohol marker — I used Spectrum Noir IG10
- PanPastel soft artist chalk — I used mostly Light Gold 910.5, Magenta 430.5, and Orange 280.5. If you get this Lia Griffith designer set (which includes these colors), you’ll find yourself using Pearlescent Red 953.5 and Pearlescent Yellow 951.5 on these flowers as well.
- Lia Griffith needle nose tweezers
- Silhouette spatula tool — this has a very specific shape that I use for both lifting designs off the mat but also for curling tiny flower parts
- Blending brushes — this is an Amazon link so you know what you’re looking for, but I was able to get a bunch from my local Dollar Tree store before they ran out
- 18-gauge green floral wire
- High-temp hot glue gun — the low temp glue is less successful on frosted paper
- White paper glue
- Wire cutters
- Embossing stylus set and soft surface
Tips & Tricks
Paper
I bought these white and green metallic papers in the hope that they could be colored and shaded to create more than white flowers. I must say this paper did not disappoint! Keep in mind that this paper is quite a bit thinner than standard 65 lb. cardstock.
The settings I used for my Cameo with a sharp blade on this metallic paper are as follows:
- Blade Depth = 2
- Force = 20
- Passes = 1
- Speed = 5
- Turn ON Line Segment Overcut (check the box next to the little triangular icon)
These settings made beautiful intricate cuts with this paper!
Scoring
I loved the tip from the Maison Gregoria tutorial where she added subtle texture lines to the back of each petal. I found this worked great with a 2mm embossing stylus and a mousepad. Craft foam would probably work as a good soft surface, as well. These lines are especially nice for the African daisy that has variations in color.
Note: You can access the video tutorial after you’ve purchased this daisy design by going back to the Silhouette Design Store for this design and click on the “Instructions” button.
Assembly Order
I’ll go into a little more detail for some of these steps later, but here is the order in which I completed my daisies.
- Cut petals and center strips in Crystal (white) with Cameo machine; remove from mat with spatula or tweezers
- Color center stamen strips with alcohol ink marker and let dry
- Score back side of petals
- Add color to front of petals with blending brushes
- Curl center stamen tips with spatula tool
- Wrap center stamen pieces around tip of 18-gauge green floral wire with hot glue to secure as you wrap
- Add “pollen” to stamen
- Hot glue petal layers to base of stamen
- Cut leaves and calyx pieces from Fairway (green) and shape
- Hot glue calyx pieces to base of flower
- Hot glue two leaves to wire stem
Coloring
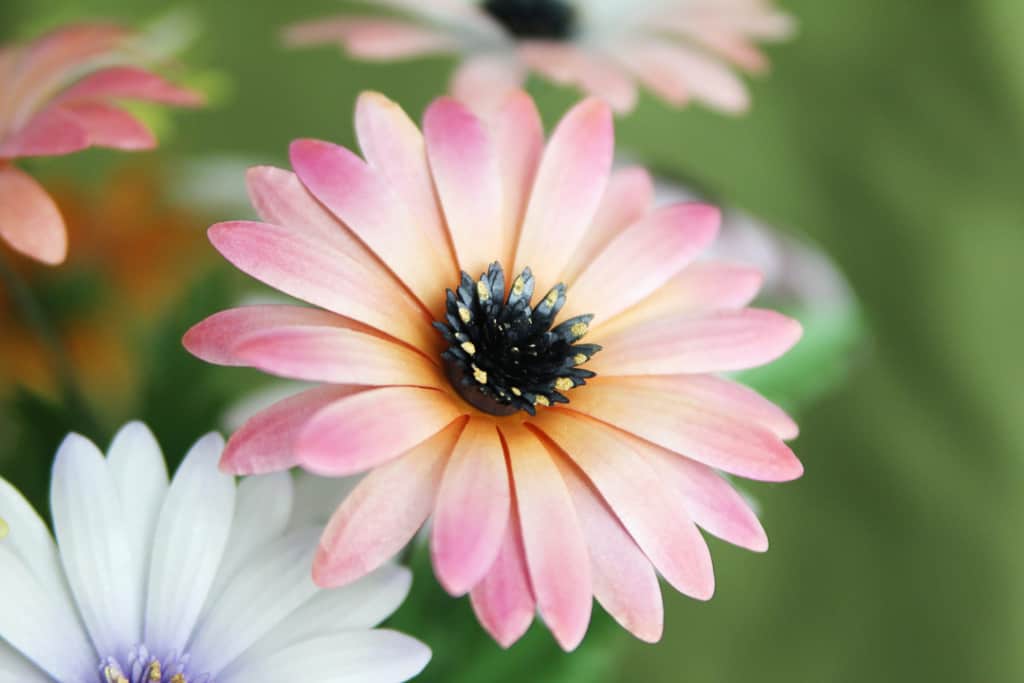
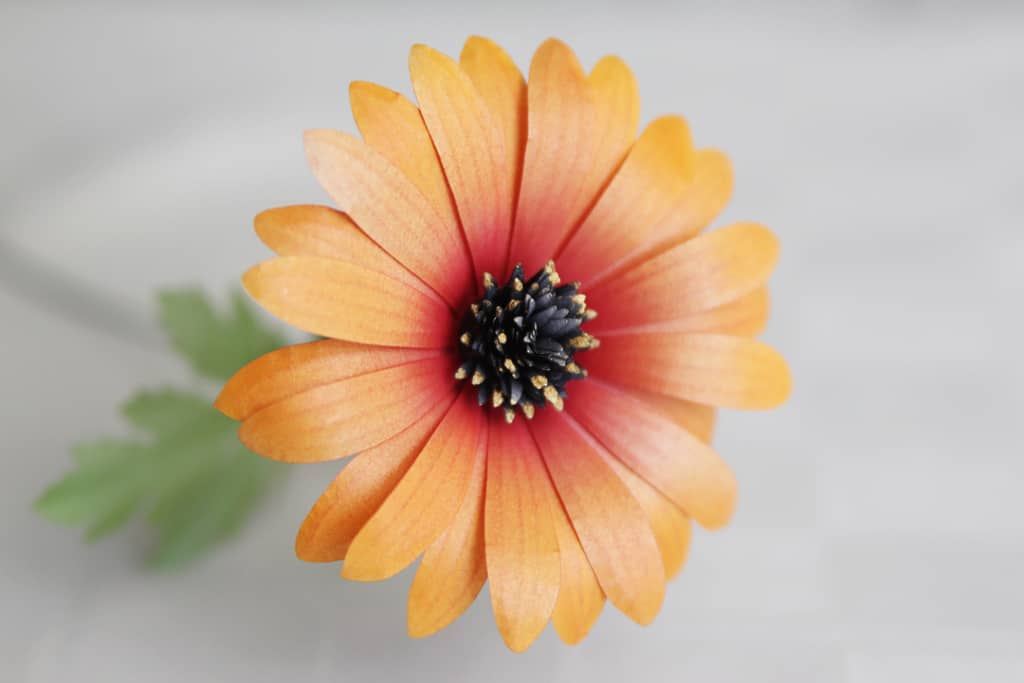
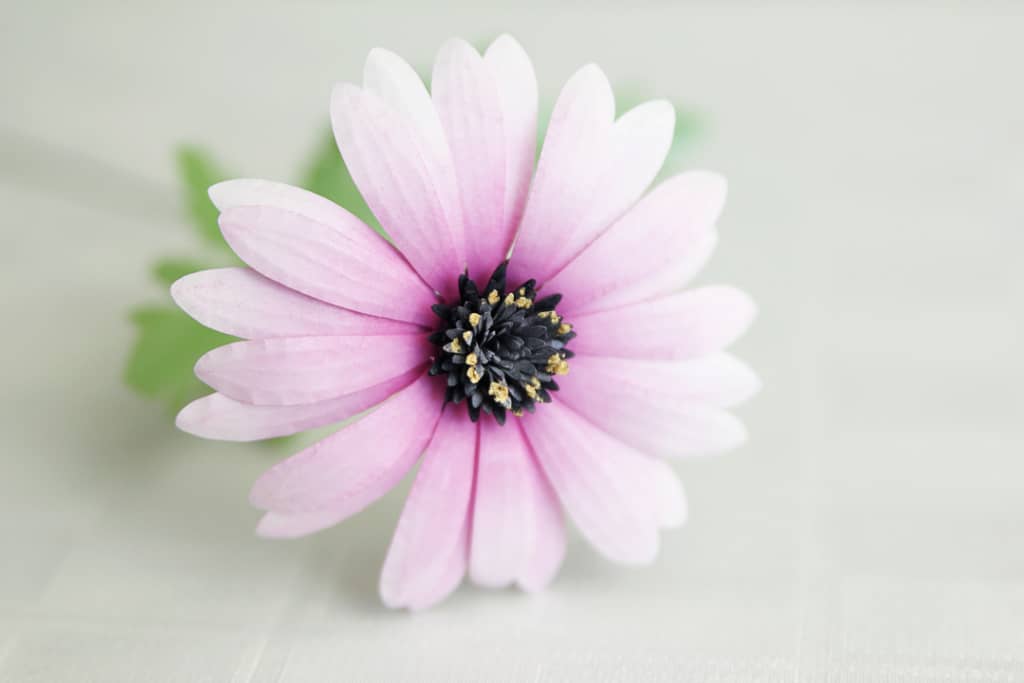
When adding color to paper for paper flowers, there are so many ways you can go. I often use a dye ink pad, but for some reason adding dye ink where I intended to glue on this metallic paper made it resistant to hot glue. I was able to use alcohol inks and PanPastel on areas I glued with no ill effect. If you use dye inks to add color (see the yellow tips below), do not add it where you will be hot gluing parts together. (The center of the petals under the stamen is colored with magenta PanPastel.)
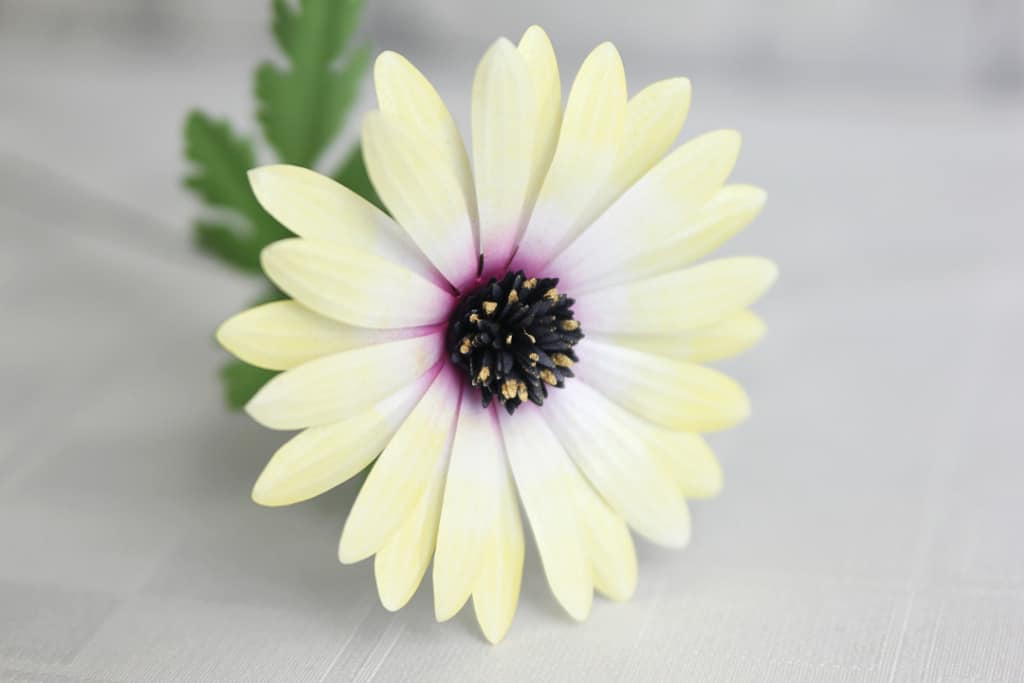
I used a dark grey alcohol marker to color the center strips. Dark purple would be a good choice as well. I also tried purple watercolor paint brushed on to the center strips before assembling (see image below). The color was nice, but the alcohol markers were much faster and more consistent in both application and dry time.
You’ll also notice the centers have “pollen” on them. With the completed centers on the wire stem (before petals are added), I added tiny dabs of white glue to various tips of the stamen, and then dipped the wet bits into a pile of loose light gold PanPastel. I tapped off the excess, and let them dry for just a bit before adding the scored and colored petals.

For coloring the petals, keep in mind these all started out as white paper. I dabbed a blending brush into the PanPastel and rubbed it onto the petals carefully enough so they wouldn’t tear but hard enough to really get that color on there.
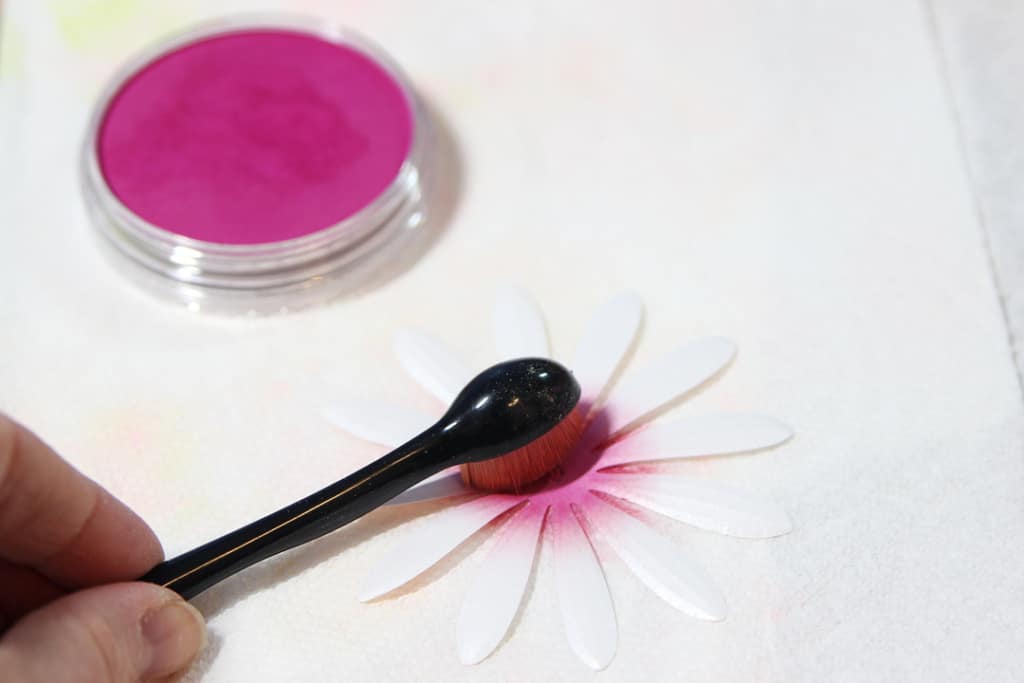
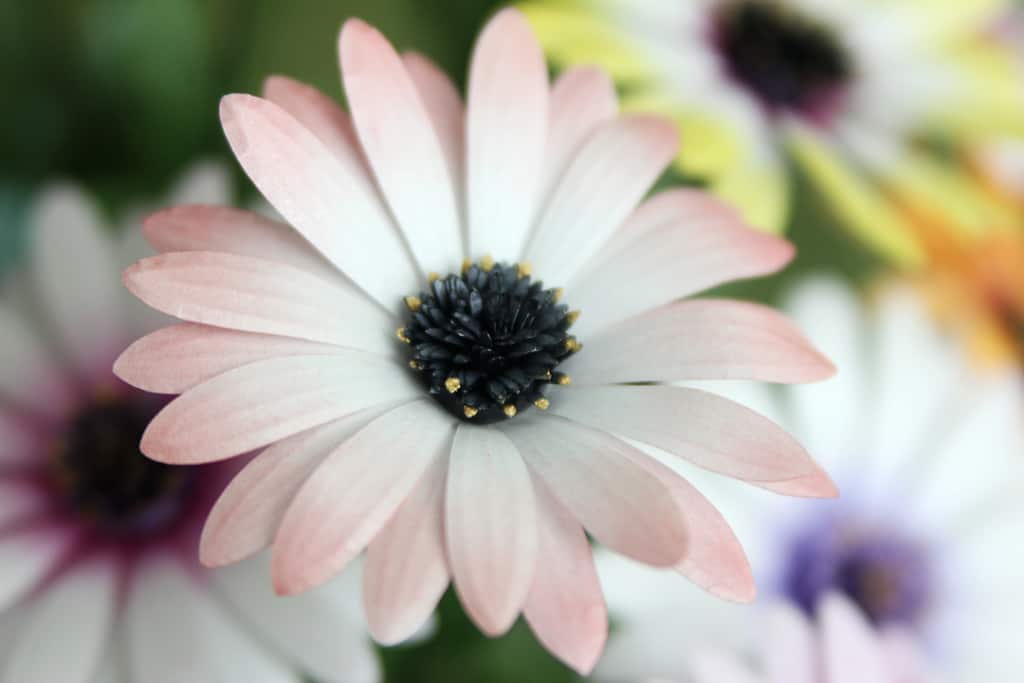
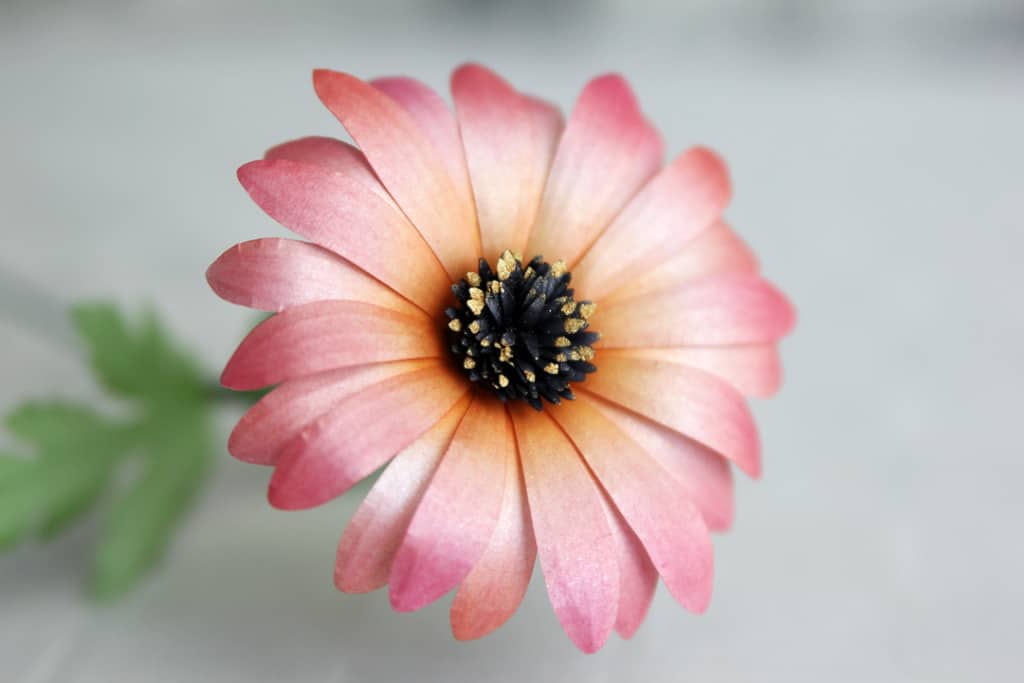
Place a piece of scratch paper or paper towel under your flowers when coloring, because it gets pretty messy. In the centers I used magenta PanPastel most often, but also sometimes orange. Orange and magenta are the most vibrant colors, but I also used pearlescent red on one of these just on the outer tips of the petals (see image below).
For inspiration on colors, I just Googled “African daisy images” and that brought up a huge range of color combinations to choose from.
Curling & Shaping
I used the flat edge of my spatula tool to add curl to the stamen before rolling them up, and also to add a little curl to my green leaves.

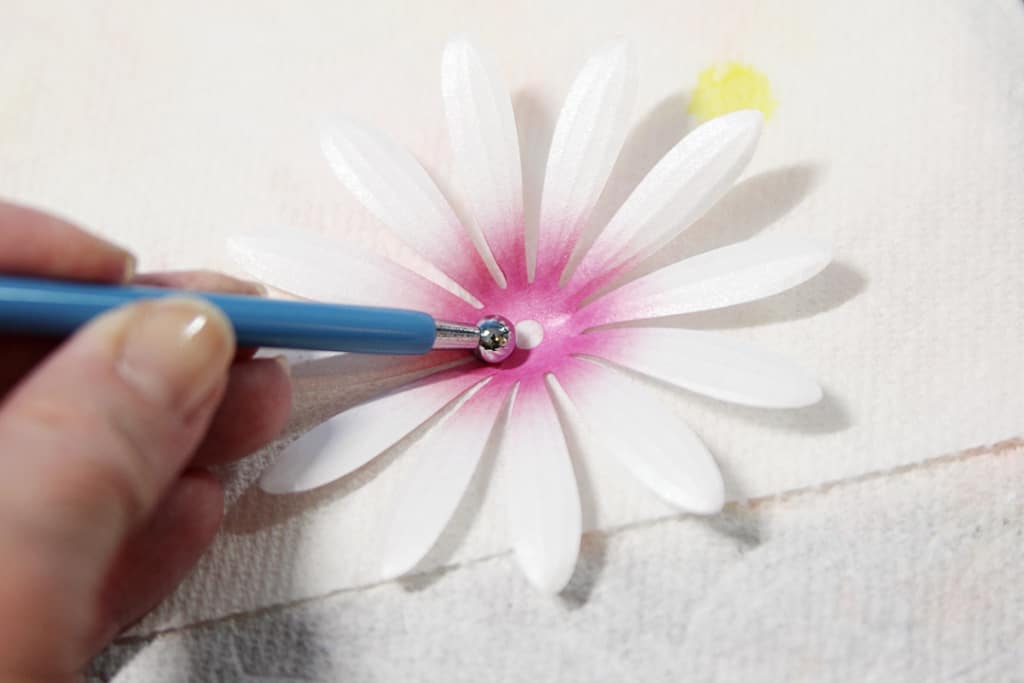
I used a 6 mm ball tool to press the centers in for the daisy petals, but most of those petals I finger-shaped once the flower was assembled. As shown in the Maison Gregoria tutorial, I used that same ball tool to turn the green calyx into a cupped shape before gluing to the bottom of my assembled flower.
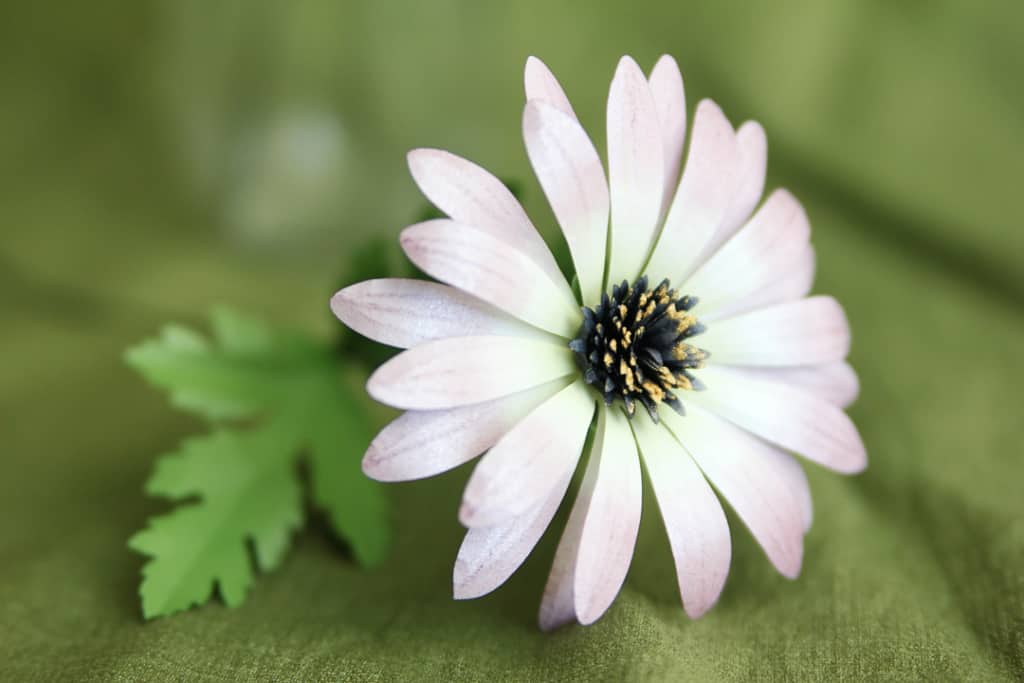
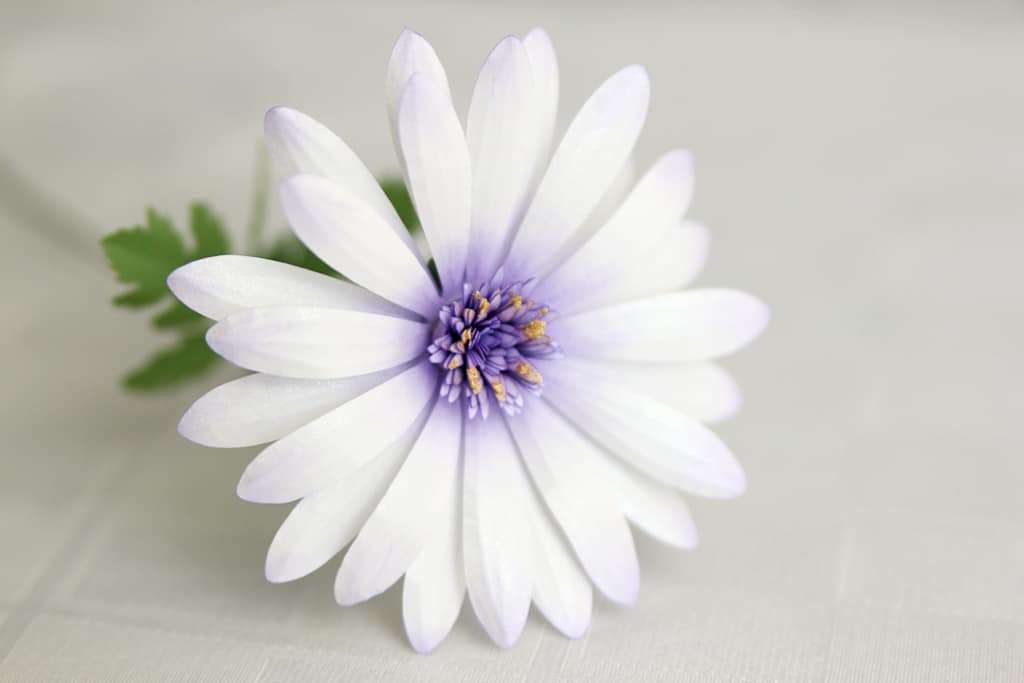
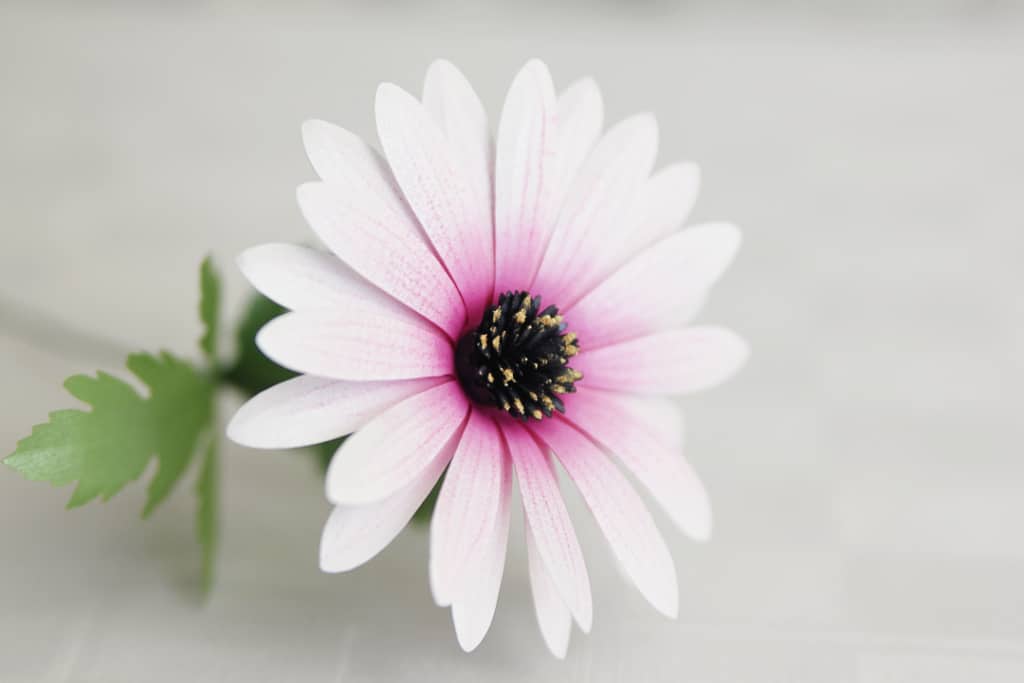
Photos
Hopefully these ideas give you a little bit of help when using this metallic paper to create these hand-colored daisies with your Silhouette machine! Let me know if you have any questions. Here are the rest of my flowers in this set. Enjoy!
This post contains affiliate links. Your price is the same, but I may receive a small commission when you use my links. Thanks for your support!

These daisies are simply beautiful. Thanks for sharing.
Thank you, Lori!
These are beautiful. Thank you for sharing how you made them. Makes me want to try.
Thank you, Alicia! I hope you do try them!
These are stunning! I can’t wait to try them!
Mags, thank you so much! You’ll love these.