Craft Along: Curio 2 Engraved Christmas Gnome
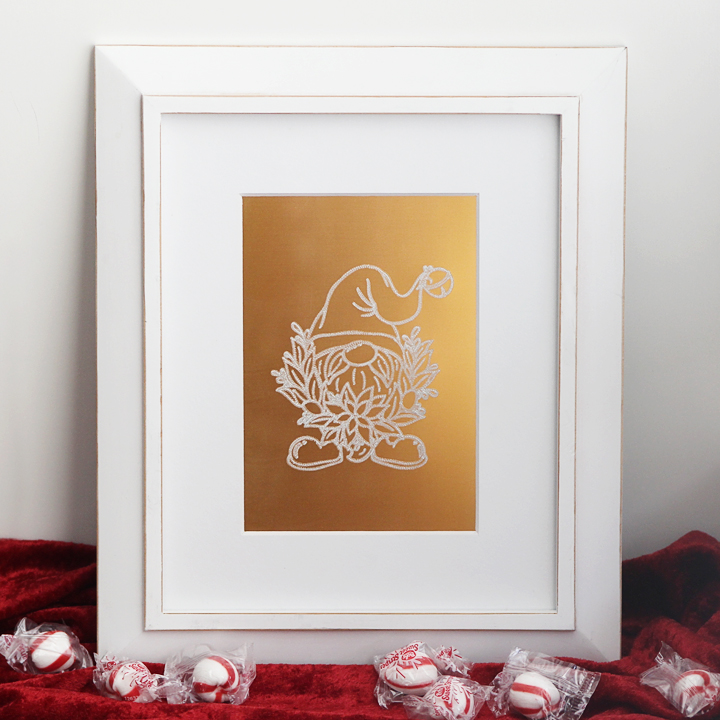
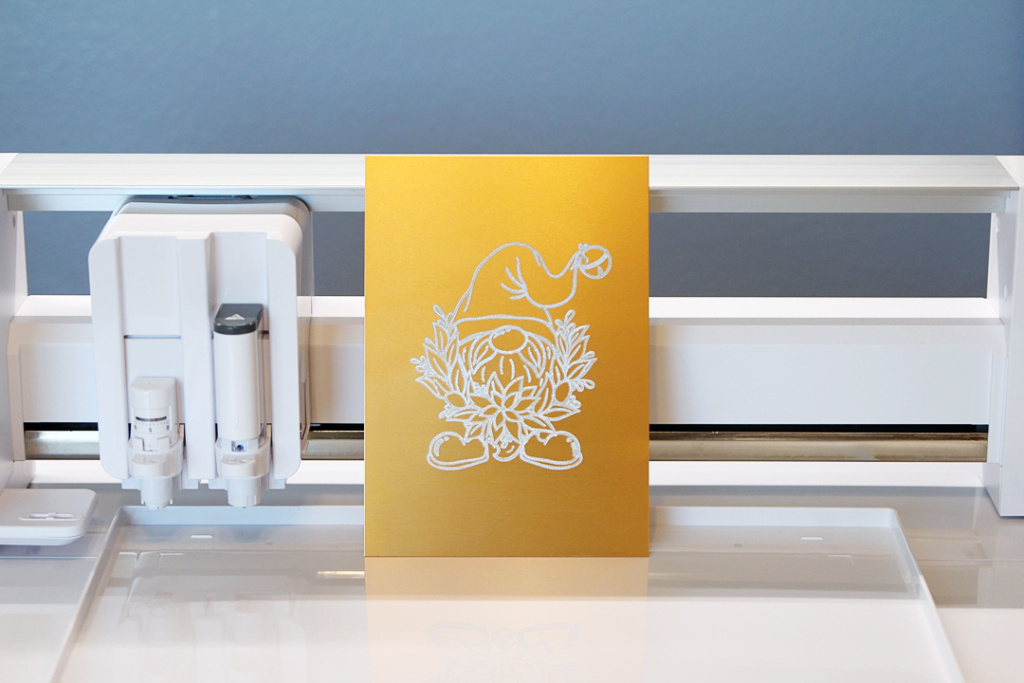
There are so many fun things to do with the new Silhouette Curio 2! Here’s a first look at engraving with the Curio 2 on metal sheets. Check out my latest Silhouette Craft Along class below for this Curio 2 engraved Christmas gnome!
Craft Along Video: Engraved Christmas Gnome
Supplies/Tools:
(Includes some affiliate links)
- Curio 2
- Debris Tray for Curio 2
- Power Engraver tool for Curio 2
- Metal etching sheet – gold
- Silhouette masking tape
- 5″ x 7″ Frame
- Soft paintbrush or toothbrush
- Scrap of thin paper for height registration
- Design ID #387516 “Christmas Gnome”
Instructions:
Setup —
- Unlock and remove ES bed from Curio 2
- Slide in and lock debris tray
- Place etching blank in upper left corner, using guides on tray
- Tape in place (not where design will be engraved)
Software —
- Page Setup for debris tray & media size (change mat; change media to 5×7, portrait orientation)
- Open Design ID #387516
- Select design and resize (3.5” wide for 5” wide frame)
- Center and nudge into position for visual balance
- [Specialty Tools Panel] Choose engraving fill pattern + spacing
- Power Engraver tab
- Spiral pattern
- Spacing 0.010
- Send Panel
- Set up for Carriage 2
- Connect Curio 2 machine
- Expand Carriage 2 (Collapse Carriage 1)
- Select design
- Choose “Power Engraver Action” and LINES SHOULD TURN BLUE
- Choose Material (may need custom setting) – Metal Sheets, Etching
-
-
- Force 15
- Speed 1-3
- Passes 1
-
- Material Thickness Detection (manual for clear, glitter, shiny, reflective)
- Click Send at bottom right of screen
- Confirm and Send checklist – load media, load tool, Send again
- Follow steps
On Machine —
- Place tape or thin matte material (parchment paper) over center of material
- Use arrow buttons to position Carriage 1 over this area
- Click Detect Thickness [in software]
- Remove tape/paper
Software —
- Skip to Send
- Send final time (Should take about 20 minutes with these settings; will vary based on density of fill, speed, passes)
Tips:
- Brush away debris with soft paintbrush or toothbrush (or vacuum)
- Acrylic sheets usually have protective layer to be removed before engraving
- Soft engraving surfaces are easily scratched
I hope you enjoy this Curio 2 engraved project! This same process and settings are pretty much the same with acrylic sheets. Odd sizes other than rectangles and squares need a few more steps, and I’ll make a tutorial for that in the future.
Let me know if you have any questions!
Check out my other Silhouette Craft Along classes here. Projects explained step-by-step so you can craft along with me!
This post contains affiliate links. Your price is the same, but I may receive a small commission when you use my links. Thanks for your support!
