Tutorial: Creating a Shape with Pattern Inside
I was asked about creating a cross shape with a zebra pattern inside. I referred them to my monogram tutorial and my valentine weld tutorial, but neither of these worked exactly right for this particular situation. Using the Modify tools in Silhouette Studio can be a little tricky, but with practice it starts to make sense (eventually…maybe). The order in which you do the steps is important.
This tutorial should work when you have a shape and a background pattern and you want to combine them. Edit: Please note that this is a background pattern cut file, and not a pattern you can access through your Pattern Fill window or an image file like a digital pattern paper.
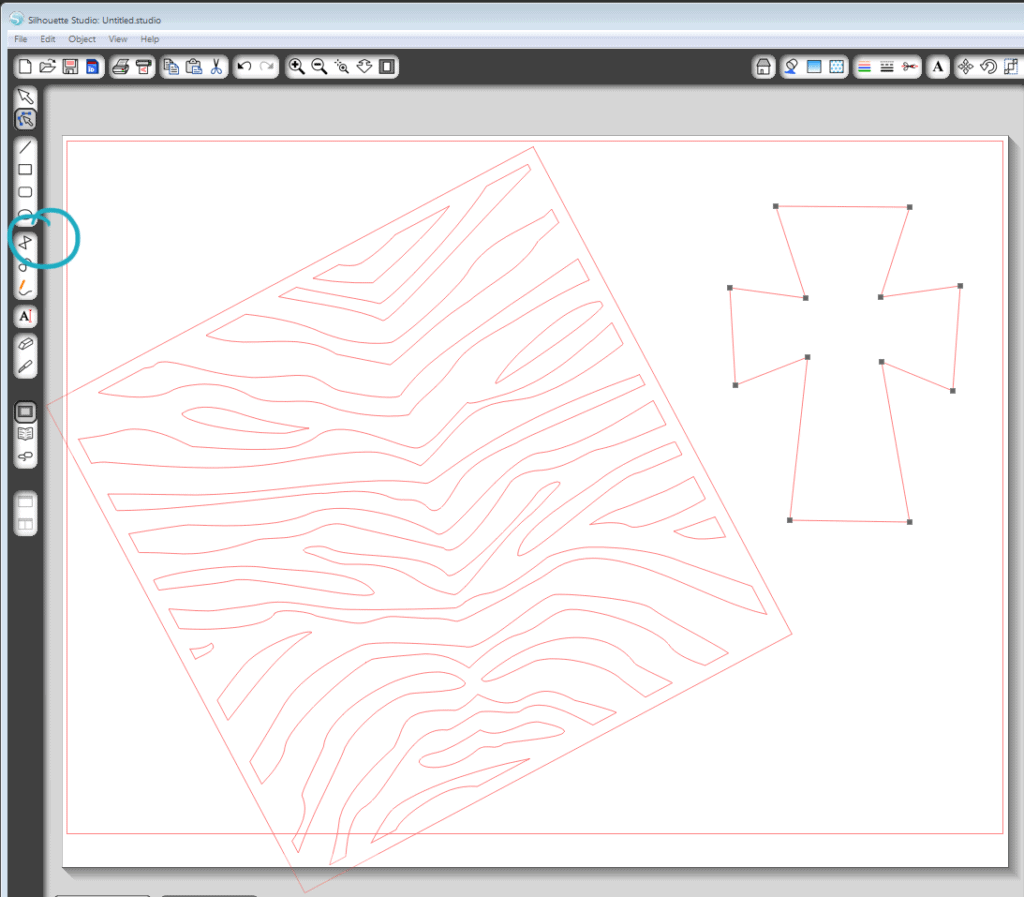
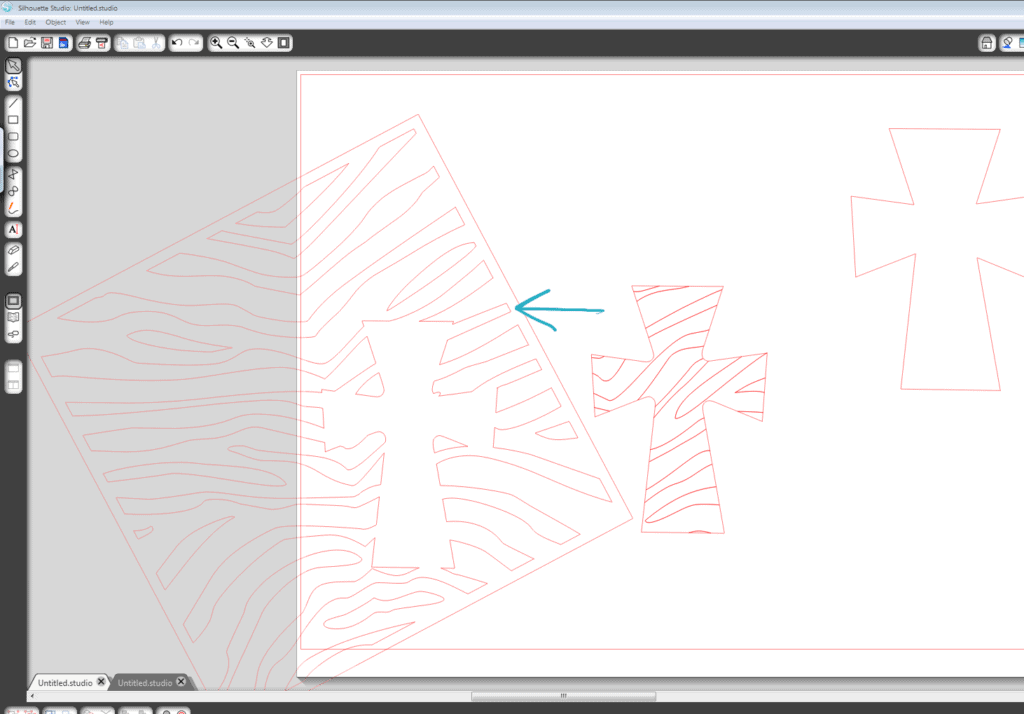
Step 1- Open your background pattern (this is zebra lace ID #5419). Then draw your shape using the drawing tools on the left. (Or open a shape you like.)
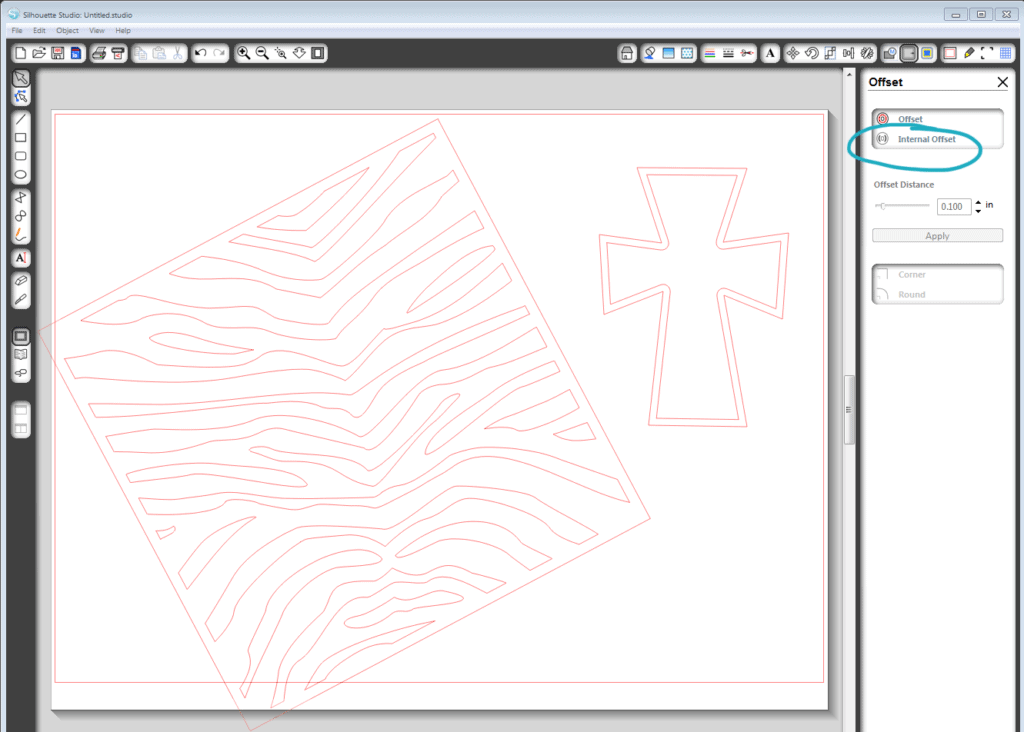
Step 2- Select your shape and create an offset. I made an internal offset of 0.1 in.
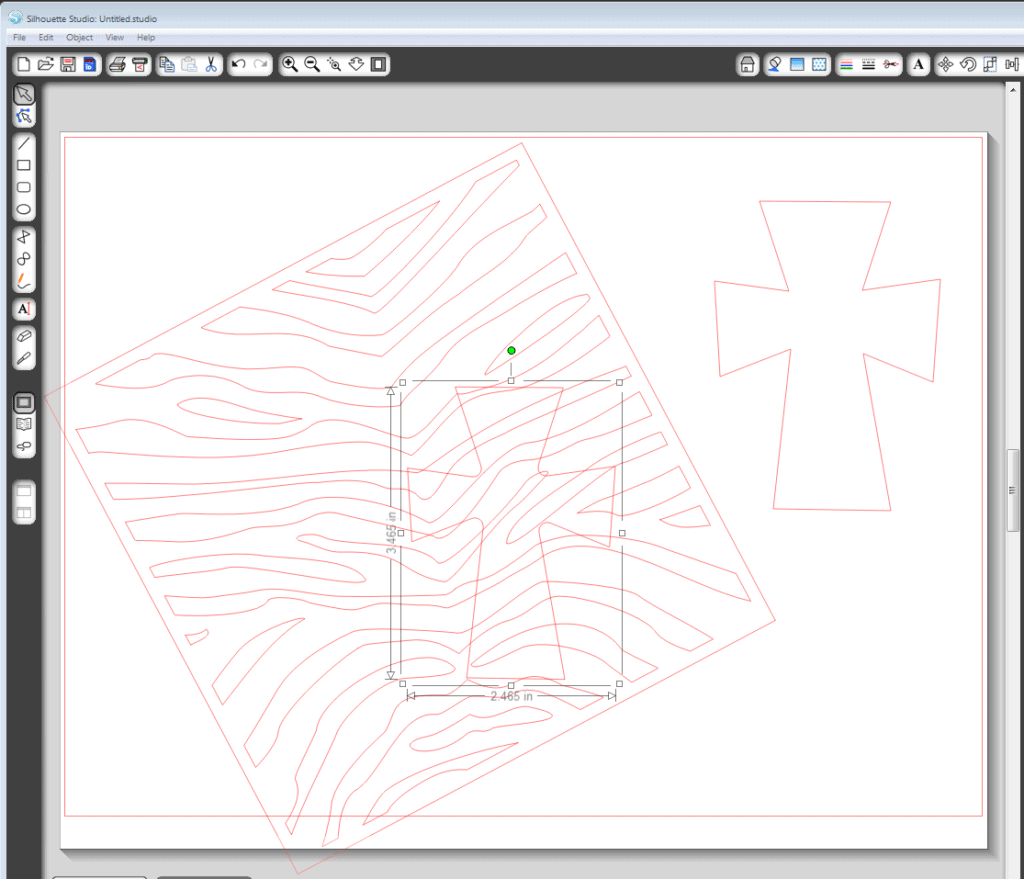
Step 3- Drag your inside shape over and place on top of the pattern.
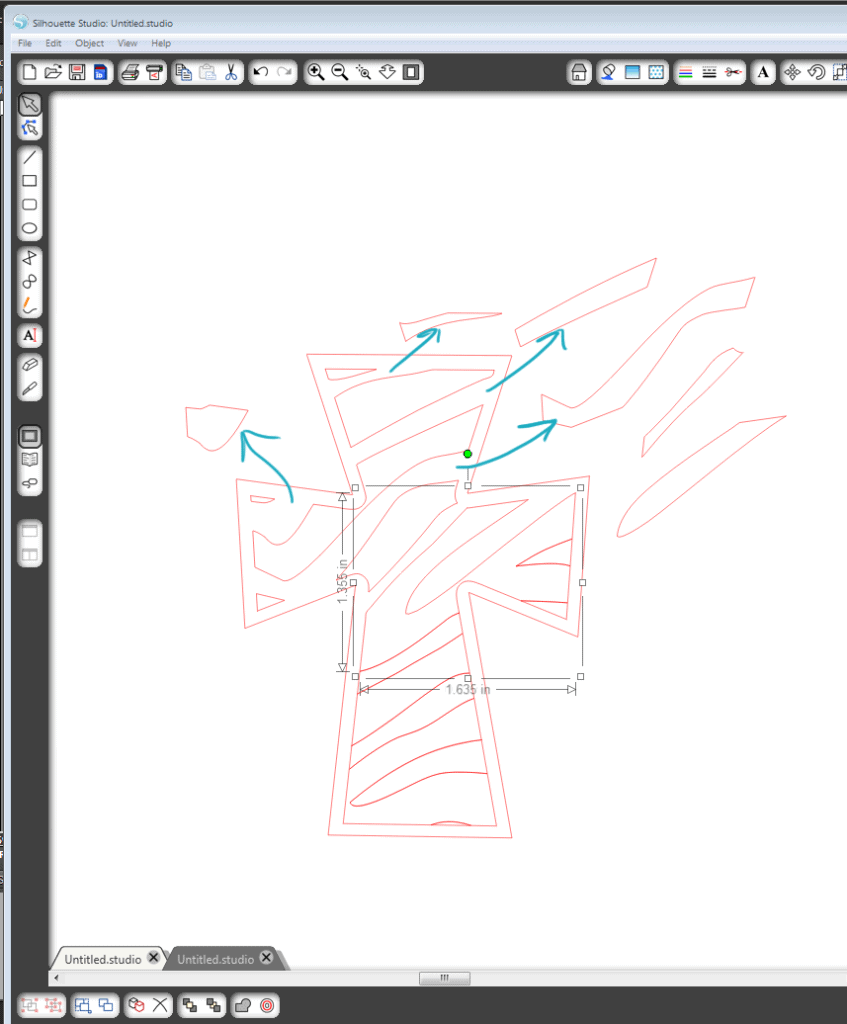
Step 4- Select the shape and the background, go to your Modify tools, and click “Divide”.
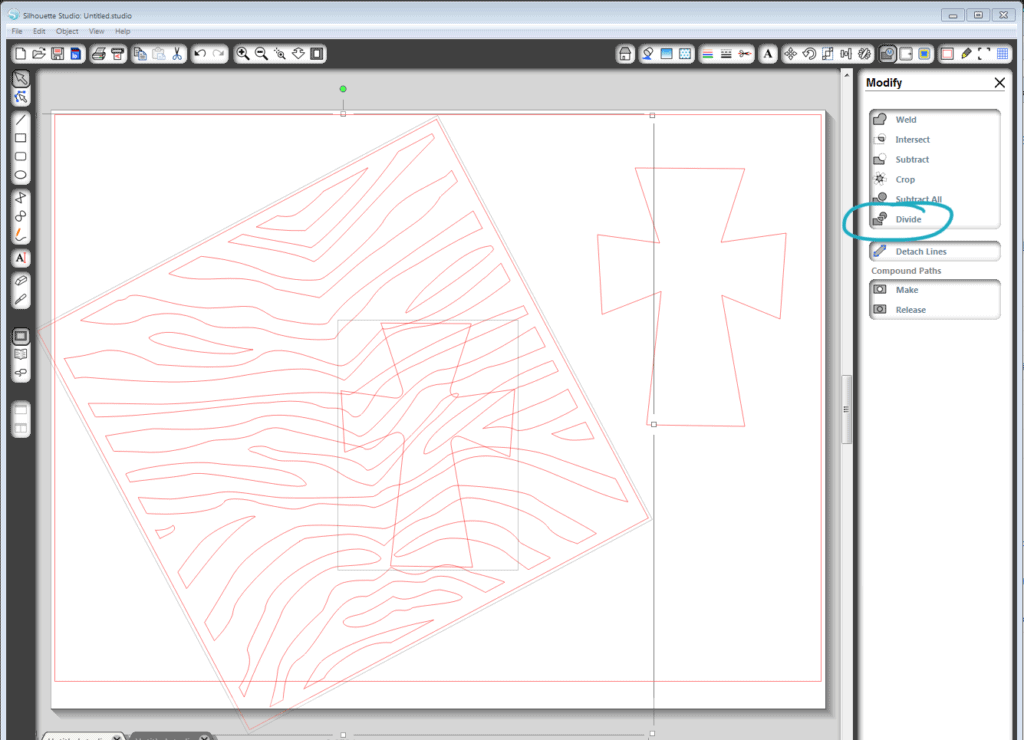
You’ll see that the lines inside the shape have become darker.
Step 5- Click and drag on the excess pattern to remove it from the shape you want to keep, and delete it.
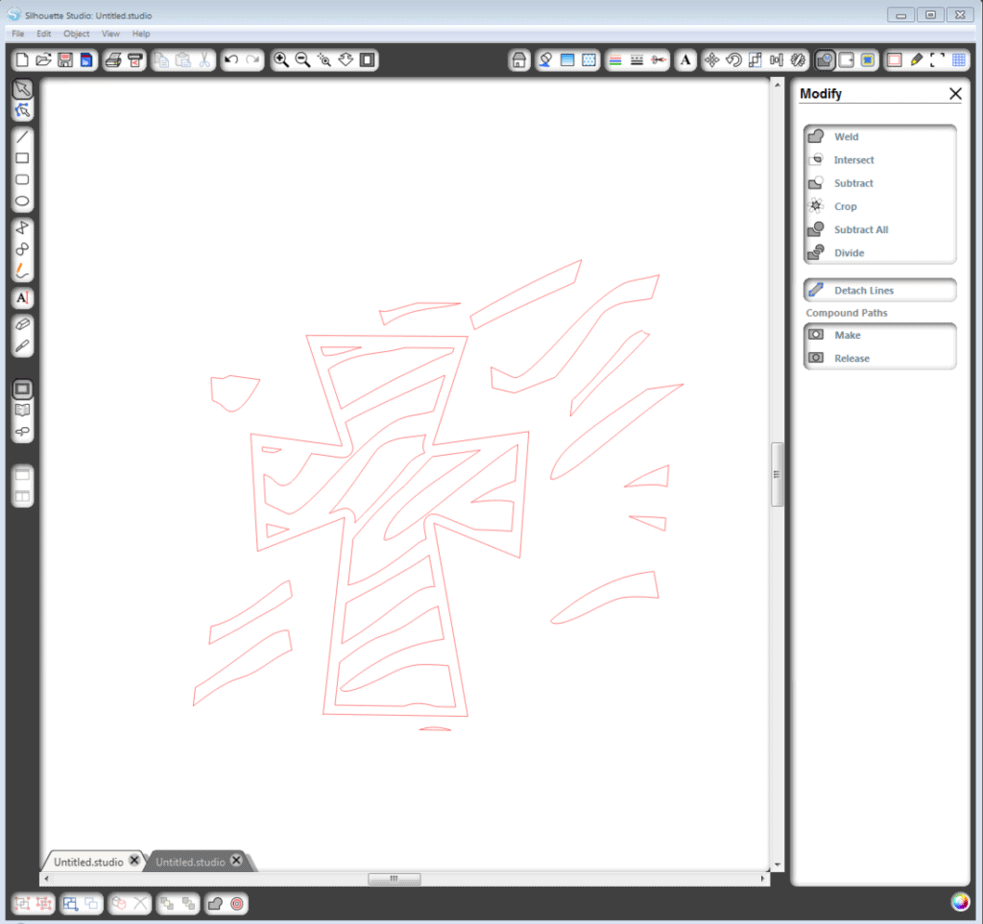
Step 6- Now drag your outer shape over the filled shape and center it so the width of the outline is even all around. For this zebra pattern, click and drag every other stripe to leave the cross border and inside stripes.
Step 7- Once you have all the unnecessary parts removed, you can delete them.
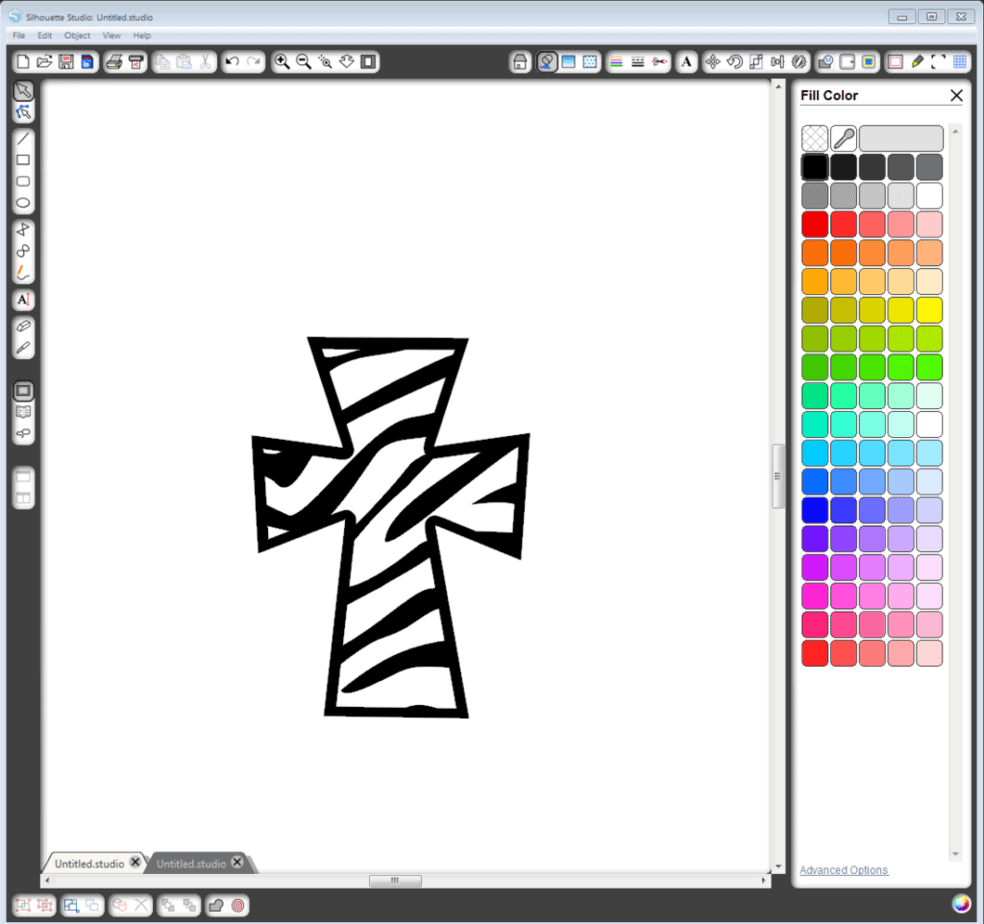
Step 8- Select all and “make compound path” with your modify tools. Then you can go to your fill and line tools and change those to the color you’d like. It won’t matter if you’re just cutting, but if you want to print or see what it will look like before you cut, then the last step is a good choice.
I hope this helps you use the Silhouette Studio tools to their full potential. The more things you try, the more you learn, and the more you can create!
EDIT:
Well, that was my version of how to do it. My friend Marcy has shown me a quicker way so I’ll share it as well. She starts out the same as me with a cross and its offset.


“I have ungrouped and colored it on the screen just to show what it will look like cut out of black vinyl…Easy Peasy…”

Hi Kelly,
Thanks for posting this. I think that it is exactly what Anna on flickr was trying to execute. There are many ways to accomplish a project with the sil software. The nice thing is that they are all fabulous when completed!!! Happy crafting… Marcy
Anna said this worked for her. Yay! And thanks for your addition, Marcy. The crop tool didn't work for me back in my December project with what I was trying to do, so I forgot to try it this time around. And this is what it's perfect for! Fun to be able to put any pattern inside any shape you want.
Thank you Kelly, love this tutorial, you know, I've never tried or even thought of something like this. Puts thinking cap on now. 😉
Hugs, Lori m
Great tutorial! Thanks for sharing!
I've been searching for this very type of tutorial. In the process of doing this right now. I think my Silhouette Studio froze up in the middle of the "divide". Hopefully it will unfreeze so I don't have to start over. But, THANK YOU THANK YOU!! Just what I needed!! 🙂
This was VERY helpful, but I still have another problem. What if I want to print this design instead of cut? For instance, I am using a chevron background and I don't want each and every zig zag line cut out, only the shape itself. I have tried everything I know (which isn't much), but I can't seem to get those cut lines to disappear. Thanks for your help!
-Leslie
Depending on how you created it, the simplest way could be to go to your Cut Style Window and choose "Cut Edge". Hopefully that will select just the outer edge and leave the inner lines alone.
If the whole shape is a compound path, however, you may still get cut lines throughout the whole shape no matter which cut option you choose. In that case, simply create an offset in the Offset Window that will serve as your outer cut edge (you can choose "corner" or "round" to suit the shape best). Then back in your Cut Style Window you can make sure the inner design is set to "No Cut" and your new offset you created is set to "Cut Edge".
Also be sure to fill your design with color so it has something to print. (The line colors won't print unless you tell them to in the Line Style Window.)
I hope this helps, Leslie! Please let me know if you have more questions.
Hi wonder if you can help me . I am doing my sons wedding invites. On the inside of the invite I am doing a pattern to be done with the sketch pen ,so only want the outline of the invite plus a little hole on the inside to be cut ! But can’t seem to be able to do it, without taking the pattern out of the invite leaving the outline. Then cutting ,when cut as finished swop blade for pen and put the pattern back and set to sketch!!!!!!
I know ages ago you could set lines with different colours so silhouette would know which lines to cut and which not to cut depending on which colour the line was, but can’t seem to do this anymore .HELP PLEASE
Hi Ann.Which version of Studio are you running? You should still be able to set different line colors (Line Style Window) and choose which to cut or sketch. In your Cut Settings Window you need to choose the Advanced cut mode, then click on “Line Color” for the cut order. Each line color can have its own material selected. Right click on the material for that color to insert a pause, which lets you swap out pen for blade before resuming the cut. Check out “method 2” on this tutorial I made for the Silhouette blog regarding sketch pens HERE.