Subway Art: The Joys of Scrapbooking
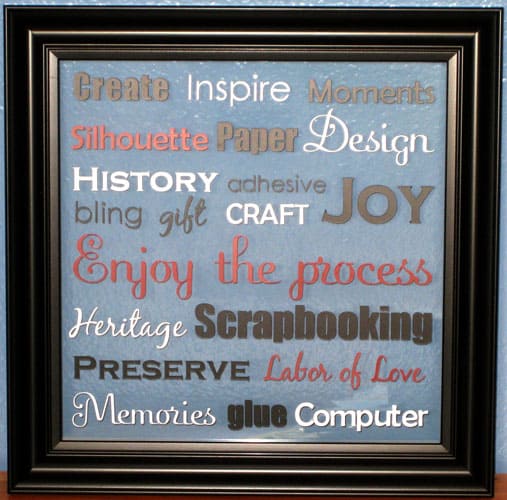
I recently entered a challenge in the Silhouette Plus forum, and the theme was Subway Art. My submission won in a three-way tie for first place. What I’m really excited about is that I made my first piece of subway art, and it will decorate my scrapbook room!
Here’s my process for creating subway art:
Step 1-
Decide on a theme. This may be the hardest part. I chose to focus on words that came to mind about scrapbooking.
Step 2-
Measure your available size on the glass from a picture frame. (You can make subway art on all sorts of surfaces, but clear glass is the absolute easiest for lining things up.)
Step 3-
Open Silhouette Studio, make a rectangle (or square) in the size of your finished surface to cover, brainstorm words you want to use, choose 3-6 fonts for those words, and start laying them out on the page until they fit the way you want. These fonts are Impact, Fling LET, Century Gothic, Berlin Sans FB, Copperplate Gothic Bold, and Black Jack. (The ones that cut best for me are Impact and Berlin Sans FB. Not all fonts are created equal.)
Another design tip is to make sure my words use the same “baseline” so they don’t look scattered out on the page.

I chose my finished colors based on my wall color at this point, just to help me visualize it on the screen.
Step 4-
Print, on multiple pages, if necessary. Make your rectangle a clear fill with a solid black outline, and make all your words grey to save on ink. Move the whole design to within your print boundaries and print, then move again and print until all the parts can be pieced together and laid under your glass, like this:
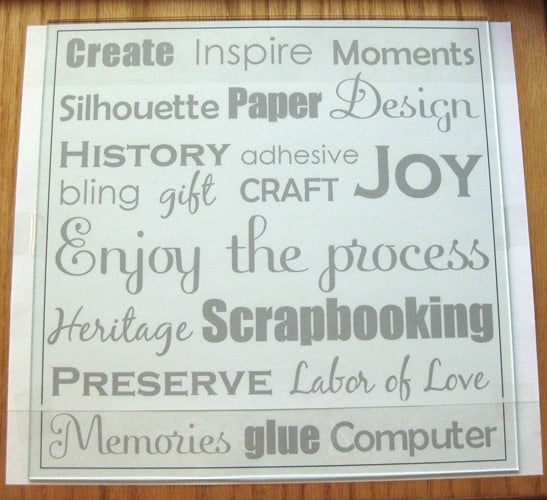
For my 10″x10″ frame, I only needed to print on two standard-size pieces of paper. I lined them up and taped them together, then centered and placed my glass on top of it and taped the glass to the sides so it wouldn’t shift.
Step 5-
Cut your vinyl with your Silhouette in the colors you have chosen. (Copy all the white words to one document, all the blacks to one document, etc., and cut all the same color at once.)
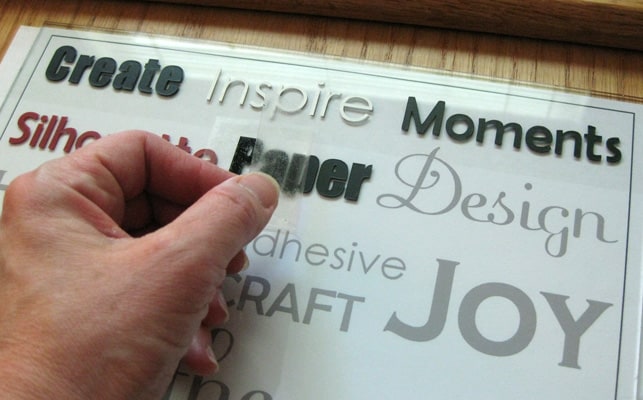
Step 6-
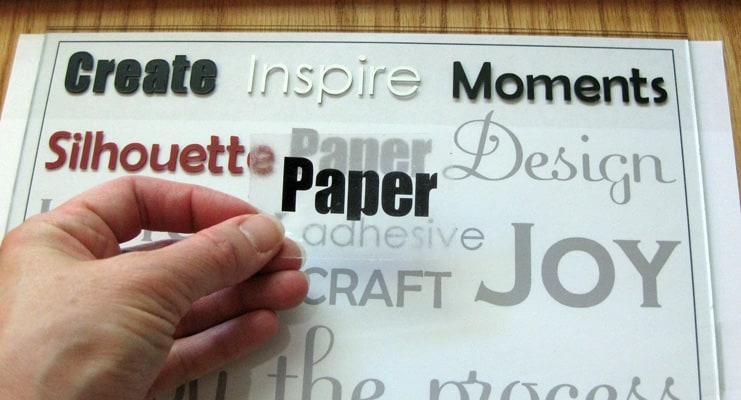
Separate and weed your vinyl words and place them one at a time with transfer tape onto the glass, exactly over the identical words on the paper printout. Clear transfer tape makes this even easier, if you can find it.
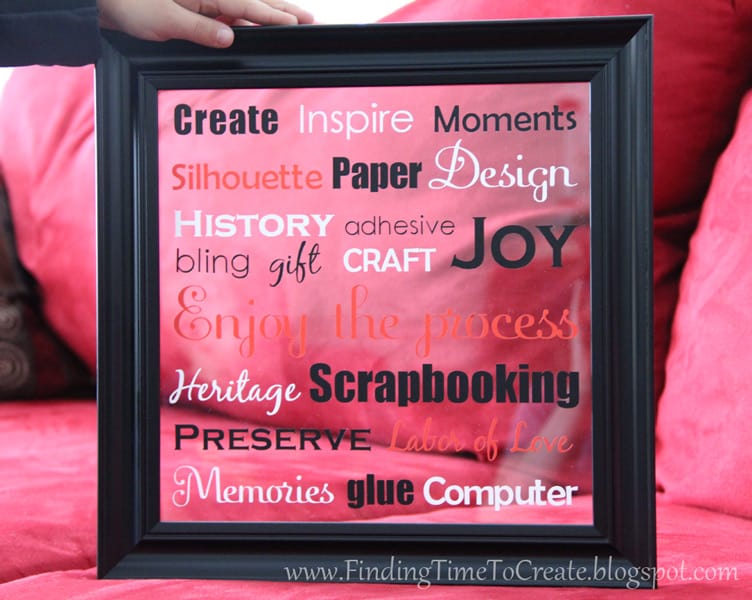
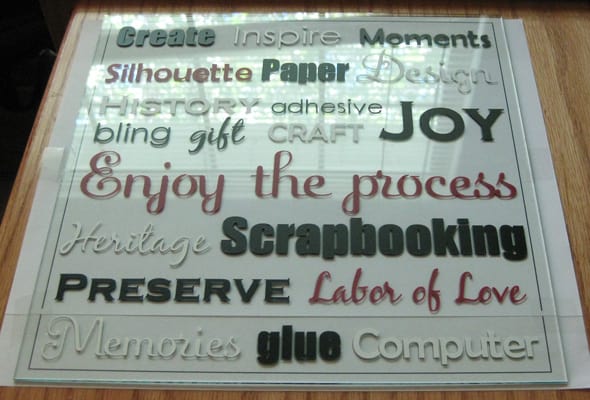
When you’re done applying all the words, you can discard the paper template and place the glass in its frame.
Choose from the following options to hold the glass in place:
- Glaziers points
- Built-in tabs already in the frame
- Hot glue along all the edges
Just make sure whatever you use doesn’t show from the front.
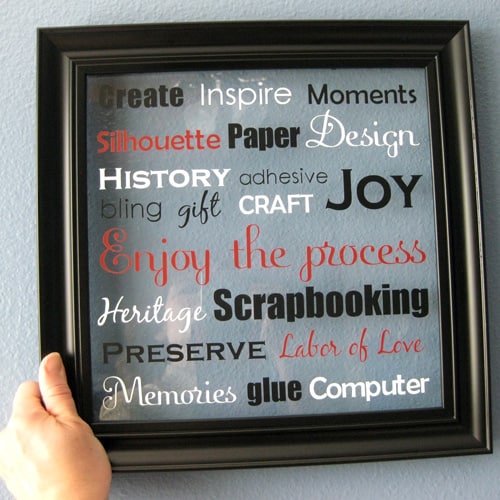
Now I’m ready to hang it in my craft room. (Which started its remodel about 5 years ago and is still in progress.) Thanks for visiting! Comments are always appreciated.

I signed up for the Silhouette Plus forum a while back but hadn't really checked it out. I checked it out today and it is Fabulous!
Thanks for reminding me!
Glad to hear it, Kathy. You can also ask me any questions here on my blog. 🙂
I follow your blog because I bought a Sihouette. Well actually it was bought for me. A year ago. I still haven't really learnt how to use it and I need more mats. I am still super excited about it though 😛
Oh and congrats on first place 😀
Alisha, did you know you can extend the life of your mats by cleaning them with soap and water, then when dry applying a repositionable spray adhesive like Krylon Easy Tack? I'd love to help you use your Silhouette more!
Congratulations! I recently purchased a Silhouette SD and have made a few cards so far! Once the kids are back in school, I hope to play some more with it. Love your work 🙂
Thank you, Lisa. Hurray for "back to school"! I'm looking forward to Monday afternoon when I've got three in school and the fourth taking his nap. Yay!
That's really cool! I would love things like this with words that inspire me around my environment. I think it is cool on the glass like that. I don't think I'd use that machine enough though to justify the cost, but if I had money, I would get it.
Hummie, I thought the machine was expensive until I had one to use. Now I can't live without it. I'm saving my pennies to buy the new 12" Silhouette Cameo when it comes out soon!
That is so lovely Kelly! I only own some white vinyl and I am still intimidated by it, your project looks easy tho. Thanks for sharing with us.
Ceci, white vinyl is the most versatile, in my opinion. It looks great on clear glass projects.
You are going to be my new best friend I love your creativity. You are awesome. I am wanting to do my favorite Bible Verse and this will help me so much. I just got my Silhouette Cameo this week and I am so excited to learn to use it. Your tutorial is so helpful. Thank you so much for sharing with strangers. It is an act of Kindness.
You just made my day! I hope your project turns out well. Let me know if you have any questions. 🙂 (And congratulations on your new Cameo!)