Cardstock Butterfly Ranunculus
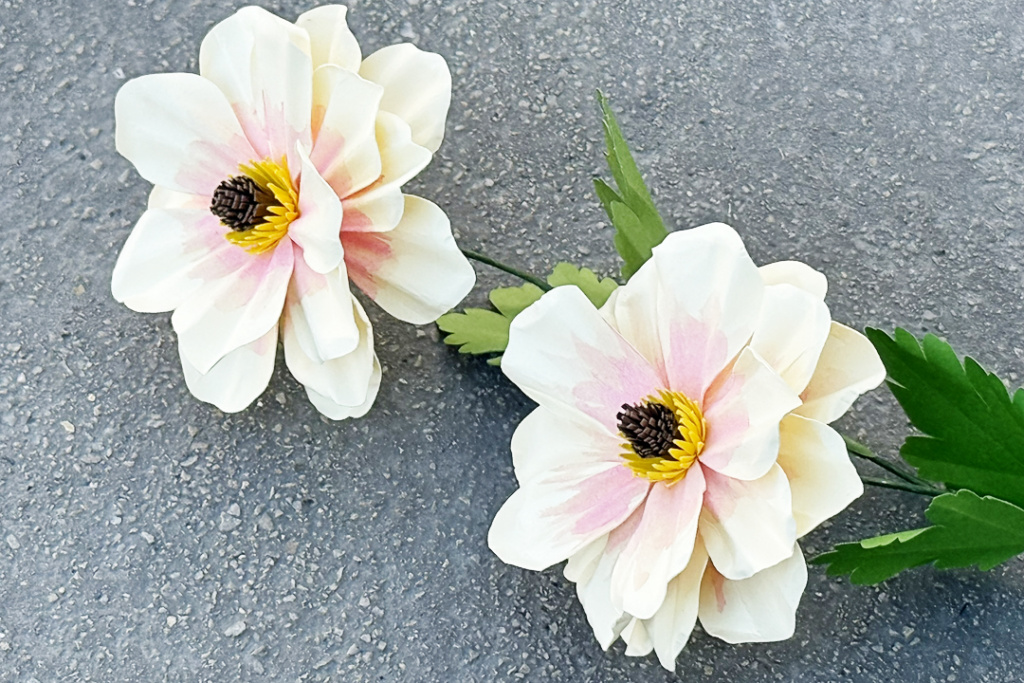
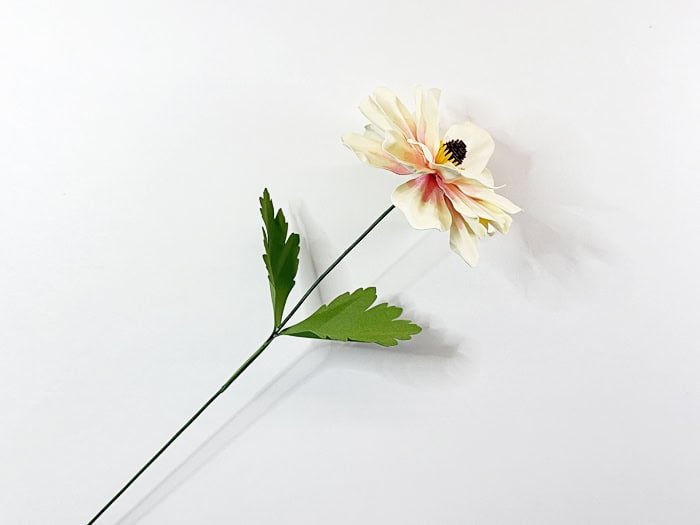
I’ve got a new 3D paper flower design to share with you to get you in the mood for spring flowers! Here’s a cardstock butterfly ranunculus that can be cut with your Silhouette (or other) cutting machine. Find my design D-1332736 (coming soon) in the Silhouette Design Store.
Cardstock flowers are pretty easy to make, and they make great gifts for friends, neighbors, Mother’s Day, birthdays, and just because! You’ll need a few basic supplies.
Tools/Materials Needed:
- Silhouette machine (any model)
- Medium-weight cardstock (65 lb) in yellow, brown, medium green, and any pale floral color—such as light pink, cream, pale yellow, white, peach, etc.
- 18-gauge green paper-covered wire
- Silhouette spatula tool
- Silhouette scraper tool
- Hot glue gun
- High-quality craft glue
- Watercolors (can substitute colored pencils, PanPastel, etc.)
- Paintbrush
- Wire cutters
- Water
Instructions:
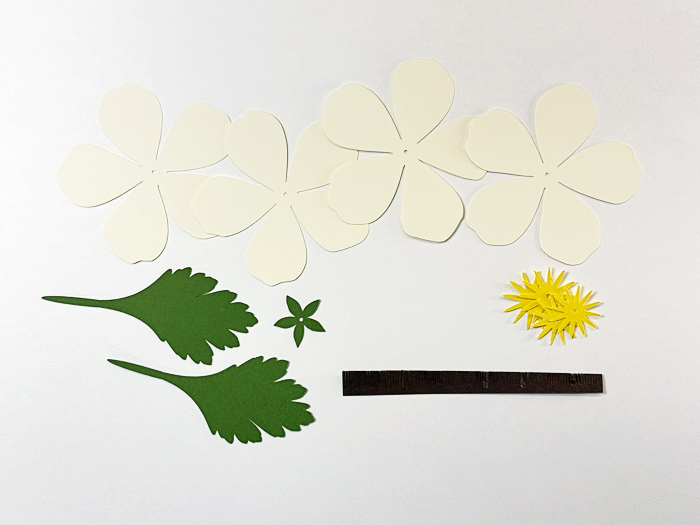
For each flower, use my butterfly ranunculus design to cut:
- 4 flower petals from any color cardstock (light pink, light yellow, white, peach, etc.)
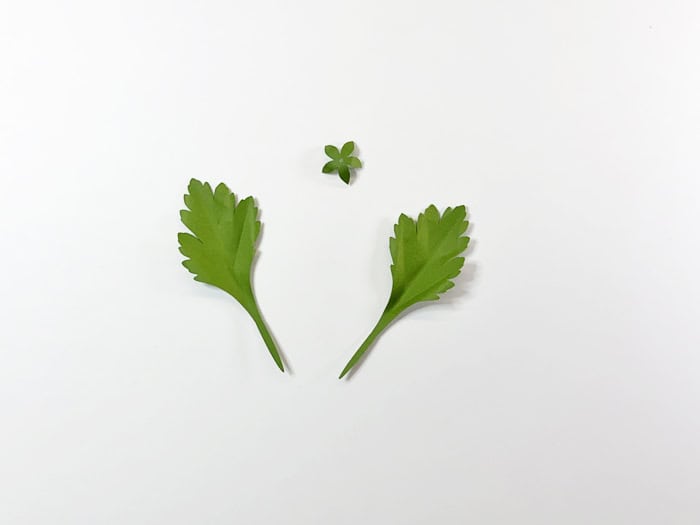
- 2 leaves and one sepal from medium-green cardstock
- 1 stamen strip from brown cardstock
- 4 stamen centers from yellow cardstock
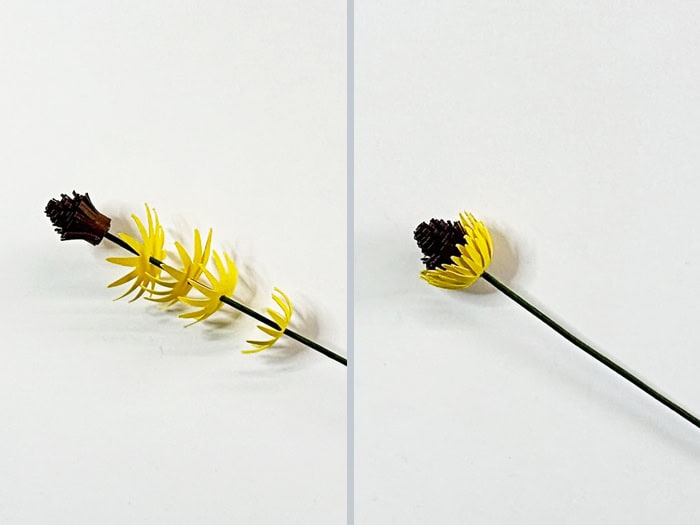
For each petal layer (work one layer at a time):
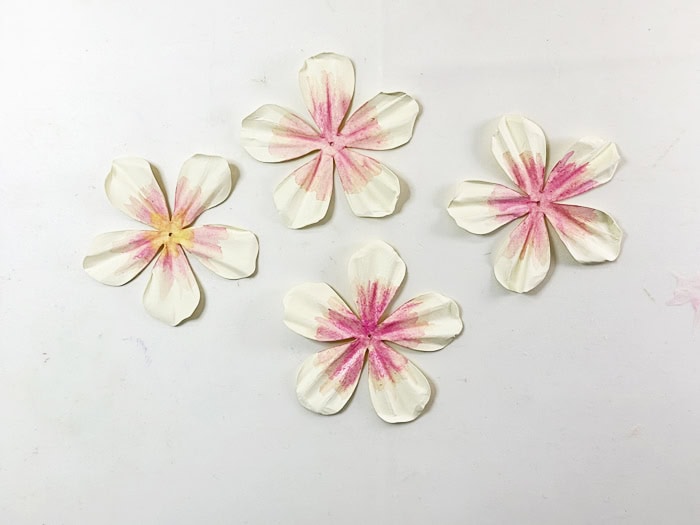
- Lightly wet petals with water
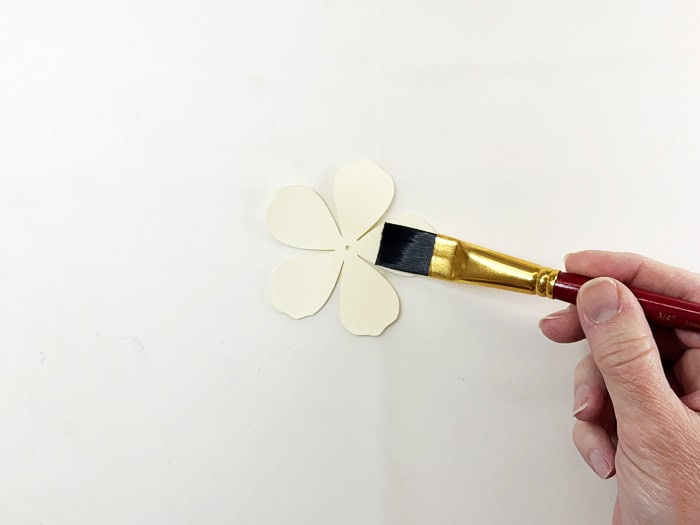
- Shape to add ripples in each petal
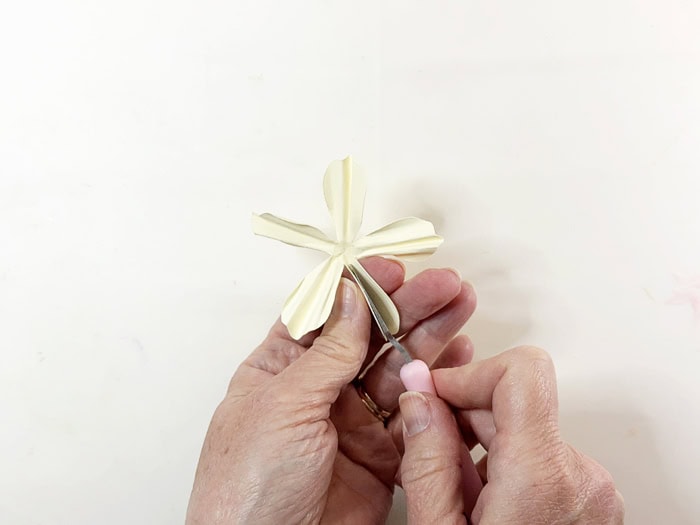
- Add some watercolor paint from the center, halfway up each petal
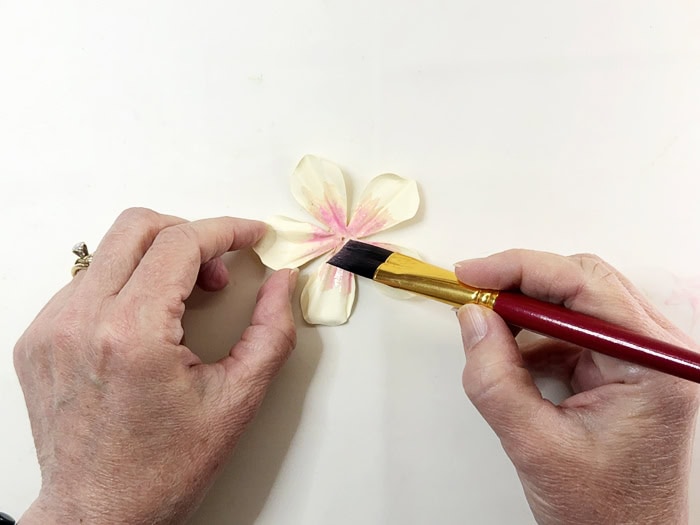
- Repeat with each petal set
- Set aside to dry
Stamen:
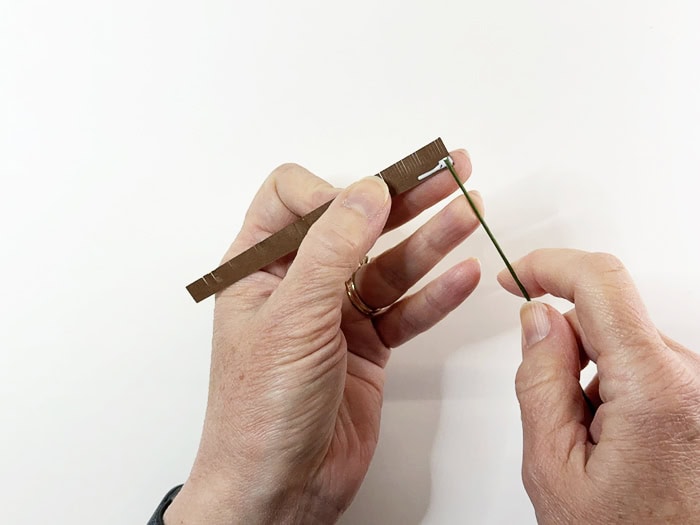
Wrap brown stamen strip around tip of 18-gauge green paper-covered wire stem.
- Start with the widest end, add a little glue along the long flat edge, and wrap around the wire.
- Add more glue along the flat edge, continuing to wrap the brown stamen strip around itself, keeping the base mostly flat and level at the bottom.
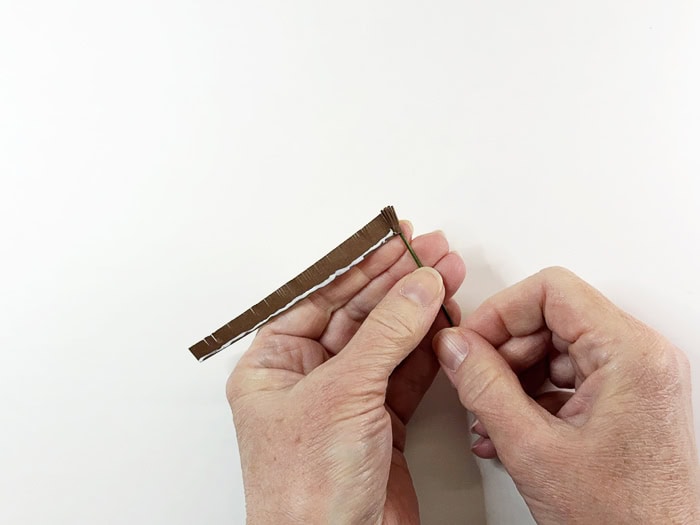
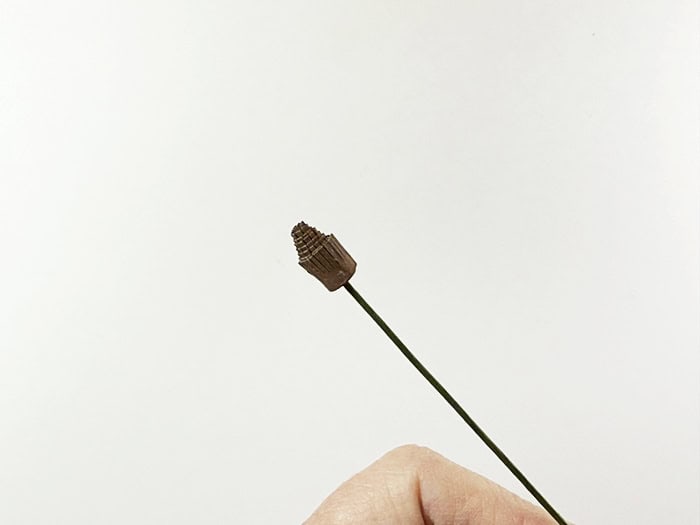
- Add extra glue to hold the wire to the brown wrapped stamen. You do not want this piece popping off! Either add more white glue inside to hold the wire in place and let it dry completely (30+ minutes), or add a dot of hot glue inside so it sets faster.
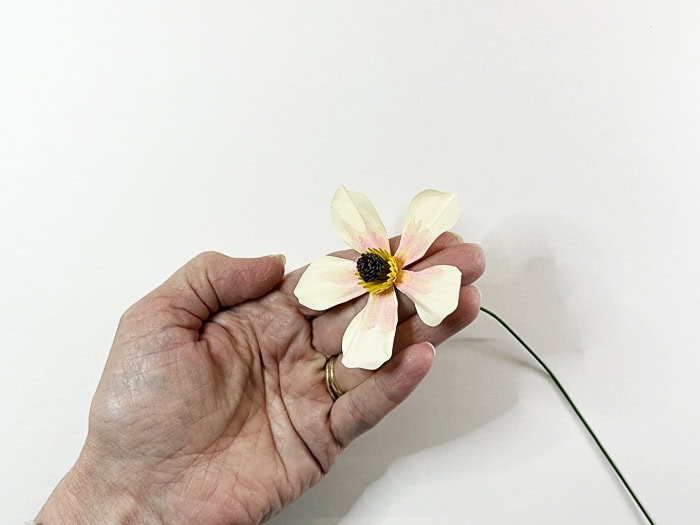
Glue each of the yellow stamen pieces to the base of the brown stamen, starting with the two larger pieces and then adding the smaller pieces. Pull them up tight against the brown.
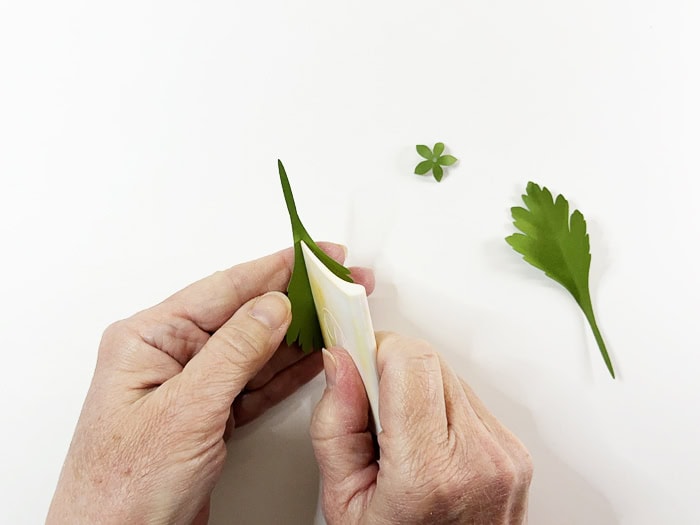
Leaves and sepal:
Curl the small green sepal piece downward.
Shape the leaves with creases down the center and some towards the center line.
Final assembly of petals and leaves:
Once the petals are dry, choose the best-looking petal set to add first. Use glue to attach below the stamen on the wire.
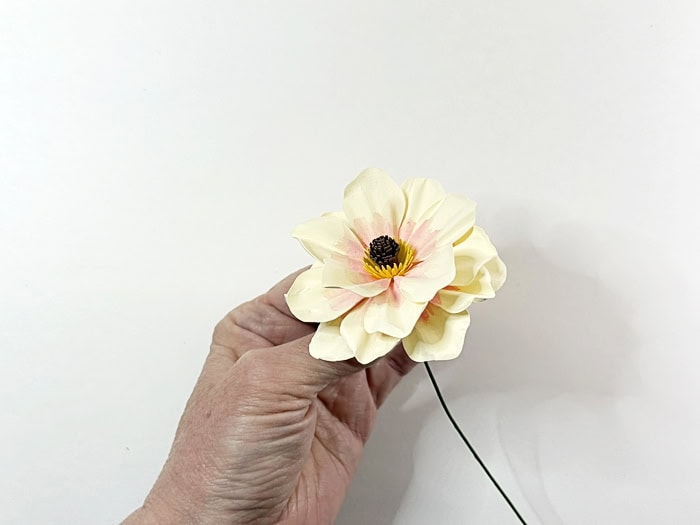
Use glue to attach the remaining petal sets, arranging so the petals in the rows below each other are peeking through the gaps and not “stacked” in perfect alignment.

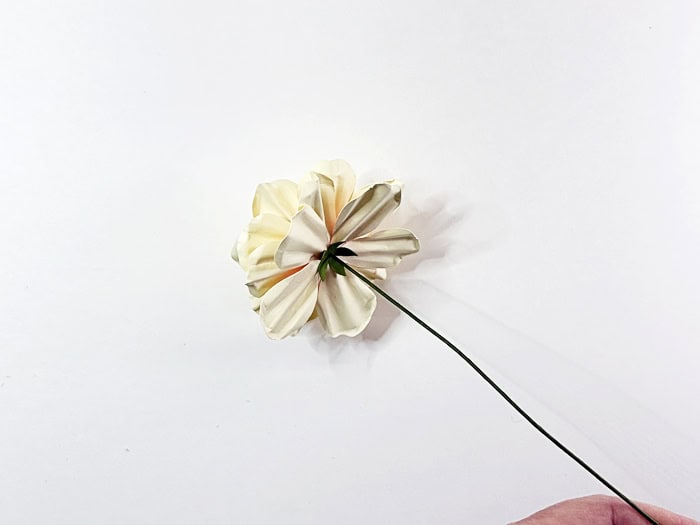
Attach the green sepal with glue to the base of the flower, with the points falling down away from the flower.
Glue the leaves to the paper-covered wire across from each other, a few inches below the flower.
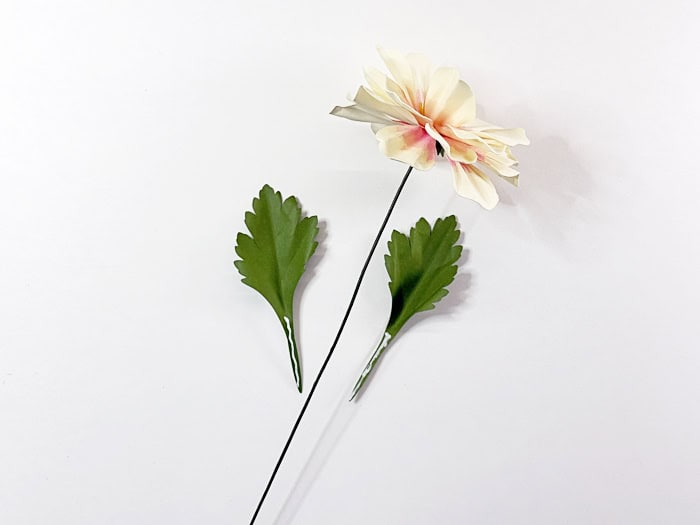
Bend the wire to add natural curves to the stem.
That’s it! I hope you enjoy this one! Tag me on Instagram @kraftingkelly if you make this butterfly ranunculus. Also — check out my other designs on the Silhouette Design Store!
P.S. If you’re a Club Silhouette member or Diamond Design Store Subscriber, I’ll be doing a live class using this flower on April 9, 2026. More tips and tricks there!
This post contains affiliate links. Your price is the same, but I may receive a small commission when you use my links. Thanks for your support!
