Silhouette Studio Tutorial: Rhinestone Tool for Single-Line Text
I know a lot of you aren’t Silhouette users, but a lot of you are. I’ve written quite a few tutorials for the Silhouette Plus forum, and teach Silhouette classes at Heartland Paper, but I’ve decided I should include these tutorials here on my blog as well. This is the first of many, I hope.
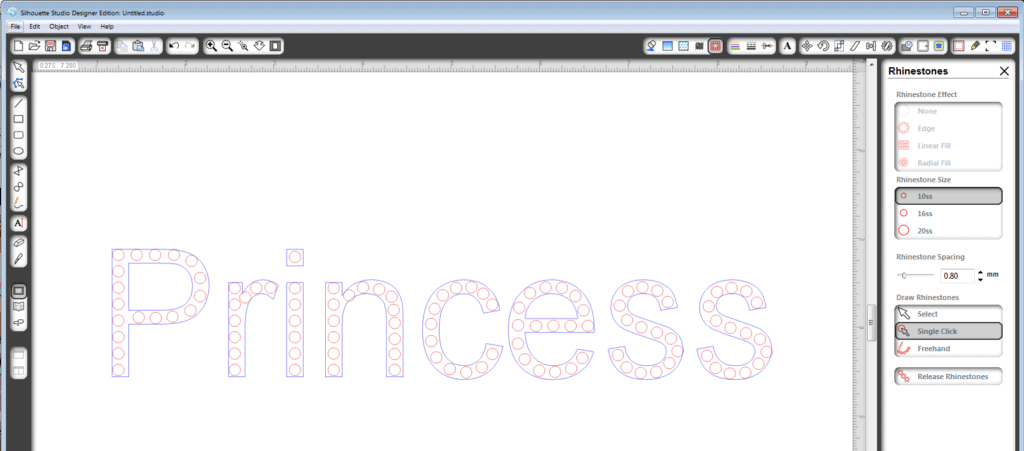
If you’re working with the rhinestone tool in Studio DE, it’s not made for single-line fonts. Just like when cutting fonts, using rhinestones with a font will get you an outline, not a single line. This is a tutorial to help write single-line letters using the rhinestone tool. No matter which of these versions you use, you’ll be doing some freehand work. Keep in mind that the larger your design, the better it looks, generally.
Option A:
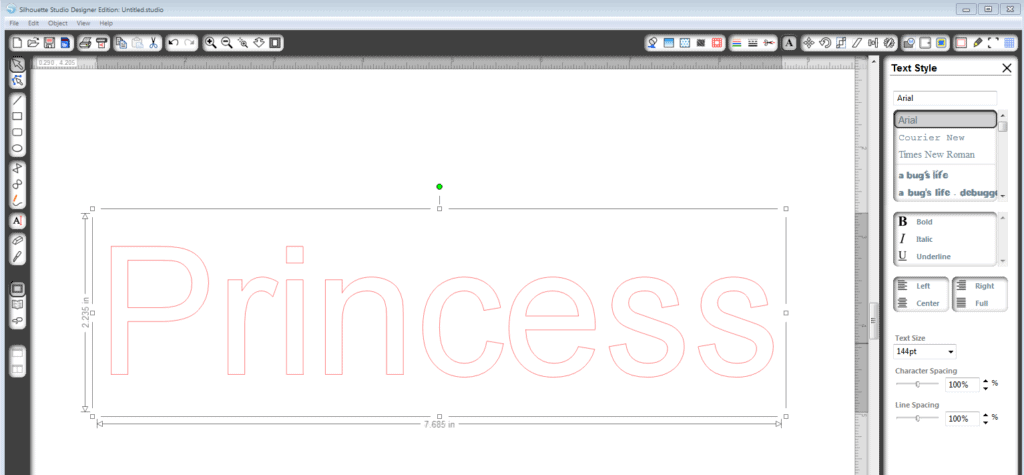
1. Type your text as normal using the Text tool, with a simple sans serif font like Ariel.
2. Enlarge the text to about 144 pt or larger.
3. Select your text so you have a bounding box around it.
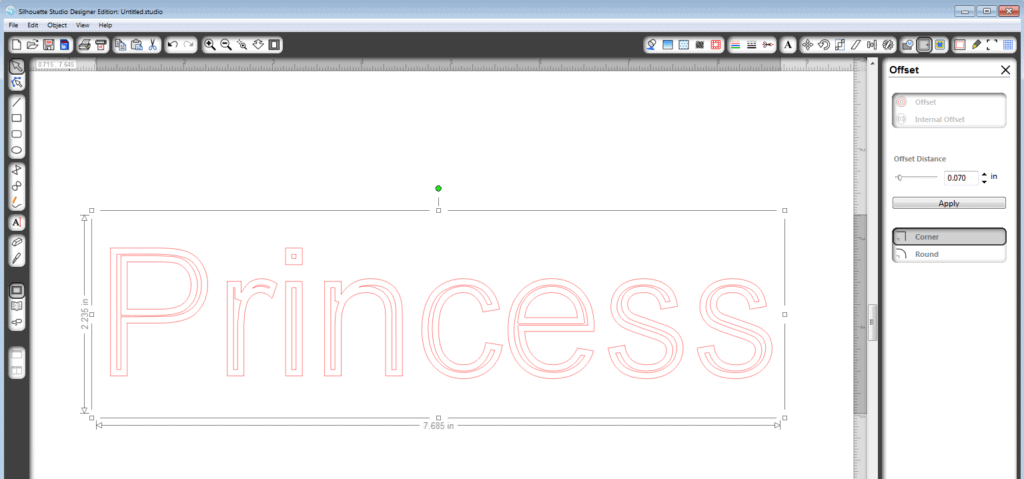
4. Go to your Offset window, choose Internal offset, with the Corner option. I made my offset about 0.070″ just so the inner lines are skinny (they don’t have to be complete and touch in every spot). When it looks good, click Apply.
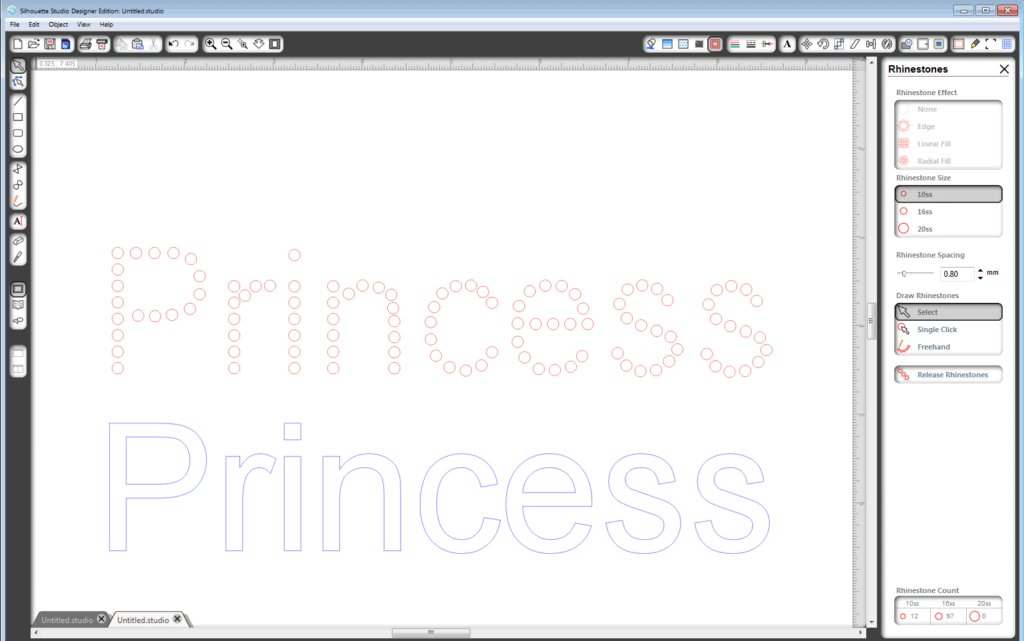
5. Drag your original text away to use later.
6. Select all the inner line pieces you just created.
7. Go to your Rhinestone window and choose a rhinestone effect that works best, also choosing your preferred rhinestone size and spacing. Some fonts I tried this on worked better with the edge or radial fill, and some worked best with the linear fill. Just play around to get the closest you can to a mostly-finished look.
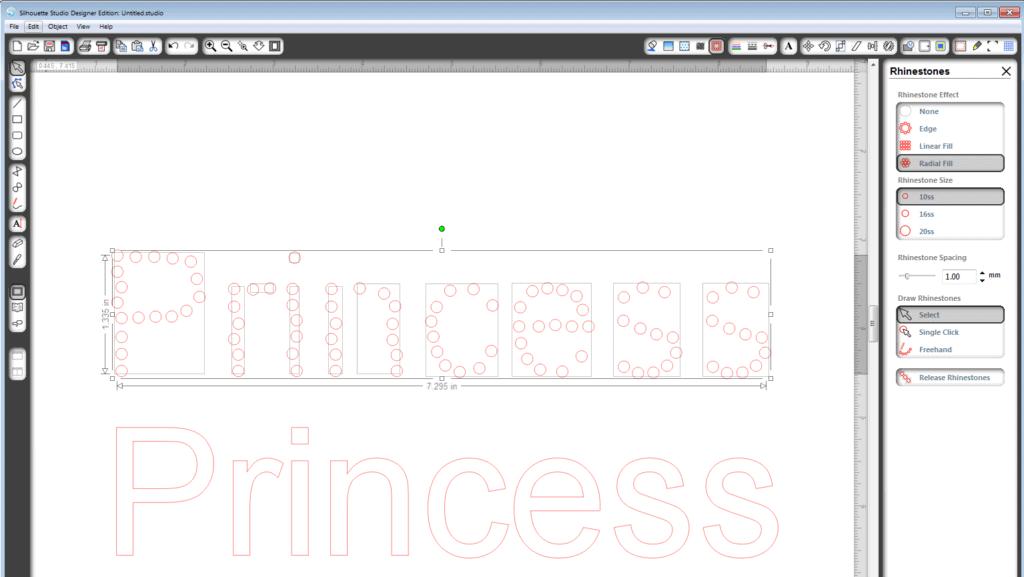
8. Choose Release Rhinestones. This allows you to move each rhinestone individually.
9. Select columns or rows of rhinestones (by dragging a selection box around them or shift-clicking) that should be lined up together, then go to your Align window. Use align left or right, space vertically or horizontally, etc. to get the rhinestones in that selected group to line up nicely and to be spaced evenly.
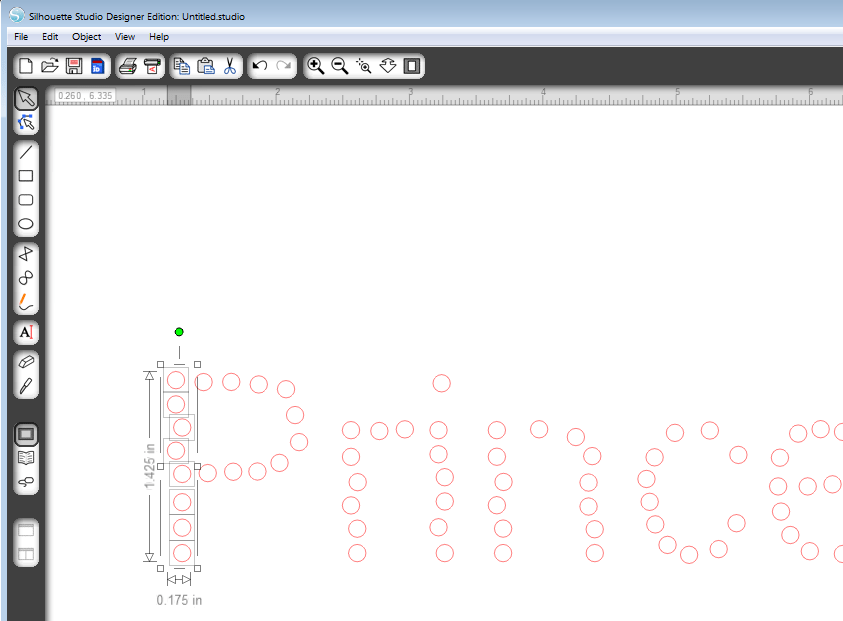
10. Continue your freehand work to get the rhinestones to look nice and even by dragging your original text back over the top of your rhinestone shapes. Each rhinestone circle can be moved individually into place. You’ll probably need to go back and forth between your Rhinestone window and the Align window.
11. Add individual rhinestones to fill in the shape with your “Single Click” option; go back to “Select” in your rhinestone draw options to be able to move them around again.
12. When you’re all done, remember to drag the original text outline off the cutting workspace or turn it to “no cut” in your Cut Style Window.
Option B (if you have a steady hand):
1. Create your font as in steps 1-2 above.
2. Go to your Rhinestone window, choose your preferred rhinestone size and spacing, and choose “Freehand” in the Draw Rhinestones options.
3. Trace inside the letters with your mouse, and the rhinestones will follow the path of your mouse. Each time you lift your tool you’ll have to select Freehand again.
4. Follow steps 8-12 above to fine-tune the placement of your rhinestones.

Thanks so much for posting your tutorials! I am brand new to Silhouette Studio with a new cameo I got for Christmas. Does the regular version of Studio come with rhinestone options? I could not find it yet.
Ashley, the regular version of Studio does not have the rhinestone function. That's one of the advantages to upgrading to the DE version. But if you want to do the same thing with a little more work, you should know that the 10ss rhinestone is a circle that is 0.130", the 16ss rhinestone is a circle that is 0.160", and the 20ss rhinestone is a circle that is 0.210". You can create those circles, use your Replicate tools, and drag them one by one to your text outline.
Thanks, Kelly! I really need to get a rhinestone starter kit and try this out!
Kelly, just a thought with regards to freehand rhinestone placing…what about using a drawing tablet (Bamboo)…or another thought that comes to mind is, could you hold down the shift key to "draw" a straight rhinestone line? Or is the Rhinestone tool similar to the erase tool…where you have to click on it each time to create a hole for the stone?
You have both options, Jann. You can choose "single click" to place one by one as you touch down (it stays selected, unlike the eraser tool), or you can choose "freehand" to draw the line. I was using my Bamboo pen tablet and it was very easy, but I didn't think to try holding shift to get a straight line that time. I'll have to try that tomorrow!
You do not get a straight line by holding the shift key while drawing in freehand rhinestone mode. 🙁
Thanks!! This is great Kelly! I needed some help with this!
re: "Each time you lift your tool you'll have to select Freehand again." I don't have the Designer Edition, but in the free software, I noticed under "Preferences" you can change the behavior of a few tools (though frustratingly, not all!) For example, I think the default is, every time you use the eraser, it goes back to the select tool instead of staying on the eraser. But you can change the settings to stay on the tool after you release it. Meanwhile, I'm going to try your internal offset advice on some fonts in hopes of getting closer to a single line for fonts using the sketch pens.
Thanks, Holly. I never turn that feature on for regular freehand drawing, but it does also work for the freehand rhinestone drawing (it's not a separate option for rhinestones specifically). The problem is, I couldn't get that option in Preferences to work unless I also chose the option to continue drawing shapes as well–which I do not like. I'll send a note to customer support about this problem.
Hello everyone, I am brand new to silhouette cameo world, however to stop drawing shapes click on the blue button on bottom right hand corner, it looks like a gear. Click preference -click select after choosing a shape- click apply
this will stop the shapes from continually drawing. It is a nightmare
Thank you so much!! I just purchased this,& was starting to get disappointed. But you saved me thanks a million!!!
Thanks so much Kelly. I was just trying to do this yesterday and couldn't figure out all the steps. This will really help. Can you do this procedure with a regular shape? Hey, while your talking to customer service maybe you could let them know it really stinks that while things are 25% off the rhinestone kit is "Unavailable". :). Just a thought. Thanks again for your great tutorials.
Yes, you can do this with a regular shape if you have the Designer Edition of Studio. This rhinestone function was actually made to work with regular shapes more than single-line fonts, so you should have pretty good success. (Try the "Edge" effect.)
That's too bad the Silhouette Store is out of rhinestone kits while there is a sale. I'm not affiliated with Silhouette, so an email from you to customer service would be just as effective as an email from me. FYI, I just looked on amazon.com and found the kit there for about the same 25% discount and possibly cheaper shipping. Go check it out! rhinestone kit on amazon
HI CAN SOMEONE GIVE ME THE SOFTWARE PLEASSSSSSEEEEEEEE
If you have a Silhouette machine, it comes with basic Silhouette Studio.
If you want the rhinestone features you can purchase the Designer Edition upgrade HERE.
Oh gracious, thank you so much for posting this (two years ago, LOL)!!! I've been going crazy trying to get this to work and this is the only place I found the answers I needed, it's now working just like I wanted! Thank you thank you thank you! 🙂
So glad I could help!