Speak Kind Words | Vinyl Tutorial

Tutorial time! I added vinyl to this 16×20 canvas art panel with the help of my Silhouette vinyl roll feeder and my CAMEO. Here is my full vinyl tutorial with tips for using the roll feeder and for applying large vinyl designs (originally posted on the Silhouette America blog HERE).
Who loves cutting vinyl with your Silhouette machine? Me too! Today I’m sharing a vinyl tutorial that demonstrates using the vinyl roll feeder for a large vinyl project. I love how it keeps my roll of vinyl running smoothly through my CAMEO without my vinyl roll scooting around and/or falling off my desk.
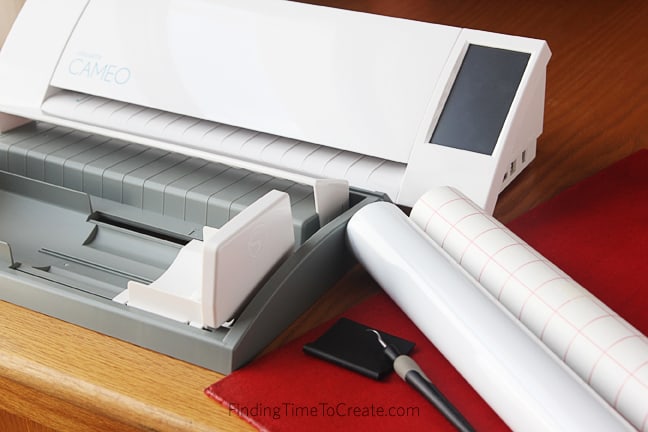
Here are the materials and tools you’ll need for this project:
- Adhesive vinyl
- Transfer paper
- Painted canvas art panel (mine is 16 in. x 20 in.)
- Hook tool
- Scraper tool
- Painter’s tape and ruler or measuring tape (optional but very helpful)
- Roll feeder
- Silhouette machine (the roll feeder fits the CAMEO, the Portrait, and the SD models)
- Speak Kind Words (Design ID #113203)
ROLL FEEDER SET UP
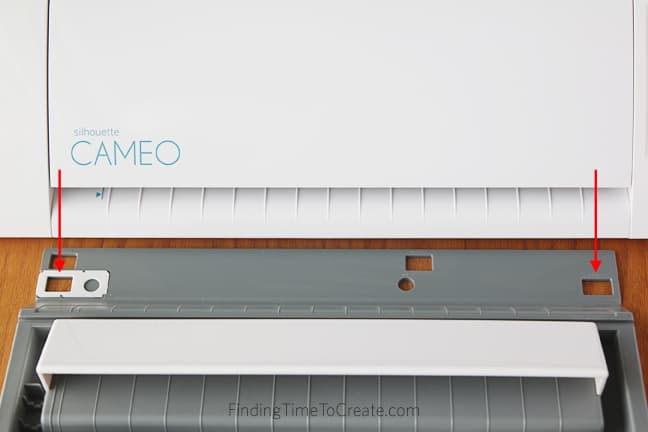
The first thing we need to do is attach the roll feeder to the Silhouette machine. The instructions show how to do this, and the holes are identified on the feeder itself. If you are using it with the CAMEO, you’ll line up these two widely-spaced rectangular holes with the feet of the CAMEO and just slide the feet into the holes. This ensures the roll feeder is properly positioned against the machine.
You can cut 9-inch or 12-inch vinyl rolls with the vinyl feeder. Simply slide the right-hand guide of the feeder into either position and set the roll of vinyl in place.
TIP: I have found the feeder works best with rolls that have a hard inner tube, as opposed to just a roll of vinyl with no cardboard tube inside.
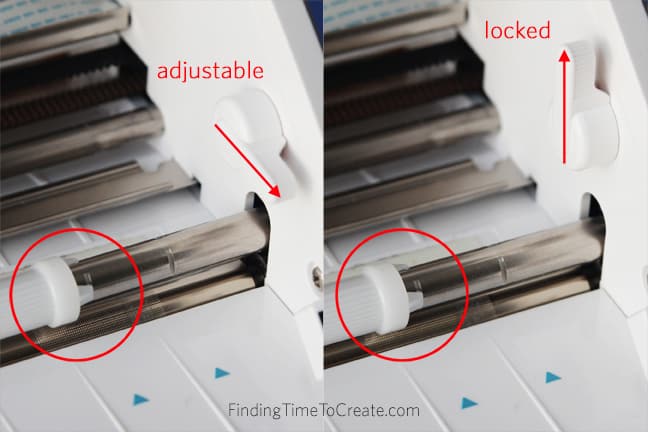
Make sure to adjust the white rollers on your CAMEO, as well. Pull down the adjustment lever, adjust the right-hand roller to the 12” position (one notch in), then push the adjustment lever straight up again.
Before loading the vinyl, be sure to trim the leading edge of the vinyl so it is straight and is perpendicular to its side edge. You can use the cutter that’s included with the roll feeder or your favorite straight-edge trimmer.
TIP: I also like to bend up the leading edge for the ease of feeding it through the roll feeder and the CAMEO. Coming from a roll it tends to bend down, so just curl it a little in the opposite direction.
To load the vinyl with the roll feeder, position the roll so its leading edge goes over the top of the roll towards the machine, then feed it under the front white opening (see image below).
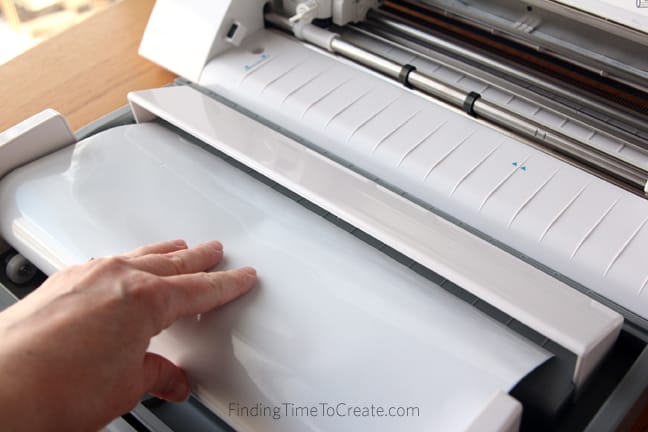
Finally, load the vinyl into the CAMEO. Your vinyl should be fully touching the machine’s rollers on both sides and the roller adjustment lever should be in the up position. Hold the vinyl against the rollers while selecting “Load Media” (not load cut mat).
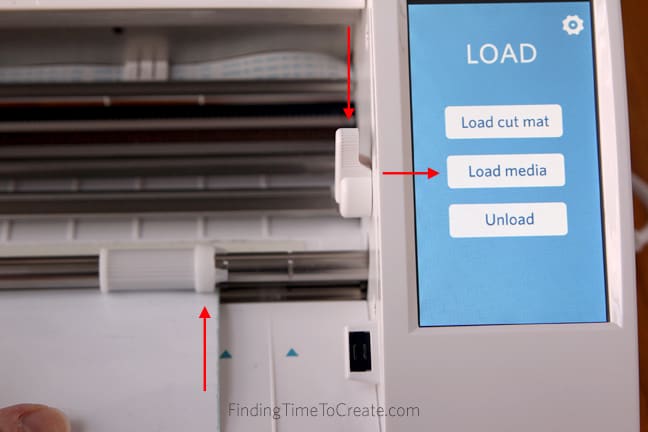
The vinyl should feed into the machine smoothly, and your leading edge should be perfectly straight against the machine’s cutting strip (you should be able to see about 1/8 in. of the cutting strip above the vinyl’s leading edge). If it isn’t straight, unload and load again. With a 12-inch roll of vinyl it should look something like this:

CUT YOUR VINYL
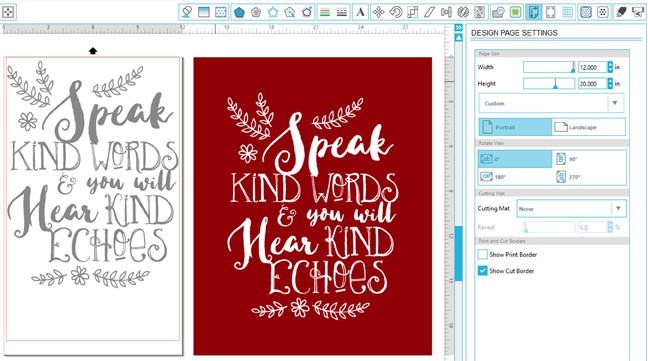
The next step is to cut your vinyl. Because my canvas panel was 16 in. x 20 in., I used nearly the full 12 in. width of vinyl available to me. I resized my design to 11.5 in. wide to give a little room for the rollers along the edges. You can see how I set up my workspace and Design Page Settings in Silhouette Studio®.
- Sample rectangle to represent my canvas of 16 in. x 20 in. (placed outside of the cutting area)
- Design sized to 11.5 in. wide (placed over the rectangle to get an idea of how it will look)
- Duplicate of design to cut placed on cutting area of workspace
- Page Size = 12 in. x 20 in. (the width matters, but not necessarily the length since we are cutting from a roll)
- Cutting Mat = none
- Check “Show Cut Border”
You can see these settings in the image below.
Then I cut my vinyl with my pre-tested settings (Blade 2, Speed 9, Thickness 8) so it would cut all the way through the vinyl but not through the backing.
After the design has been cut, simply unload it from the machine and cut it off from the roll. My design was only about 15 in. long, but with the roll feeder you can easily cut nearly the entire length of the roll.
WEED YOUR VINYL
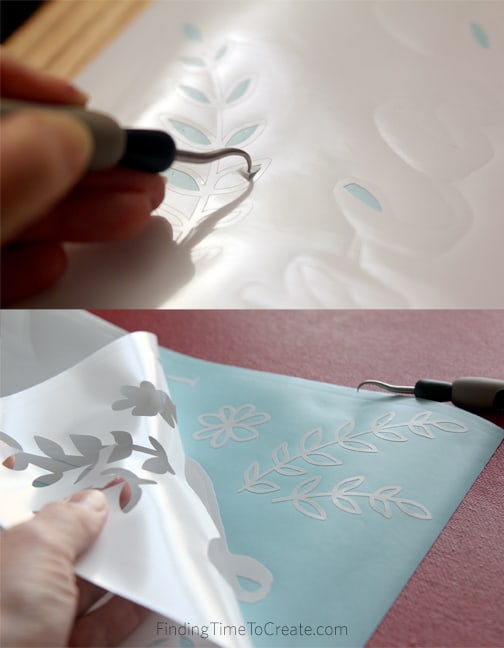
Next, weed your vinyl with the hook tool by picking out and disposing of all the excess vinyl around and throughout your design.
TRANSFER YOUR DESIGN TO YOUR PREPARED SURFACE
Now it’s time to apply the vinyl to the prepared surface. Because I used 12-inch vinyl, I also used 12-inch transfer paper.
Cut the transfer paper to match the weeded vinyl design.
My trick for applying transfer paper to a large design is to bend down about an inch or so of the backing on the top edge of the transfer paper, then carefully line up and press down that top inch of transfer paper to the vinyl design’s top edge of backing. Once that’s secure, you can peel away the transfer paper’s backing from underneath while smoothing the transfer paper along the vinyl design.

Once the transfer paper is covering the vinyl design, use the scraper tool to press and rub the full design for good adhesion.
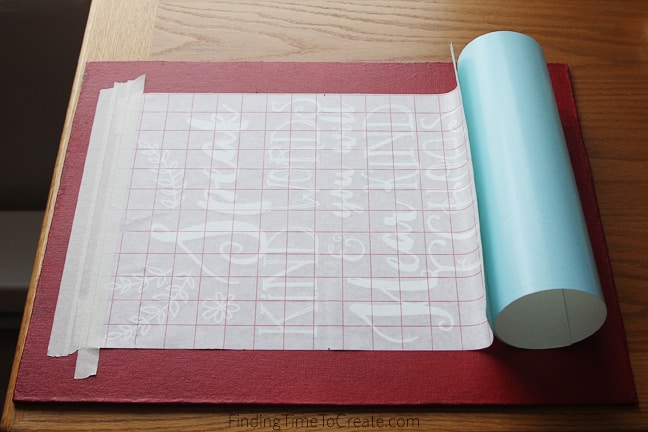
Now position the transfer paper and design on to the prepared surface. Use a ruler and painter’s tape to help get it straight.
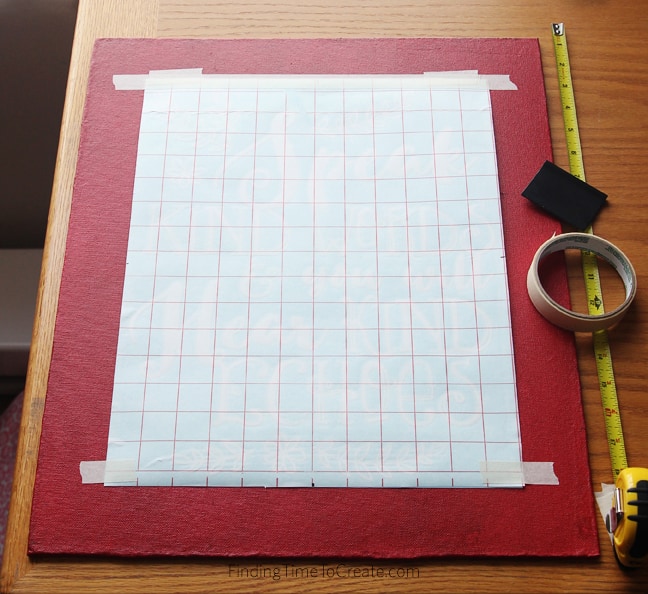
Once you’re sure of the position, use painter’s tape at the top (add more if necessary) to act like a hinge so you can start peeling away the vinyl’s backing from the top and work your way down. Press the vinyl design (on the transfer paper) against the surface as you peel away the backing from underneath.
Use the scraper again to press the vinyl design against the canvas panel, then carefully peel away the transfer paper as the vinyl design stays in place.

Now you’re ready to make large vinyl décor like a pro!