Try Etching Acrylic with Silhouette Curio
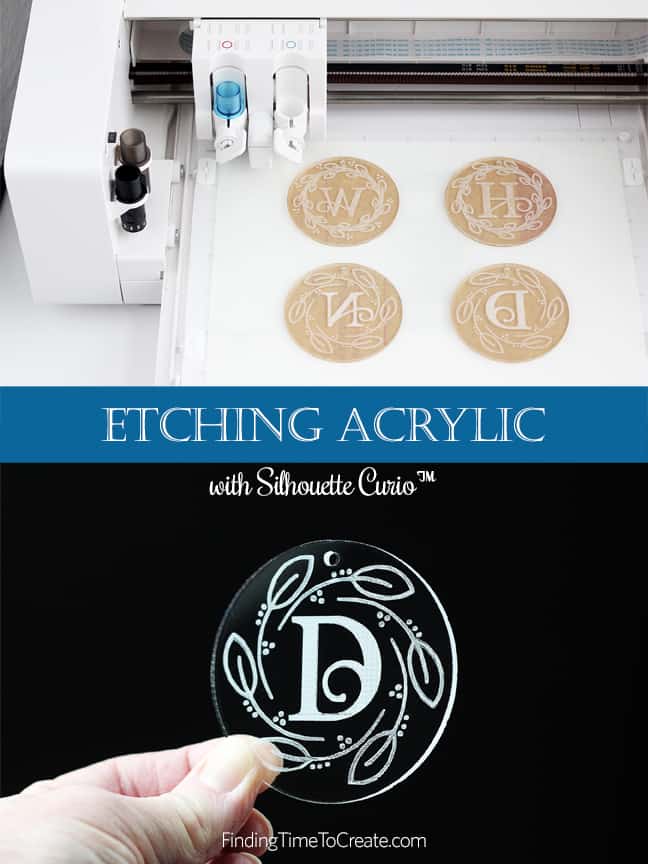
I recently tried etching acrylic with my Silhouette Curio, and it was such a success I decided to make etched acrylic ornaments for all my neighbor and friend gifts this past Christmas season! I want to share with you how I did it, so I’ve got the full tutorial below.
This tutorial is based on 2.5” round clear acrylic blanks I purchased from Craft Chameleon. This is not a sponsored post; I’m just a happy customer!
Supplies/Tools:
(some affiliate links)
- Silhouette Curio™ with standard base
- Embossing mat, small
- Curio Stippling/Etching Tool
- 2.5” Round flat acrylic blanks, clear
- Etching Template
- Ribbon for hanging
- Hook tool
Designs:
- Floral Monograms by Kolette Hall (design ID varies by letter — use filter to search by artist Kolette Hall)
- Leaf Wreaths by Dresden Carrie (#225912, #225900, #225897, #225903)
The Template
As I mentioned above, I bought 2.5” round clear acrylic blanks from Craft Chameleon. They are about 1/8” thick. A template or jig of some kind is necessary to hold the blanks in place while the Curio scribbles and pushes against these blanks, or they could move from your mat during the process and destroy the design.
You can create your own jig that will hold your circles in place if you’re willing to go through the effort, but I was happy to pay only $1.29 more to get Craft Chameleon’s template for these 2.5” round blanks that I can use indefinitely.
Their template includes a plastic page with holes cut out to fit the 2.5” rounds, and it lays on top of the mat and clips directly into the Curio fasteners on the base. It’s quite clever, and works great. The only sticky part of your mat that’s exposed is the four circles where you place the acrylic disks for a tight fit during etching.
The template also comes with instructions, a PNG file with the circles that match the plastic template, and a Silhouette Studio file that has circles of various sizes to match your blanks.
Set up Template in Silhouette Studio:
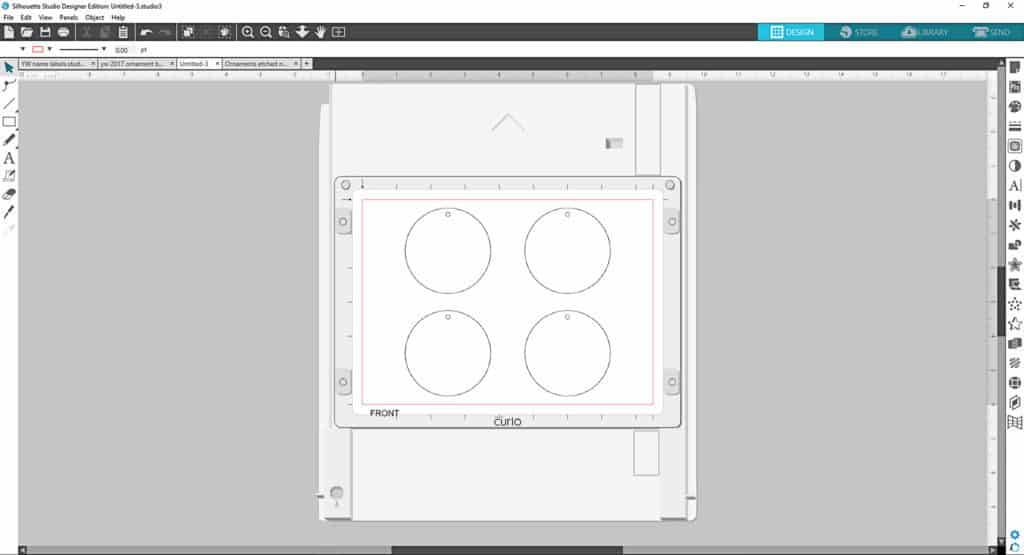
- In the Page Setup Panel,
- Set page size to Curio (8.5 x 6 in.)
- Cutting Mat = Curio (emboss) 8.5 x 6 in.
- Open the PNG template file (drag and drop from a computer folder to your workspace)
- Center the PNG to the page by clicking this symbol
 in the Quick Access Toolbar (the object needs to be selected)
 - Now you know where to position the designs for etching.
Create designs:
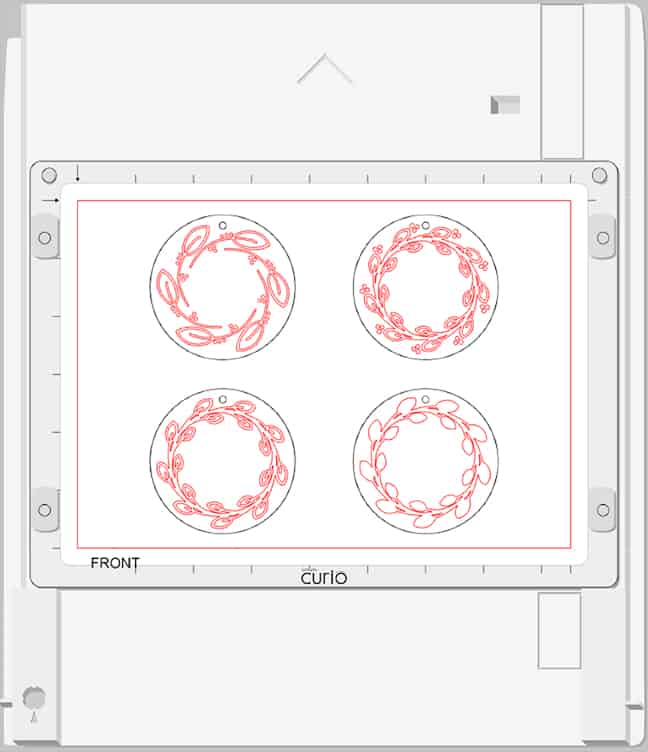
Any single-layer design is fair game for this part.
Tip: If you fill it with color and any inner pieces (if any) are blank, you’re good to go. If it’s grouped and any inner pieces fill with color, select it all, right click, and choose Make Compound Path. You don’t want any overlapping areas in your designs, or the fill will look funny.
- I chose some fun wreath designs by Dresden Carrie (listed in the supplies at the top) and some nice monogram letters by Kolette Hall (I deleted the flower portions and just kept the letters themselves).
- I did delete some of the inner portions of a couple of the wreaths to make room for the monogram letters.
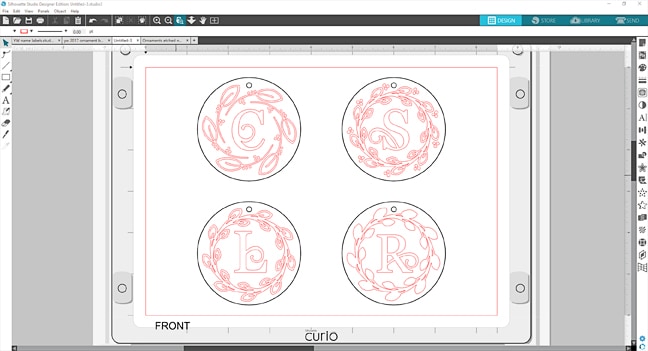
- Center the wreaths and monograms within each template circle. You’re mostly “eyeballing” this for visual balance.
- Rotate any wreath so it doesn’t cover the hole. You don’t want any part of your design to cover that hole or it could catch the tool while it’s etching.
- It should look something like this before applying emboss fills:
Apply Etch Fills and Mirror Design:
- Select your designs (you can select everything and then Shift + click on the template to deselect it)
- Open the Emboss Panel
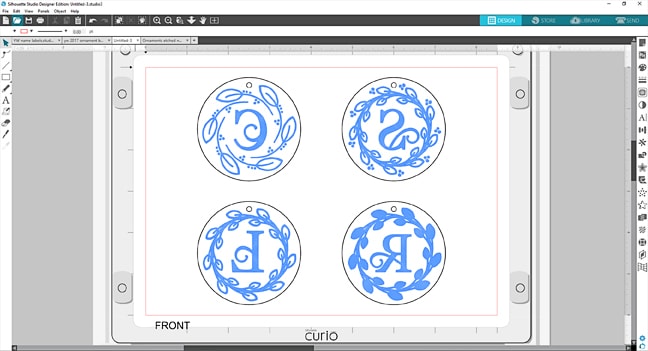
- Choose Deboss
- Select an Embossing Pattern (either of the last two – Cross Hatch or Spiral – are my favorite)
- Decrease the Spacing to 0.005 (drag it all the way to the left)
- Now right click and choose Flip Horizontally.
Tip: Mirroring the design is optional. I think the etch looks good either from the front or the back of the clear acrylic disk.
- You may need to nudge the designs back into a centered position (use your arrow keys on your keyboard for tiny nudges).
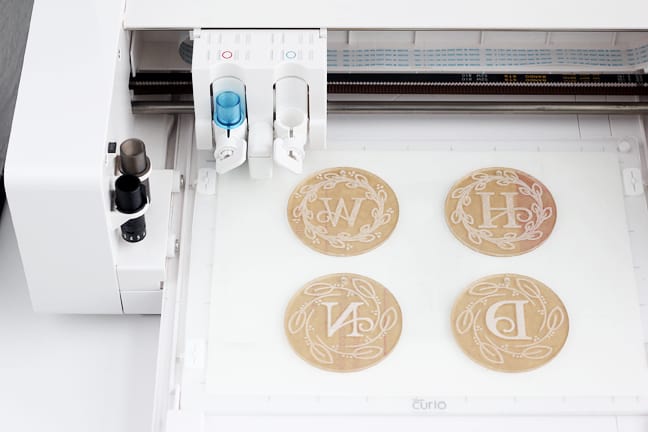
The designs should now look something like this:
Prepare disks and mat:
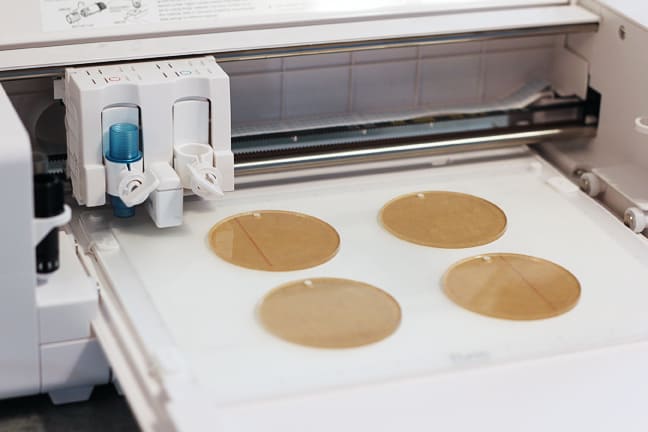
- The platforms on your base will be a #2 platform on the bottom, then the soft white embossing mat, then the plastic template stuck to it and all clipped in place with Curio’s built-in clips. For these 1/8″ thick blanks, the total platform value is 3.
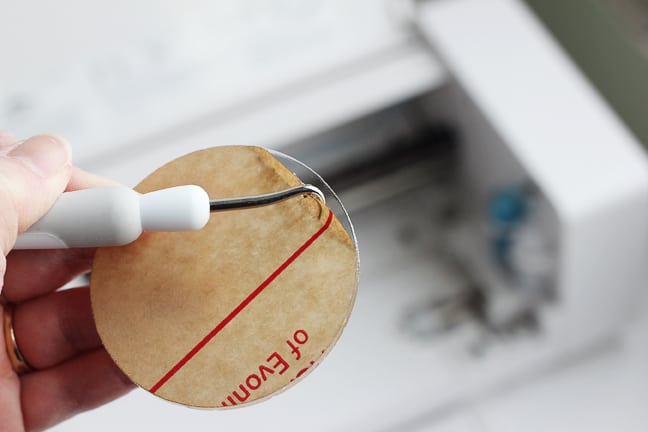
- The clear acrylic etching blanks I got from Craft Chameleon have a protective paper layer applied to each side, so they don’t get scratched before use.
- Carefully peel away the backing off of one side of each blank. I used my sharp Silhouette hook tool to do this. Be very careful, though, because the hook can scratch the acrylic.
- Leave the backing on the other side and place it backing-side-down in each hole of the plastic template. Arrange it so the hole is on top as seen on the virtual template. The blank should be sticking to the embossing mat at this point, snugly fitting inside the plastic hole of the template.
- Load the base into the Curio, and the blanks are ready to etch.
Prepare Cut Settings:
In the Send Panel, we’re going to set up a custom setting for acrylic blanks so we can use it again in the future.
- Use the Simple Action tab for this project.
- Set a custom material as follows (you can also watch this video):
- Click the dropdown arrow for Material.
- At the bottom, choose Add New Material Type.
- We want to set an action other than Cut, so click on the + symbol and choose Add Etch Action.
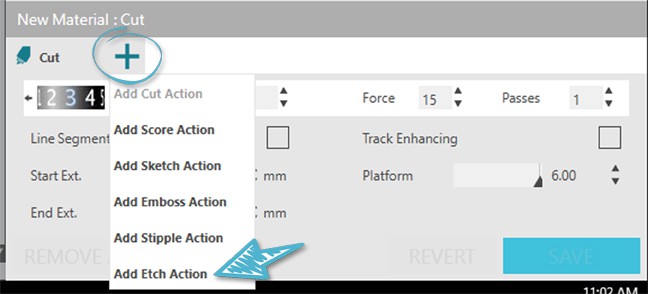
- Change the settings to Speed 9, Force 17, Passes 1.
- Set a Platform number to 3.
- When it’s set the way you want, click the blue Save button.
- Double click the “New Material” text to change the name for your custom material to “Acrylic blanks”, and hit Enter to accept.
- Click the X under the Send Panel’s blue tab at the top to get back to the normal Send Panel view.
- Ready to etch. Make sure your etching tool is in the left (red) tool holder to match your settings.
- Click on the Material drop-down arrow, and choose “Acrylic blanks” as the material by scrolling to the bottom and finding it in the User Defined section.
- If your base is loaded and the settings look right, then press Send and watch your Curio do its thing!
Tip: This creates a lot of acrylic dust, so you’ll need to blow or brush it from your blanks, etching tool, and machine when the job is finished.
- Remove the other side of the paper backing, add a string or ornament hook, and package it up nice and pretty!
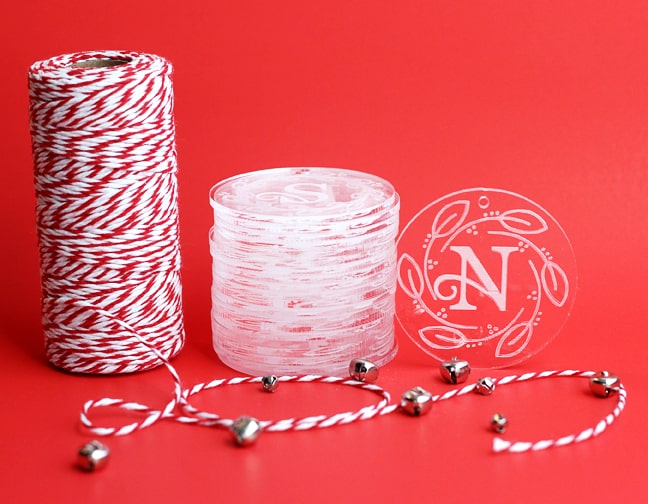

I love how these turned out, don’t you?
Want to Learn More About Acrylic Etching?
I did a little research to get started on this project and asked around to make sure I was using appropriate settings and found out there’s more you can do with materials and various etching tips (and even adding color to the etch).
My friend Cindy Pope, a fellow teacher at All Things Silhouette and a master artist with the Curio, has an online course for acrylic etching that you may want to check out if you want to take this type of project further. It’s called Etching With Your Curio on Craftcast.
Thanks for stopping by! Please let me know if you have any questions.
This post contains affiliate links. It won’t change your price, but it helps you by getting exactly the product I used, and it helps me by giving me a little income to help support this blog. Win-win. 🙂

What treasures!
Thank you for the tutorial!
Glad you like it, Michelle! 🙂
Last month I bought all the materials from Craft Chameleon, and was going to try and figure out how to use them in my Curio (which I also haven’t used). This tutorial is perfect timing, thank you!
I’m so glad! I’d love to see what you make, Jackie!
Love, love, love – haven’t started using my curio but I’m so glad I found you!
I’m so glad you found me, too, Barb! I can hear that Curio calling your name to break it out and start making stuff! I’ve got lots of Curio tutorials. 🙂
Thank you for this tutorial. Out of all the tutorials available this one was the most helpful. Results were perfect.
I’m so glad to hear that! Thanks, Kay!
Can I do this with my silhouette?
This cannot be done with a Silhouette CAMEO or Portrait. The Silhouette Curio allows for depth adjustments for something thick like this, and the etching fills are only available in Silhouette Studio if you plug in a Curio.
PERFECT tutorial, I just opened my Curio box and was able to etch my design with your tutorial however I kept accidentally moving the template. Is there a way to make the template stay in one place and not move by accident when you try and click to move and adjust the designs?
Elly, if you’re talking about the digital template in Silhouette Studio, I find it easiest to open the Layers Panel (available in Silhouette Studio Designer Edition and above), put it on its own layer, and lock that template layer. You can watch my tutorial on Layers and Cut by Layer here in this YouTube video. https://youtu.be/Z6TBEdTs46I Please let me know if you have more questions.
Hey, great article!
Thank you so much for sharing! It’s a beautiful work!
I see that you are using Curio. Do you think it is possible to make these pieces on Cameo 3?
xoxo
Thank you, Tati! Unfortunately, the Cameo 3 does not have the adjustable platform and the locking pieces to hold the template in place for these thick acrylic blanks. A Curio is really the best machine for this job. I have had a friend play with thin 1 mm acrylic blanks in her Cameo, but I’m concerned there are too many factors that could cause damage to your machine. The Curio’s adjustable platform allows for the right amount of distance and force between the etching tip and the material itself.