How to Install Multiple Versions of Silhouette Studio – Windows 10
Have you ever wished you could run more than one version of Silhouette Studio® on your Windows computer? Mac users can do it easily, but doing this in Windows takes a bit more effort and digging around, renaming folders and paths.
If you’re a computer-savvy user of Silhouette Studio® you may want to try this out. Especially if you want to run a beta edition to try it out and provide feedback to the Silhouette software developers, while also keeping a stable release version to fall back on.
This tutorial is for advanced users. I’ve debated sharing it because it’s possible to mess things up if you don’t know what you’re doing, but I have found it extremely helpful over the years as I have the need to run several versions of Silhouette Studio® while juggling personal use, teaching, and beta testing.
Notes:
- This does not affect your library or your upgrades to Designer Edition, etc.
- Try this at your own risk. You may wish to take precautions like exporting a copy of your library, creating a restore point, and/or deactivating your upgrade, but I’ve been doing this for years and rarely run into any glitches. (I currently have more than 15 versions I can open on my laptop.)
- This is for v4 and higher, running Silhouette Cloud. I have not successfully run v3 and v4 on the same computer.
- Only one instance of Silhouette Studio can be open at a time.
- If you are currently running an older version and simply want the ability to add newer versions, start with step 5.
To uninstall a newer version of Silhouette Studio in order to install an older version:
- Type “remove” in Windows taskbar search bar, then choose “Add or remove programs”.
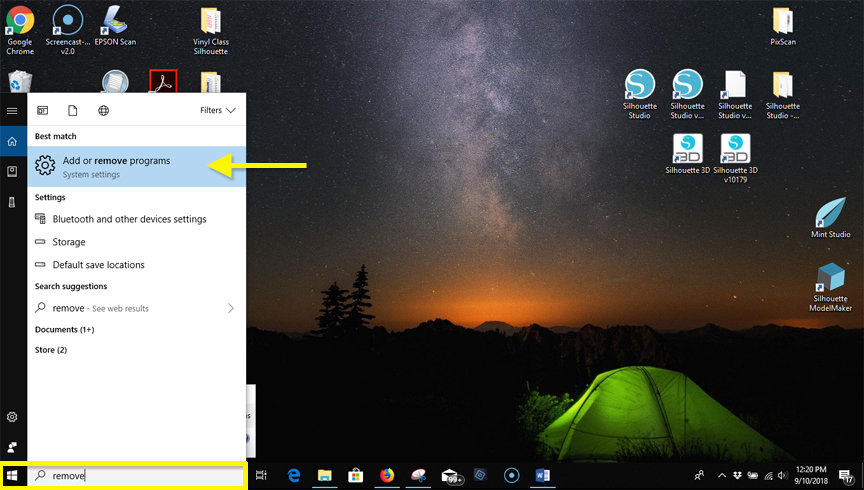
- Find Silhouette Studio and Uninstall.
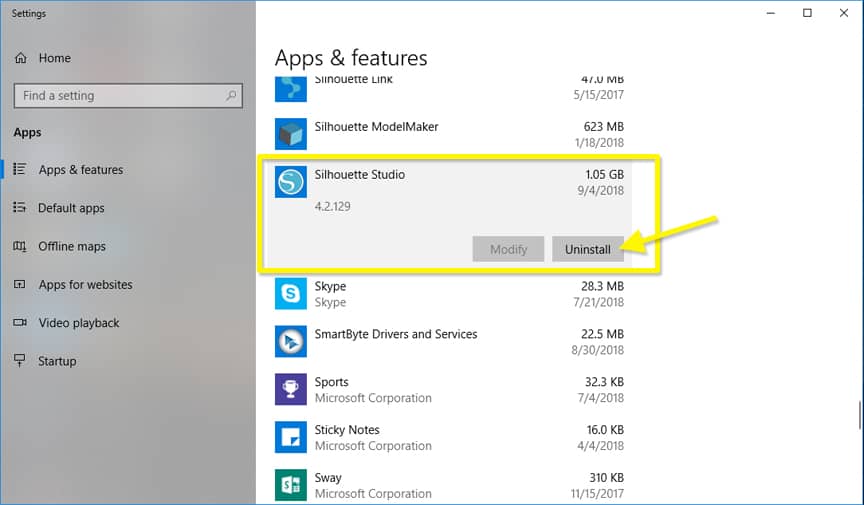
- Restart your computer.
- Install the older version you still want to access (e.g. version 4.1.473).
To rename an older version in order to install multiple versions:
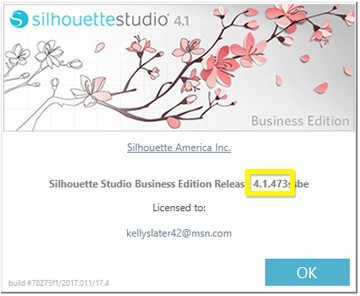
- Verify the version of Silhouette Studio you are about to rename. (In Silhouette Studio: Help > About Silhouette Studio).
- Close Silhouette Studio.
- In Windows Explorer, open the folder: This PC > OS (C:) > Program Files (x86) [NOTE: In versions 4.2.6xx and above, you may find the 64-bit version of Studio in: This PC > OS (C:) > Program Files instead of Program Files (x86)]
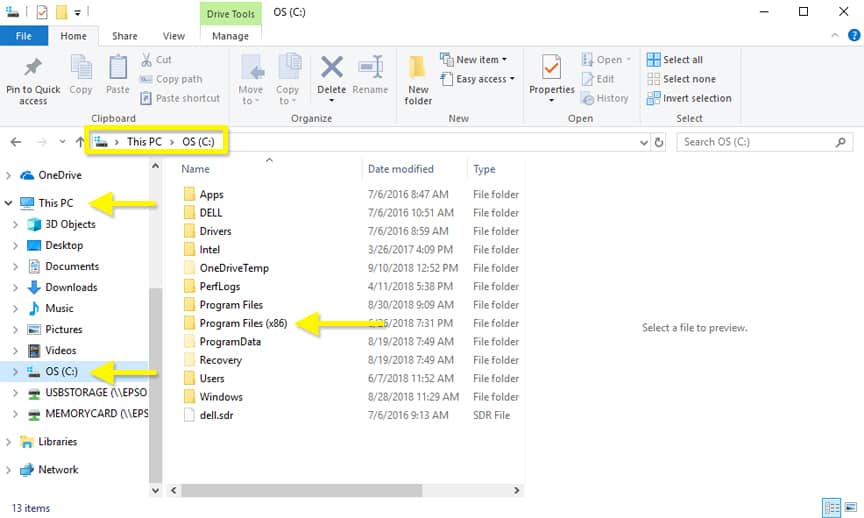
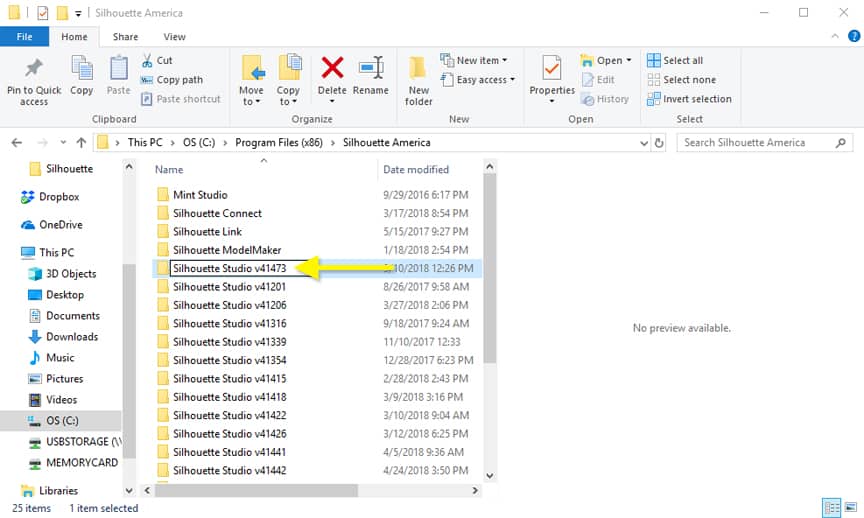
- Open the “Silhouette America” folder.

- Find (but do not open) the folder that says “Silhouette Studio”.

- Rename the folder that says “Silhouette Studio” to “Silhouette Studio vxxxxx” (For version 4.1.473, I would rename it “Silhouette Studio v41473” with no spaces or decimals.)
Note: You may get several popups throughout this process stating you need administrator permission, which you need to accept/continue.
Rename Silhouette Studio’s shortcut icon:
- Right click on the current Silhouette Studio icon on your desktop and choose “Rename”.
![]()
- Add “ vxxxxx” after “Silhouette Studio” so it is exactly the same as you typed it to rename the Silhouette Studio folder above. (e.g. Silhouette Studio v41473)
![]()
Rename the Shortcut Path:
- Right click the renamed Silhouette Studio icon and choose “Properties”.
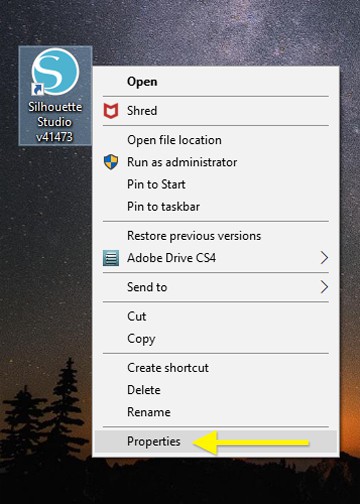
- Open the Shortcut tab.
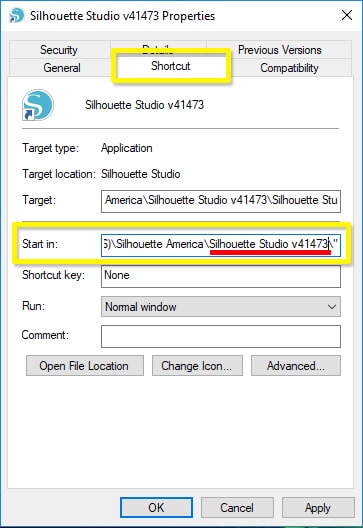
- In the “Target” input, add “ vxxxxx” after the first “Silhouette Studio” so the full Target path says “C:\Program Files (x86)\Silhouette America\Silhouette Studio v41473\Silhouette Studio.exe” (using v4.1.473 again as my example).

- In the “Start in” input, add “ vxxxxx” after “Silhouette Studio” near the end of the line so the full Start In path says “C:\Program Files (x86)\Silhouette America\Silhouette Studio v41473\” (using the same version example of 4.1.473).
- Open that version of Silhouette Studio with the newly-renamed desktop icon to verify it works.
Install a newer version of Silhouette Studio:
- Now you can install a newer version of Silhouette Studio as usual by running the downloaded .exe file.
- If you wish to install yet another version of Silhouette Studio to have more than two versions available, simply go through the renaming steps (5-16 above) for the most-recently-installed version before installing a newer version.
You can choose which version to open, but you will have to close one version before opening another.
Good luck!

Thanks so much for the detailed instructions. Worked like a charm. Just have one question. How do you uninstall the different version. Do you just delete the different version’s folder if you want to delete the older version. There is only one listed in the uninstall listings in control panel.
I’m glad to hear it worked for you, Melissa! If you’re not worried about computer space, there’s no need to delete a previous version. That’s correct that you can not uninstall an older version through the Control Panel. I would just delete the unwanted Silhouette Studio vxxxx folder and shortcut from the Program Files (x86) > Silhouette America folder and Desktop.
Oh, my gosh, your instructions just made my Silhouette life a whole lot less frustrating. The latest updates (v4.2.xxx) have a problem with my library in that I cannot delete files. Oh, I can delete them, they show up in the recycle bin, I empty the recycle bin, then the software syncs and there is the file I originally deleted, back where it was to begin with and it’s also back in the recycle bin! At one point I had twelve empty miscellaneous folders. It was nuts.
Contact with Silhouette support didn’t help, the only solution they could come up with is delete the new version, re-install an old version, delete those unwanted files, uninstall the old version and re-install the new version.
I’m so glad you shared this and even more glad I found it.
I’m so glad it was helpful, Lisa! And glad you were able to resolve your library issue. That would be frustrating!