3D Printed Lithophane with Silhouette Alta
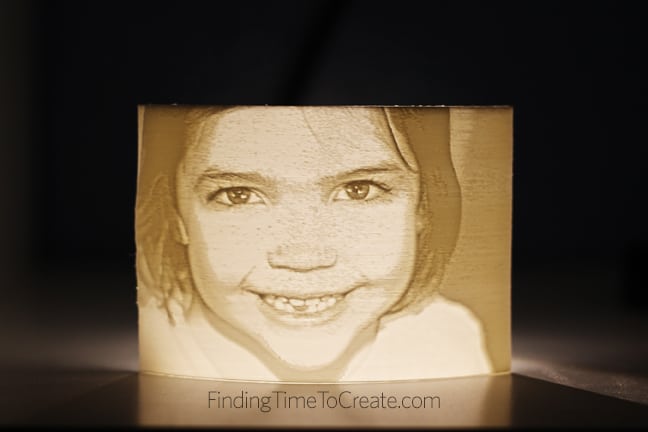
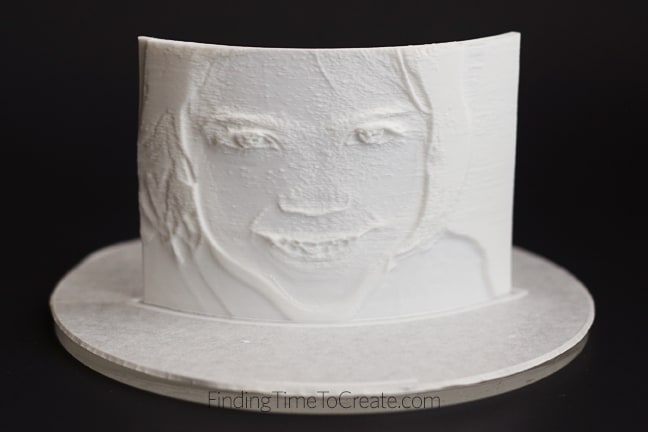
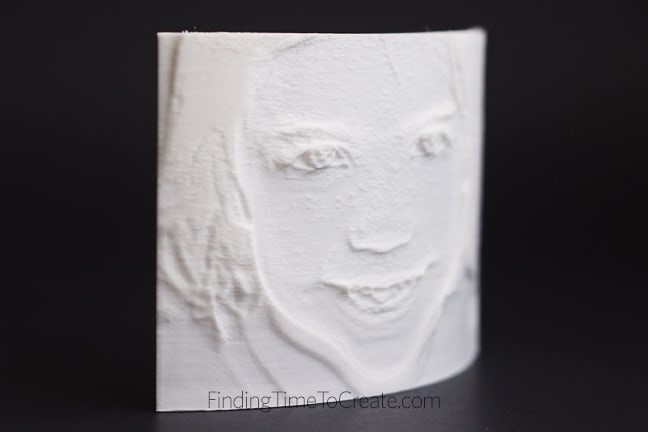
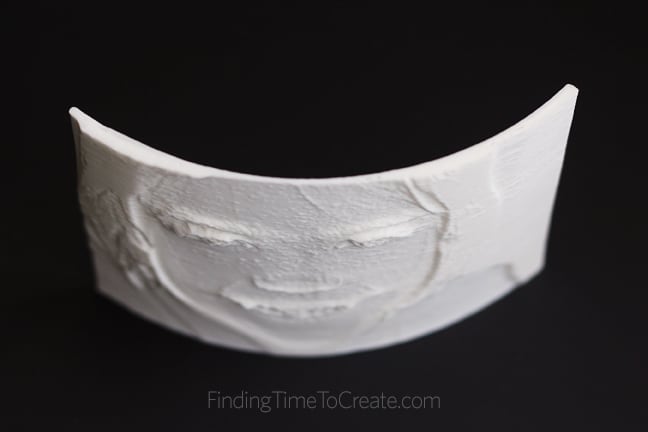
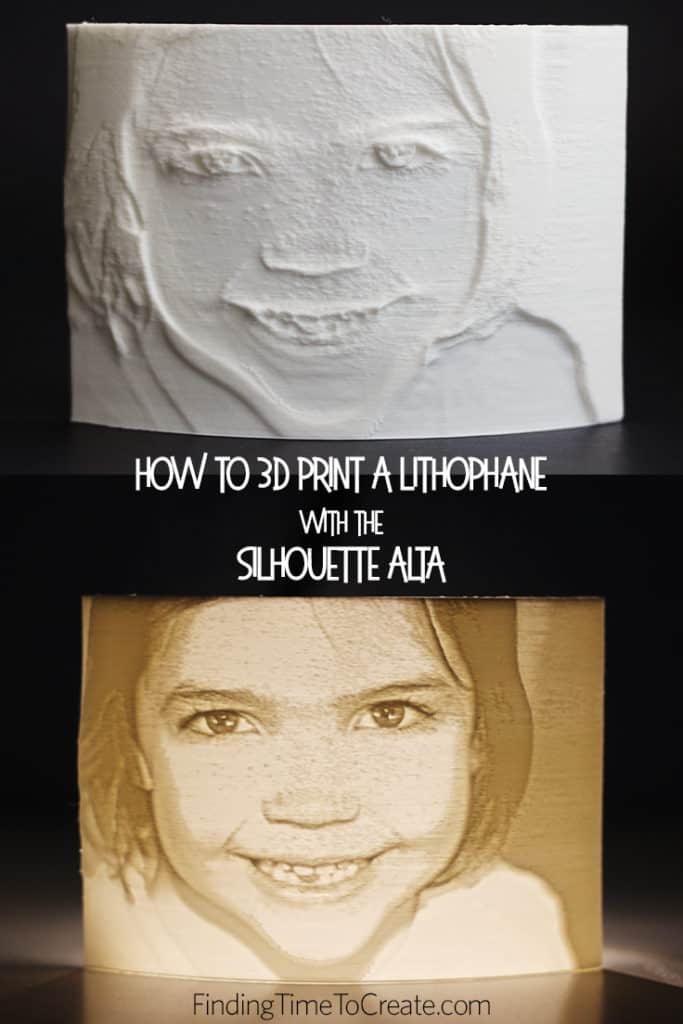
I tried something new this weekend with my Silhouette Alta, and it’s so cool and so easy that I had to put everything else aside and share it with you! This is a 3D printed lithophane, which is made of thin white PLA filament where the image can only be seen clearly when backlit with a light source.
The Silhouette 3D software does not generate a lithophane for you (although we’ve asked the software developers to consider adding it as a future feature), but Silhouette 3D does open STL files. So it’s really easy if you use a free online program to create the STL file, then open it in Silhouette 3D.
You will need:
- Silhouette Alta 3D Printer
- White 1.75mm PLA filament
- Free online lithophane generator
- Silhouette 3D software
- USB Cooling fan
Instructions:
- Find a photo or image you want to print as a lithophane. High contrast (big difference between light and dark areas) is best.

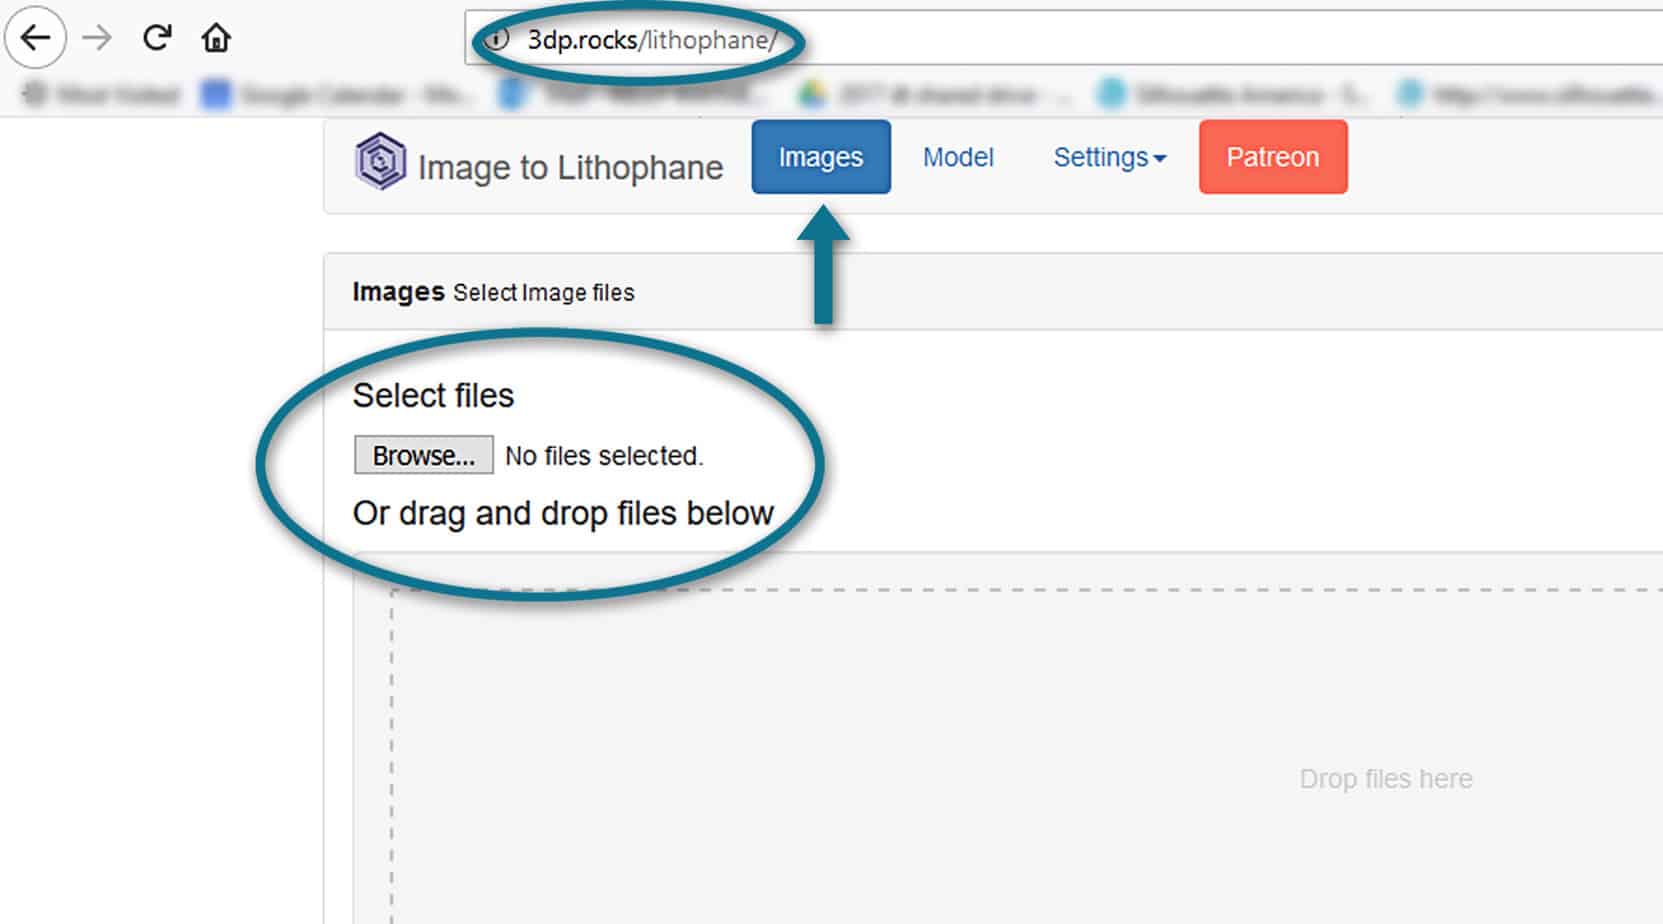
- Open the free Image to Lithophane program here at 3dp.rocks/lithophane.
- Go to the Images tab and upload your photo.
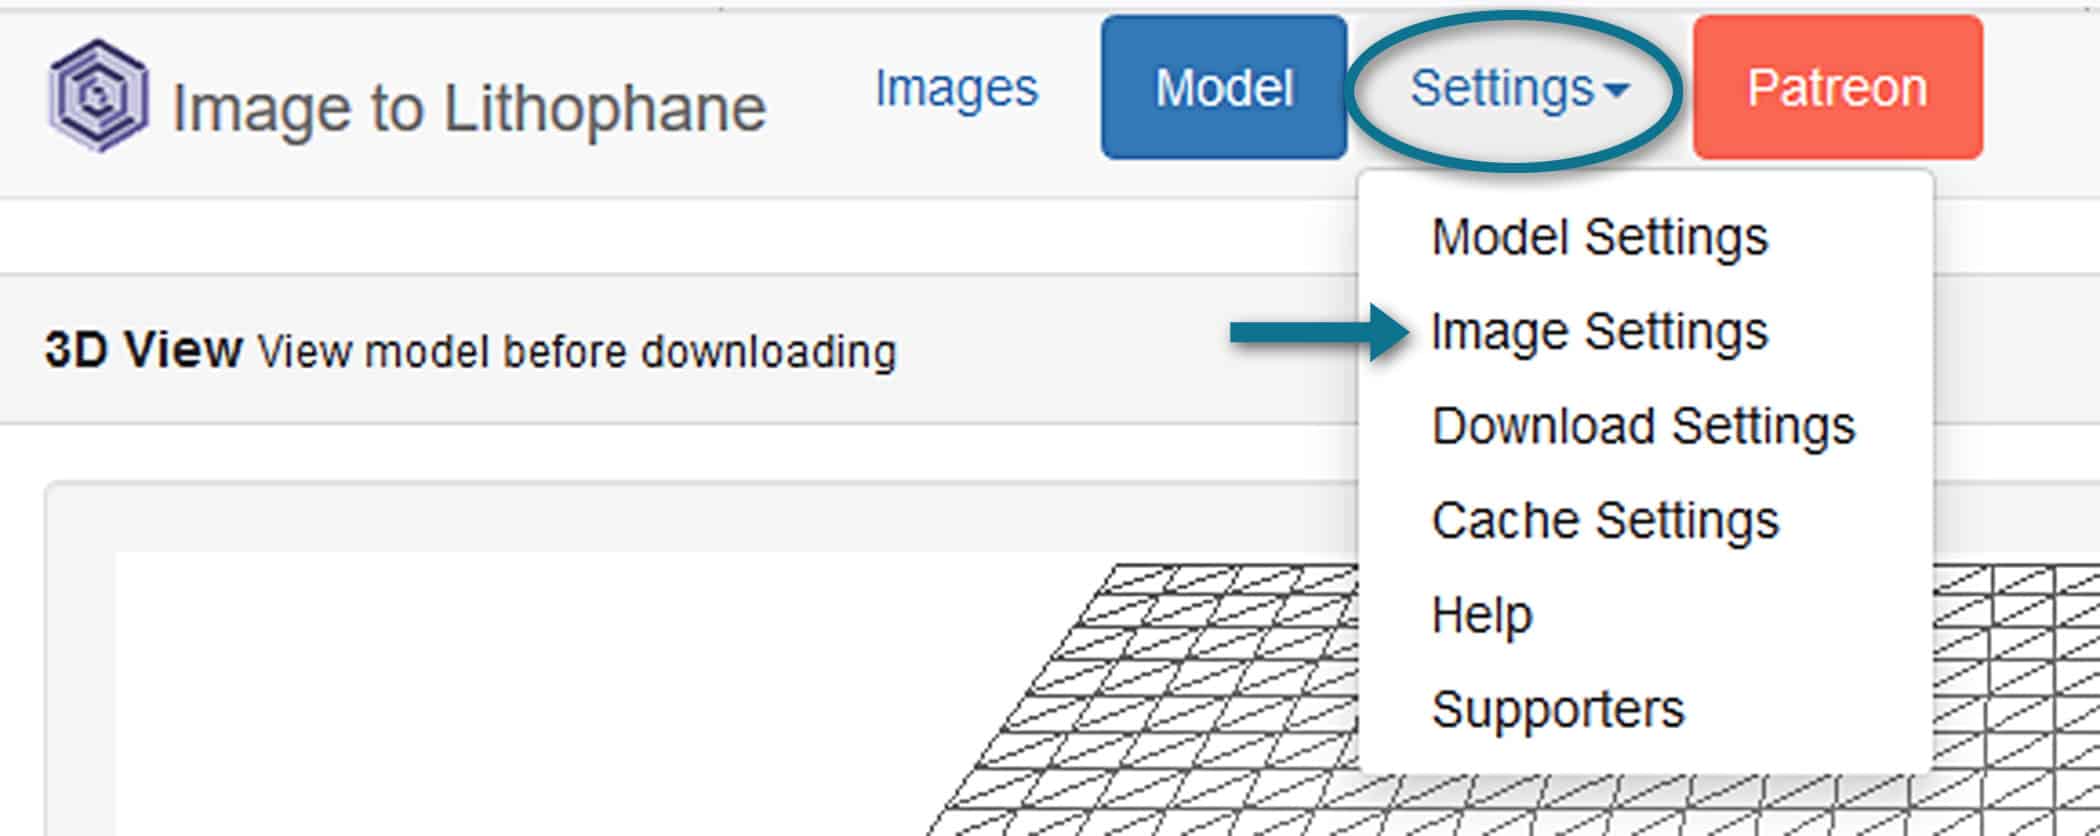
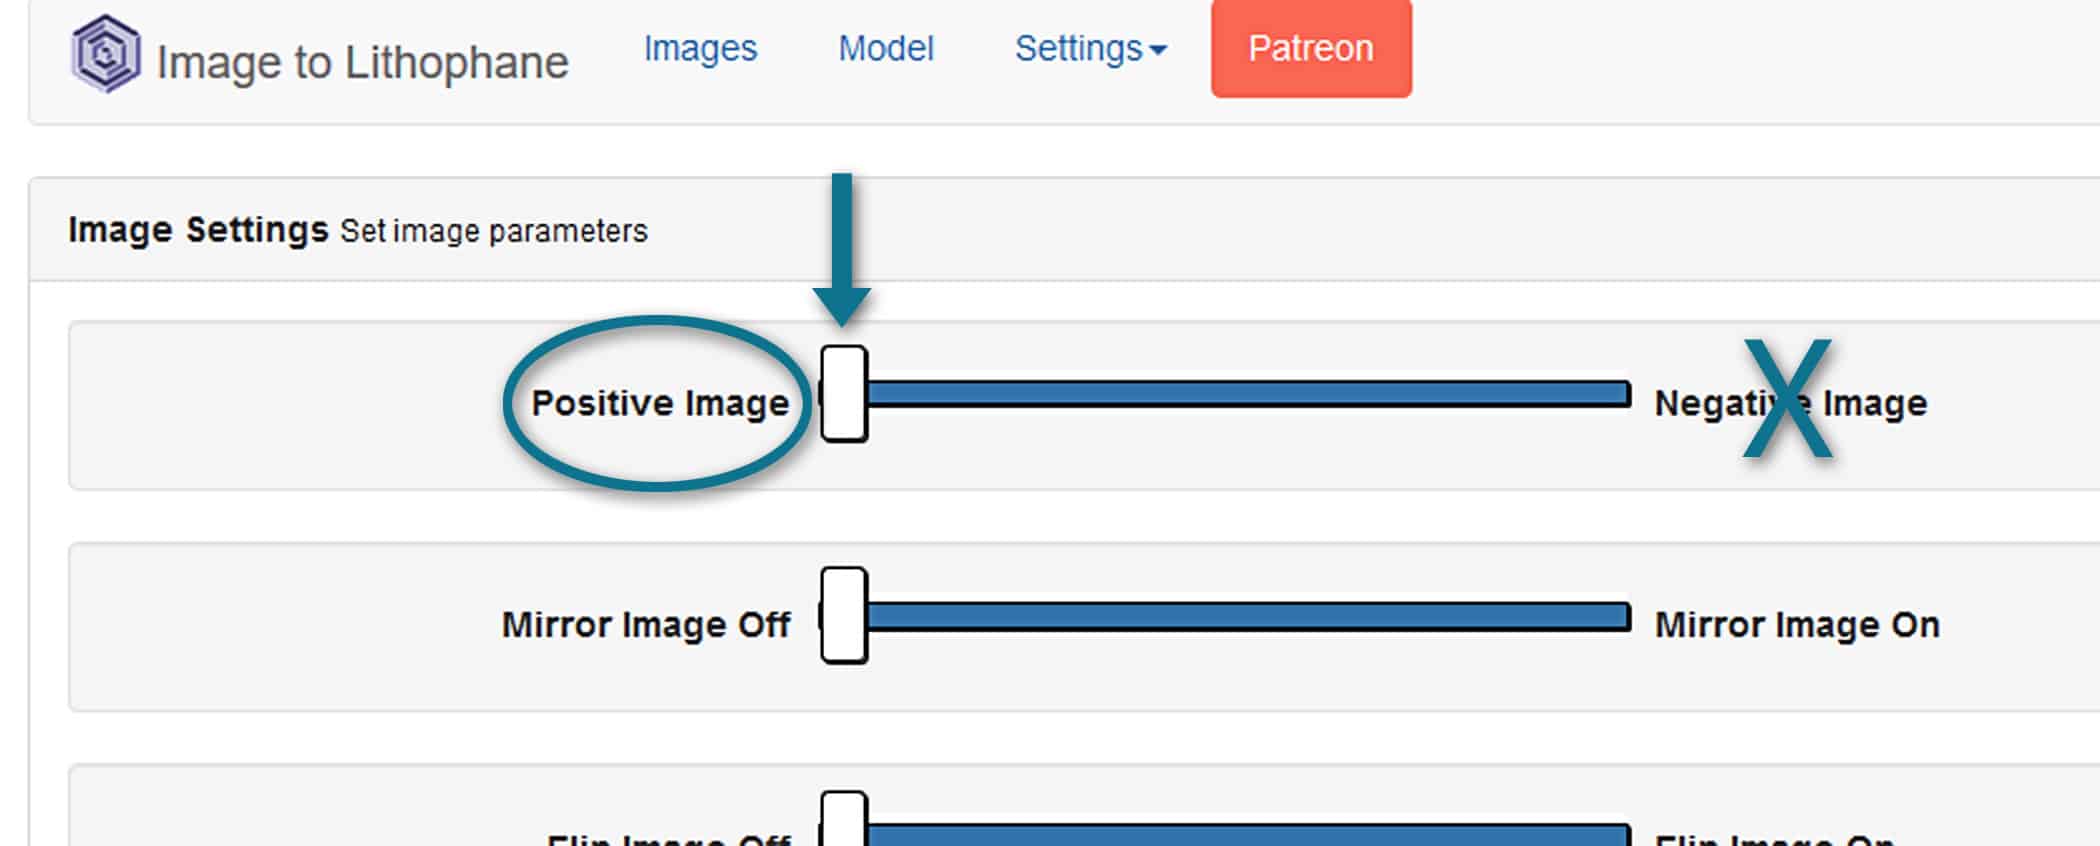
- Go to Settings > Image Settings and set it to Positive Image. (I left everything else at the default.)
- In the Model tab, choose a selection at the bottom. I used “Outer Curve”. Each time you choose a different one, click Refresh to see the changes.
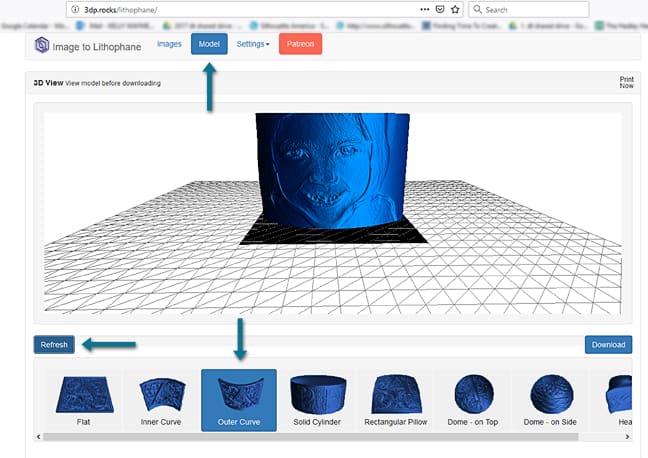
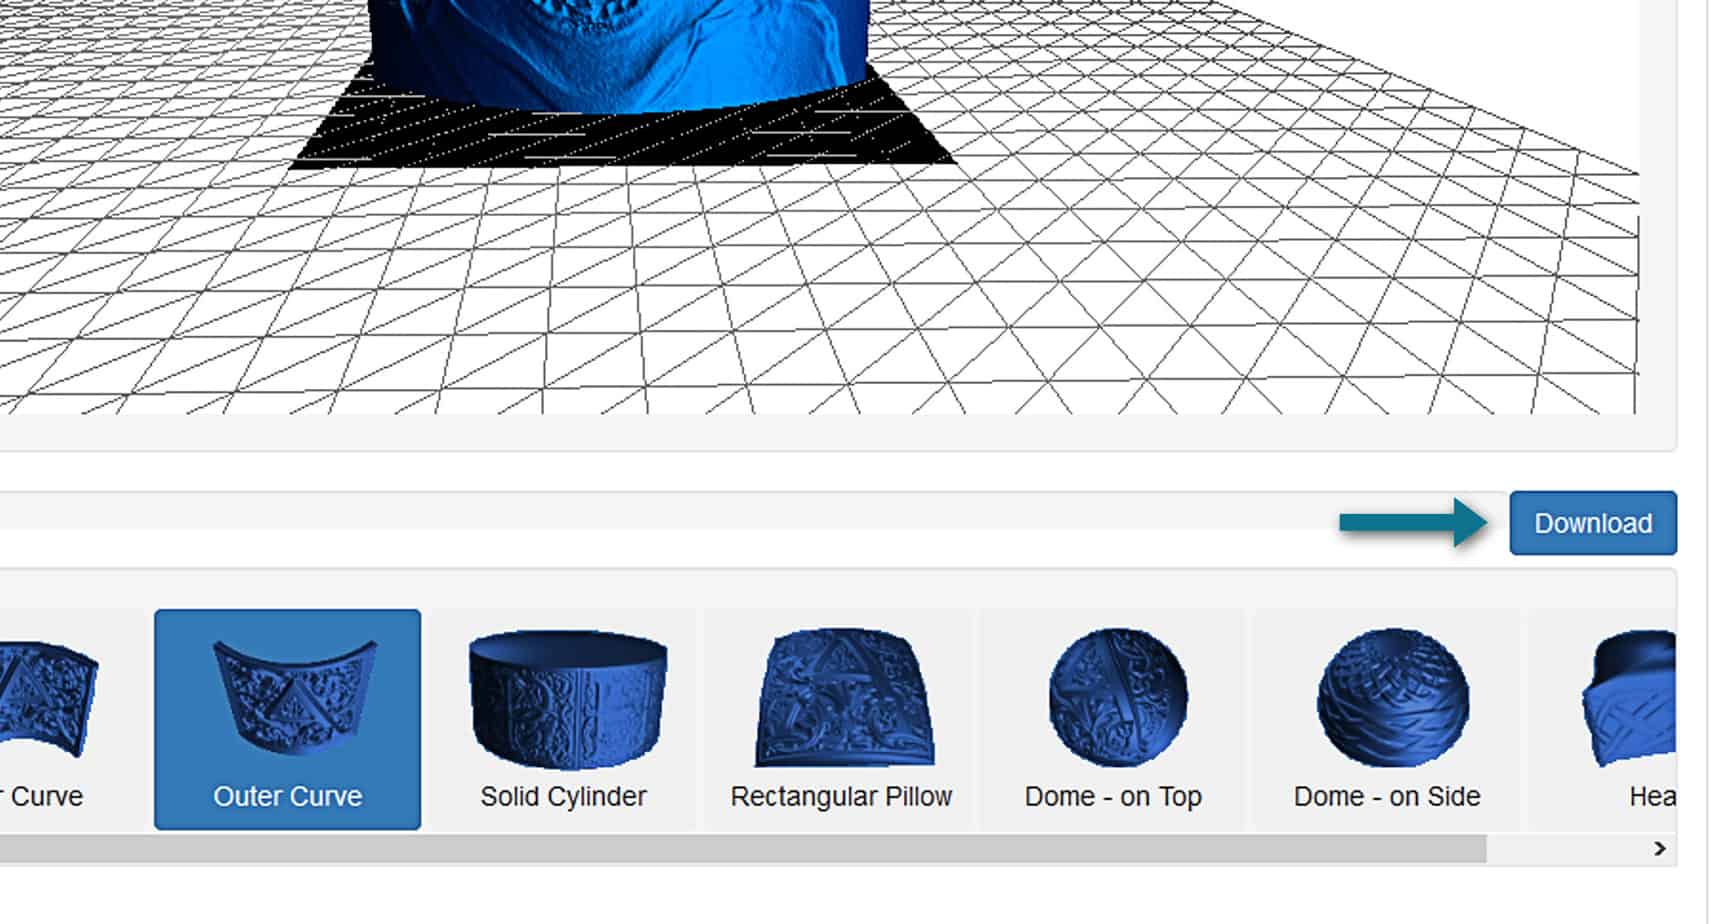
- When you’re happy with the result, choose “Download” and save it to your computer. This will be an STL file.
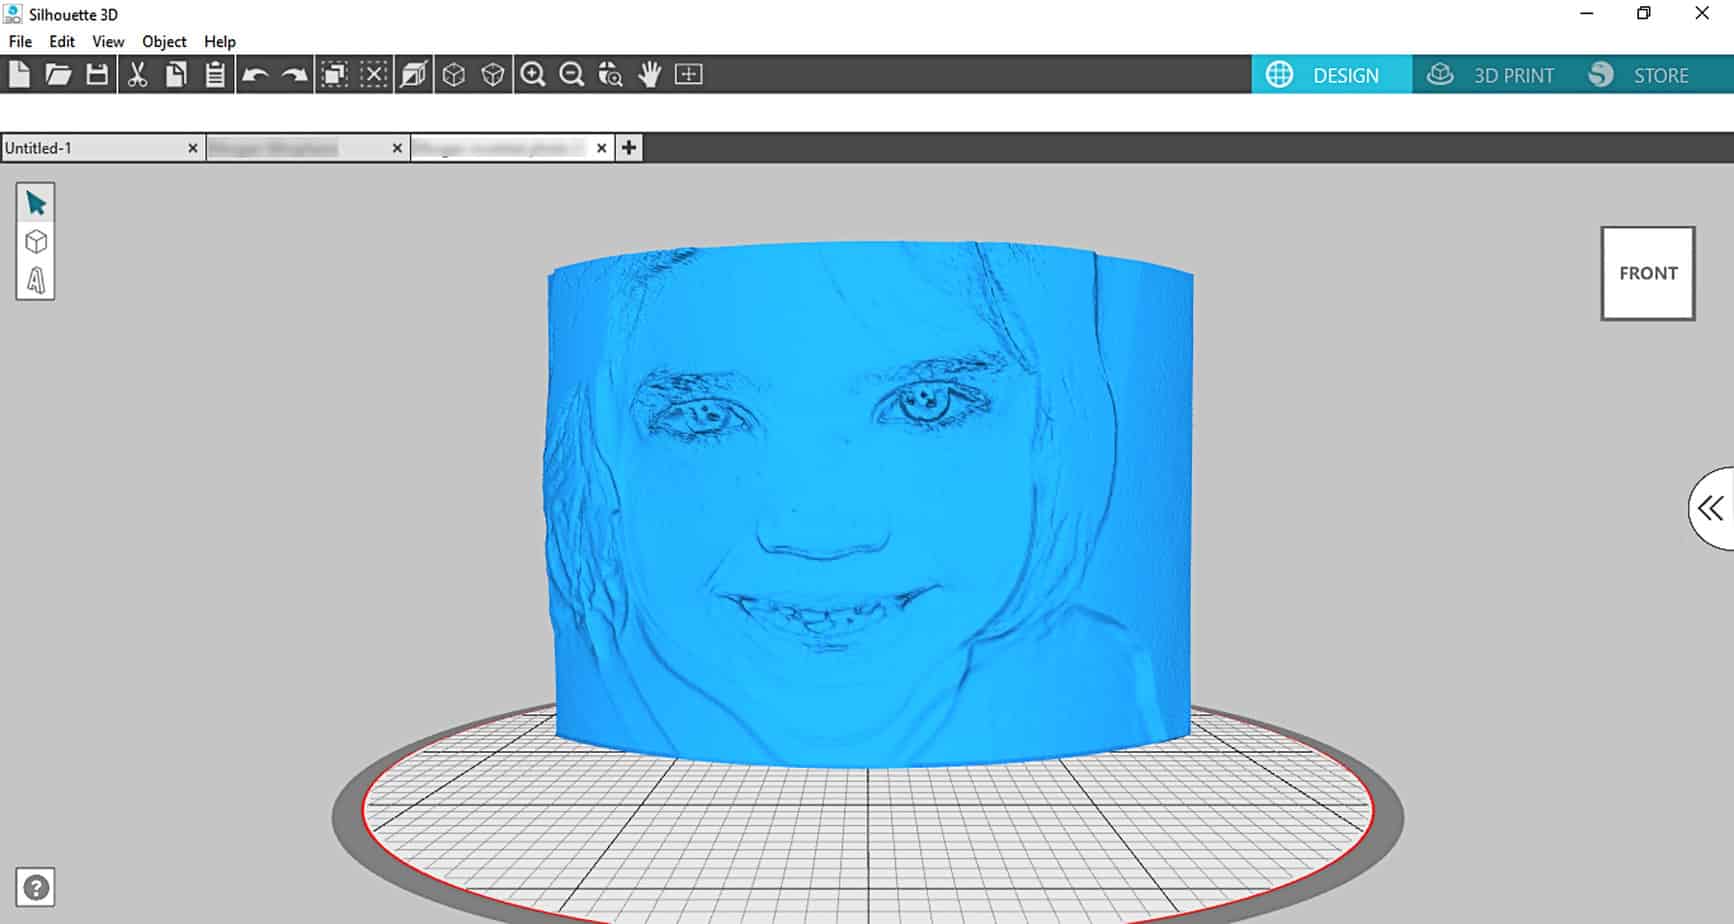
- Open Silhouette 3D and open the downloaded STL file.
- I did not need to resize my shape at all. It opened in a size that will print successfully in S3D.
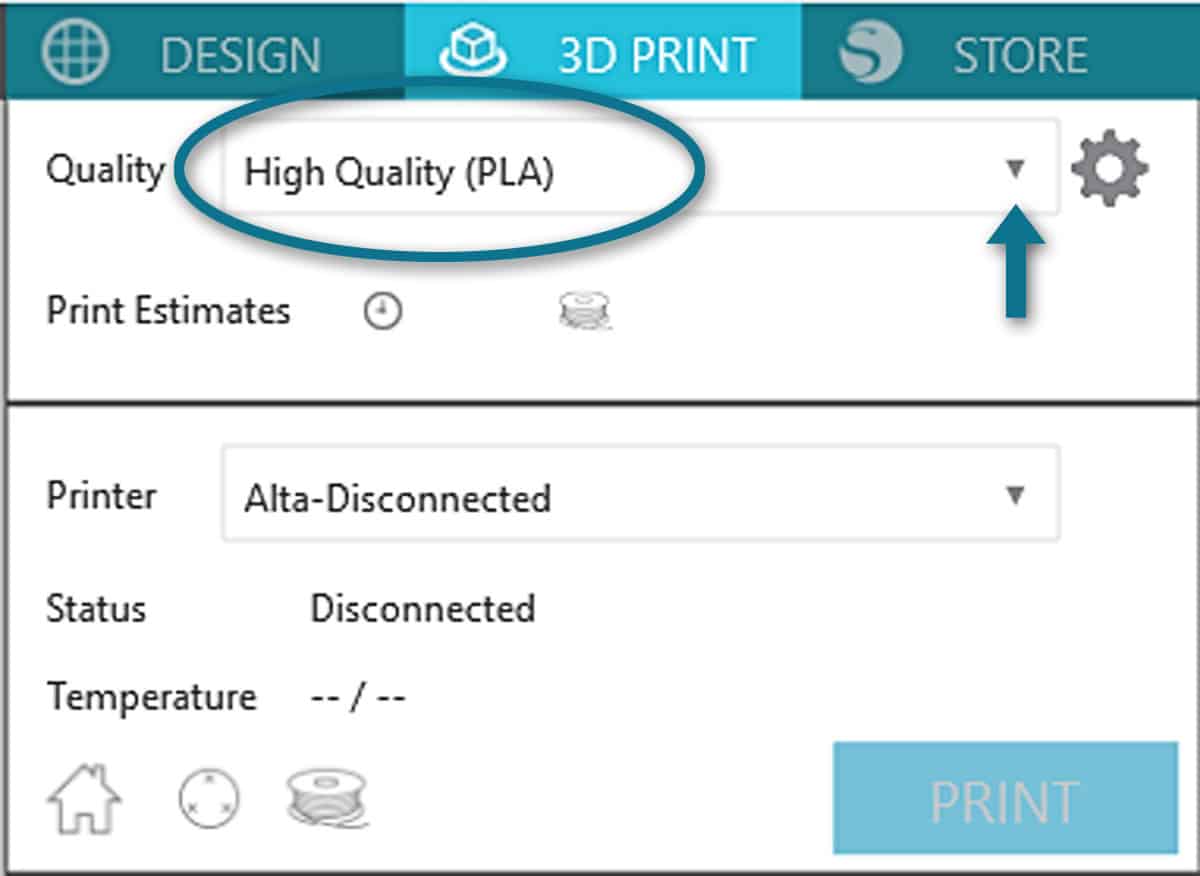
- Go to the 3D Print tab and choose Quality: High Quality (PLA). This gives you maximum infill and a slower speed.
- Load white PLA filament. (It needs to be very light in color so the light can shine through.)
- Calibrate if necessary.
- Click print. This one took about 2 1/2 hours to print.
- I used a small fan on mine with the door open after the first few layers were down. I suspect the print would not be as clean with all the tiny overhangs moving from thin to thick without the fan.
That’s it! It only took a few minutes to create the file, so all the time was spent in the printing. I’ve got other ideas I hope to try with this to customize it even more. Let me know if you have any questions!
For more help working with the Silhouette Alta, watch my free online class or these software video tutorials.
This post may contain affiliate links. Your price is the same, but I may get a small commission when you use my links. Thanks for your support!
