How to Add Foil Quill Accents to Print & Cut Designs

In this video tutorial, I’ll show you how to add foil accents to Print & Cut designs by tracing in Silhouette Studio. I’m using the new We R Memory Keepers Foil Quill tool to add the foil. As a bonus, I’ve included four different ways to fill text so you’re not just drawing the outline. (These fill methods work with more than just text.)
It’s not a short video, but it’s packed with information so you can see the different processes I use, and also watch the Foil Quill in action. I’ve listed a breakdown below the video so you can skip to the part you need. You may want to watch the whole video first before re-visiting specific parts.
Add Foil Accents with Bonus: 4 Ways to Fill Text
- Start from the beginning
- How to Trace to create foil/sketch lines
- Fill Option 1: Line Effects Panel (available soon)
- Fill Option 2: Curio Emboss Panel
- Fill Option 3: Designer Edition Sketch Effects
- Fill Option 4: Internal Offset Workaround
- Cut by Line and tool setup
You should be able to adapt these instructions to other Print & Cut designs. Please let me know if you have any questions!
For more help with Tracing in Silhouette Studio, please watch this video.
Purchase tools I used in the video here:
- Silhouette CAMEO 3 (use code TIME2 through 5/12/19 for bundle deal)
- We R Memory Keepers Foil Quill all-in-one bundle (all 3 tips + foil + tape)
- We R Memory Keepers Foil Quill standard tip (most versatile if you’re only getting one)
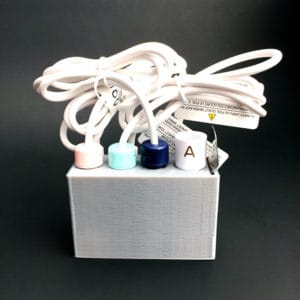
Free 3D Printer .stl file: Holder for 3 Foil Quill tips + Silhouette adapter + heat plate — DOWNLOAD HERE (my design)
Disclaimer: Using the Foil Quill in your Silhouette machine may void the warranty. I’m only using it in my machines that are out of their one-year warranty period. While I don’t expect the Foil Quill to cause issues, any non-Silhouette tools have the potential to cause problems with heavy use or over long periods of time. Do so at your own risk.

Thank you! You have covered so many how-tos with this tutorial in such a clear understandable way.
I’m so glad you found it helpful! 🙂
Finished my Mother’s Day card with foiling today. Thank Kelly for a wonderful video on how to do this technique on my Silhouette. Your instructions were very clear. I am very excited with my finished project and what you have taught me in this tutorial. I have gained a lot of knowledge that I will now be able to use on future projects. With much appreciation.
I’m happy to hear it!
Thanks so much for the video it really helped me and was able to print and cut plus foil easily because of it.
Marie
You’re welcome, Marie! I’m glad it helped. 🙂
Hi Kelly, I have just followed your tutorial of the foiling of the flower design. I followed everything as you said in the tutorial but for some reason, my foiling is not lining up with the printed design. Any help appreciated.
It sounds like you may be running into some typical print & cut problems. Are your cuts accurate when you do a print & cut without foil? There are things to check, like make sure your page size on the Silhouette Studio document matches the page size your printer is set to print, avoid glossy paper, etc. Here’s a video on Print & Cut Troubleshooting https://youtu.be/1Oi-t5tGVJA You may also want to go through this list on Silhouette’s site for Print & Cut troubleshooting. https://www.silhouetteamerica.com/faq/solution/print-and-cut-registration-failure-or-cutting-off
If it’s off in the same amount and same area all the time, you may need to calibrate your machine.