Felt Projects with Silhouette Tips & Tricks
I have wanted to try some felt crafts for a while, and I finally did it! Thanks to this felt stuffie mini course and awesome felt animal designs from the Lia Griffith team, my first two felt stuffies were a success! I want to show off pictures of my felt projects, plus give Silhouette users some tips and tricks.
I include affiliate links throughout the post so you know exactly which products I’m using.
Do I Need a Cameo 4?
The first question is, do you need a Silhouette Cameo 4 to cut felt? The answer to that is yes and no. If you want to cut felt or fabric directly with a Silhouette cutting machine, you do need a Cameo 4 and the rotary blade. However, I don’t recommend using the rotary blade for felt stuffies. The pieces need to be very accurate to match up and get the precise shape you want. You also can’t afford to have any extra slices in the felt where they don’t belong. Your best bet is to use sharp scissors to cut your designs.
The rotary blade has some limitations, especially when cutting small details. Here’s a rotary blade guide you may find helpful.
Keep reading for tips on how to use any model of Cameo or Portrait to assist you in cutting felt.
Can I Use Cheap Felt?
The local craft stores are full of inexpensive felt pieces, so can you use this inexpensive felt for making stuffies? I do not recommend the cheap synthetic felt for anything that needs to be stitched and stuffed. There are uses for the cheap felt, like if it’s going to be used as a single layer, but the texture and density are pretty inferior for high-quality crafts.
I used this beautiful wool blend felt from Lia Griffith. It comes in pretty colors, it feels substantial, and it will hold the hand stitching even when lightly stretched with stuffing. If you want to try the cheap craft store felt before purchasing the nice stuff, go ahead and try it.
Cutting Felt with a Silhouette Portrait or Older Cameo
But don’t abandon your Silhouette machine entirely for felt crafts! You can still save steps and increase the accuracy of your cuts by using your Silhouette machine. Here’s how:
1- Use the SVG file to maximize your felt by sketching on coated freezer paper.
If you’re using a Lia Griffith pattern (or other SVG design), you can open the SVG directly in Silhouette Studio Designer Edition or higher.
2- Set your Page Setup to match your felt and/or freezer paper size. I used the 12″ x 18″ felt sheets, so I used my 12″ x 24″ mat to fit it all at once. I trimmed my freezer paper to 12″ x 18″ (from an 18″ wide roll) to match the felt and input 12″ x 18″ as my media size.
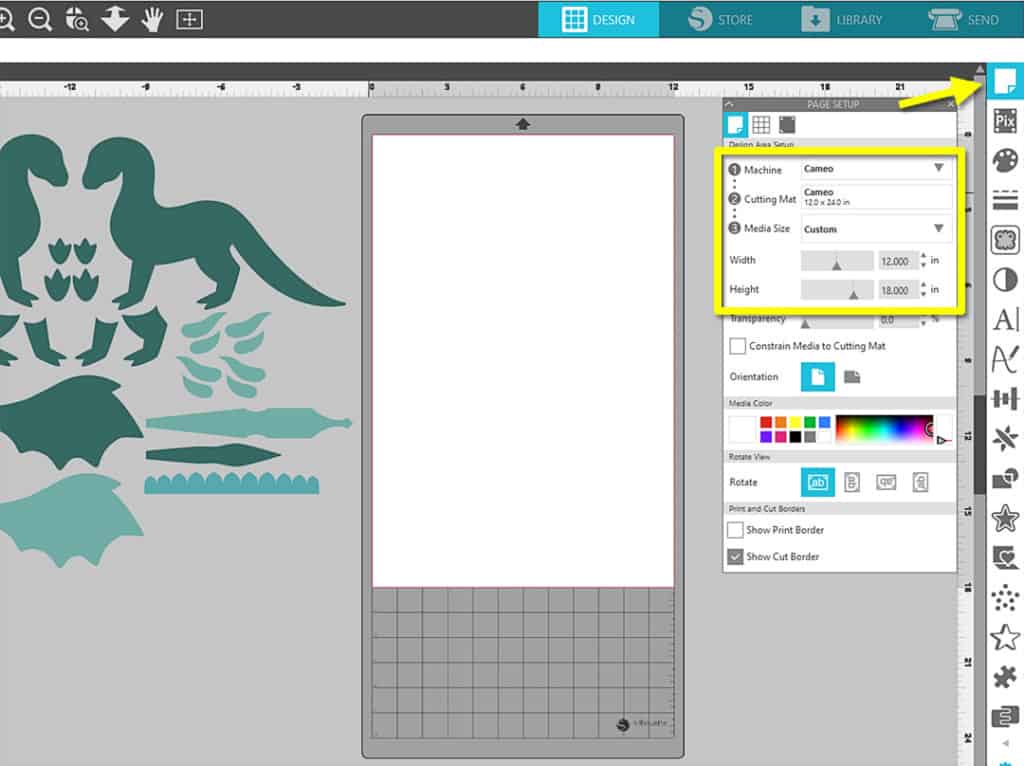
3- Rearrange the pieces to fit on your freezer paper, leaving some room between shapes for cutting with scissors. I suggest working with one color at a time. With some careful rotation and maneuvering, you can pack a lot of pieces in a small space and conserve your felt.
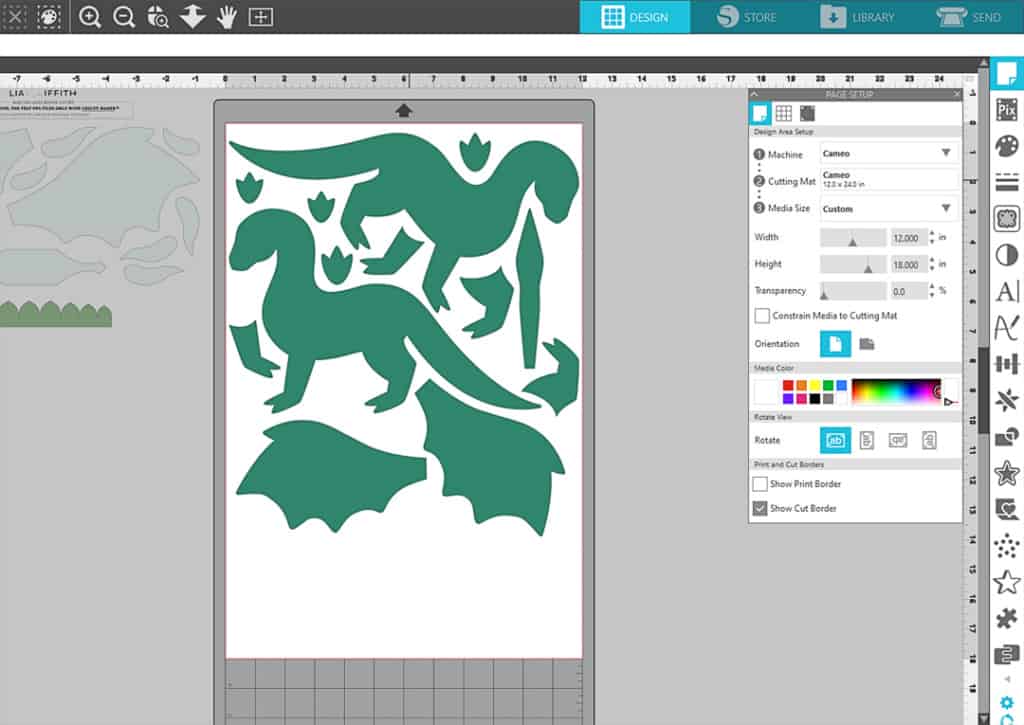
Tip: Sometimes the SVG pieces are ungrouped, but if they are stuck together and using “Ungroup” doesn’t separate them, then select the design, right click, and choose “Release Compound Path”.
4- In the Send Panel, set it up to sketch. Either select “Pen” as your tool and “Sketch” as your action (for older machines with no auto tool-detection), or let your Cameo 4 or Portrait 3 auto detect a sketch pen or pen holder as you place it in your machine.
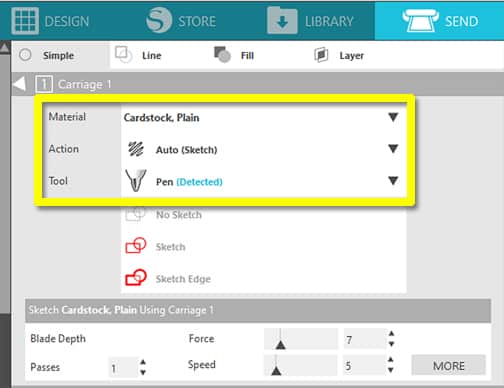
I used a Sharpie Ultra Fine marker in my Cameo 4 pen holder, but you can probably use a regular sketch pen or other favorite pen in your pen holder.
The default settings for any paper (such as “Cardstock, Plain”) are usually fine for sketching on freezer paper.
5- Place the freezer paper on your cutting mat glossy-side down (paper side up), and load it before sending to sketch.
Tip: I like to support the mat in the front of my machine with the cardboard tube from an empty vinyl roll. This results in less stray sketch marks, if that’s a problem for you. Strays aren’t a big deal for the freezer paper, though, because it’s disposable.
This video clip shows me using my Cameo Pro, but the 12″ x 24″ mat also works in any standard size Cameo machine. To use a Portrait, you will have to cut your freezer paper smaller to fit your mat.
6- Remove the freezer paper from the mat and set it on your felt piece, sketched/paper-side up. (You can trim off excess clean paper to save for other felt-sketching templates.)
7- Use a hot iron to fuse the freezer paper’s glossy coated side to the felt sheet. Iron directly on the sketched paper side. It does not take long (just a couple seconds), so don’t burn your felt. You can always add another swipe with the iron if it doesn’t seem to be sticking well enough.
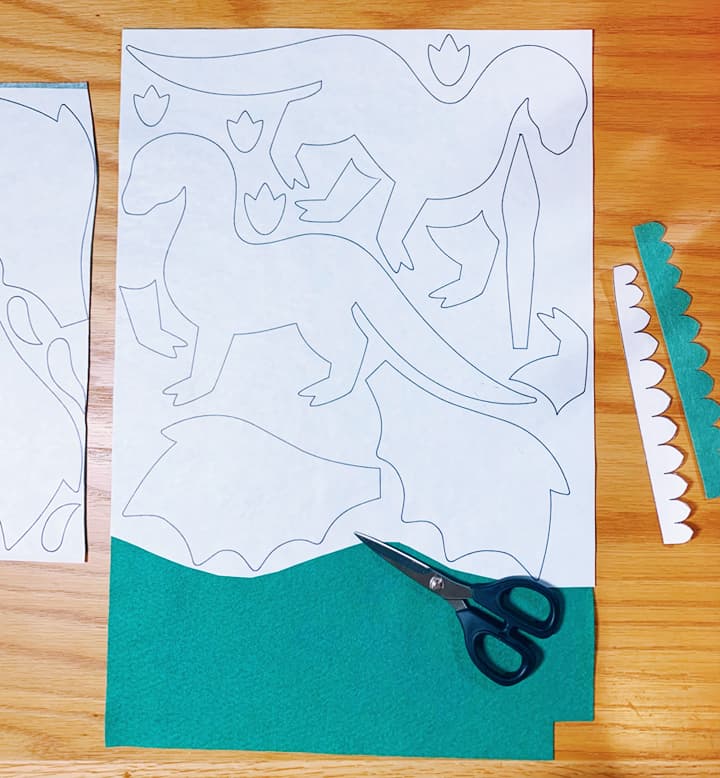
8- Use sharp scissors to cut the felt along the sketched lines. The freezer paper peels easily off the felt. I’ve heard you can re-use the freezer paper template — just iron it again to more felt.
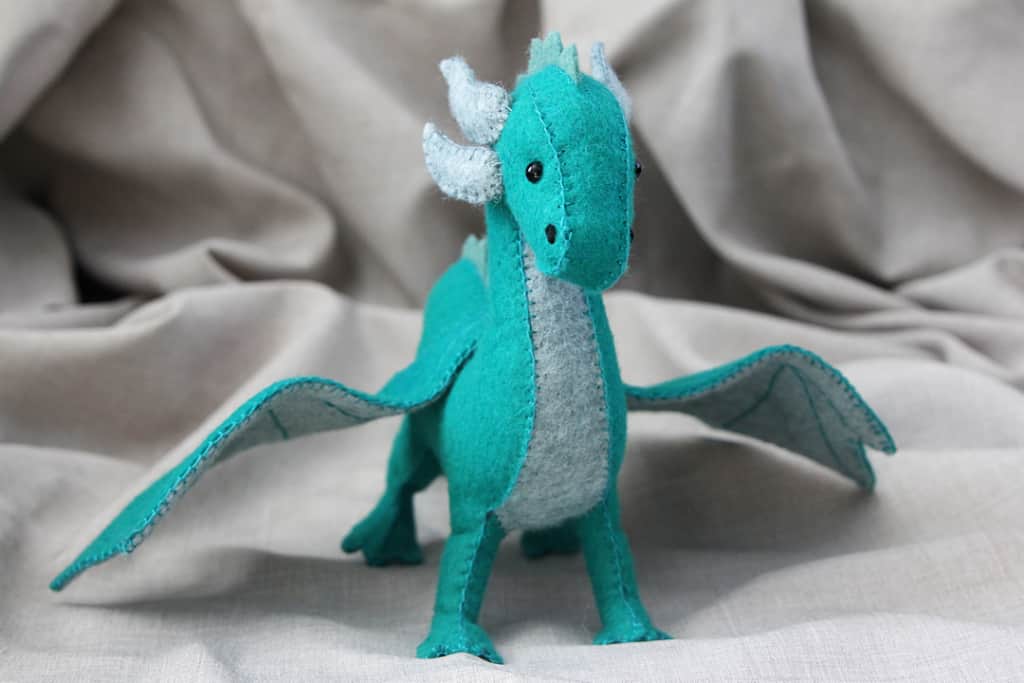
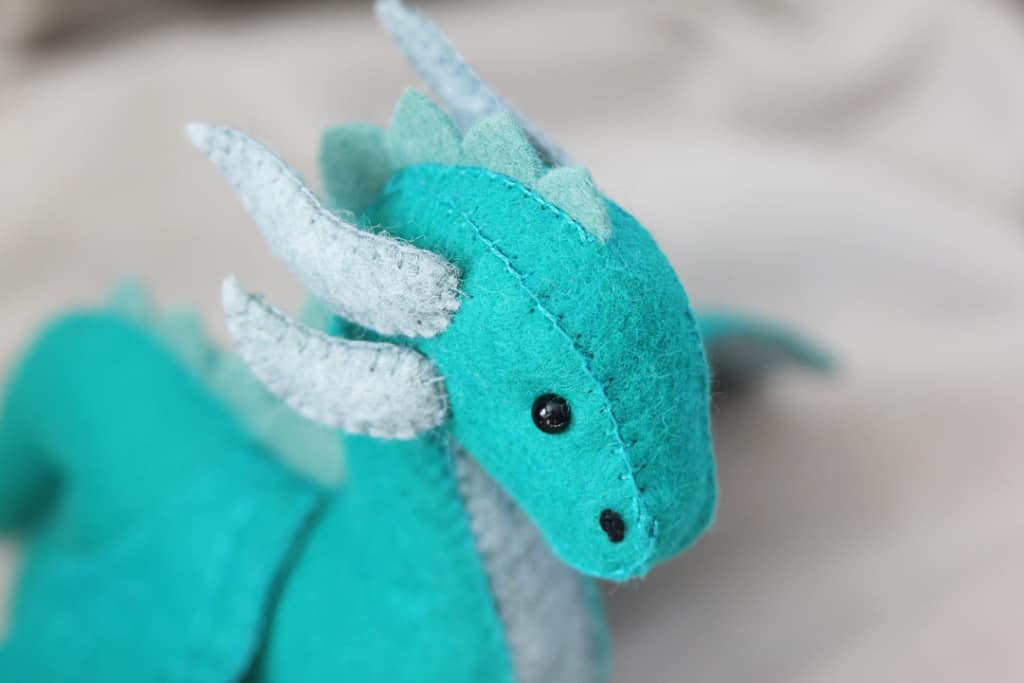
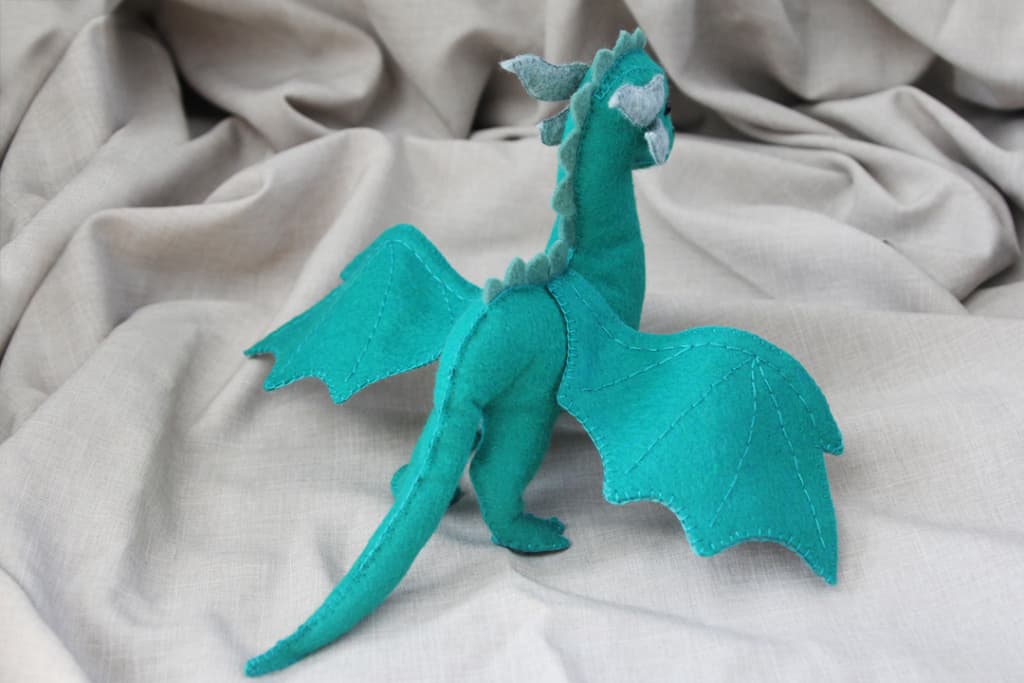
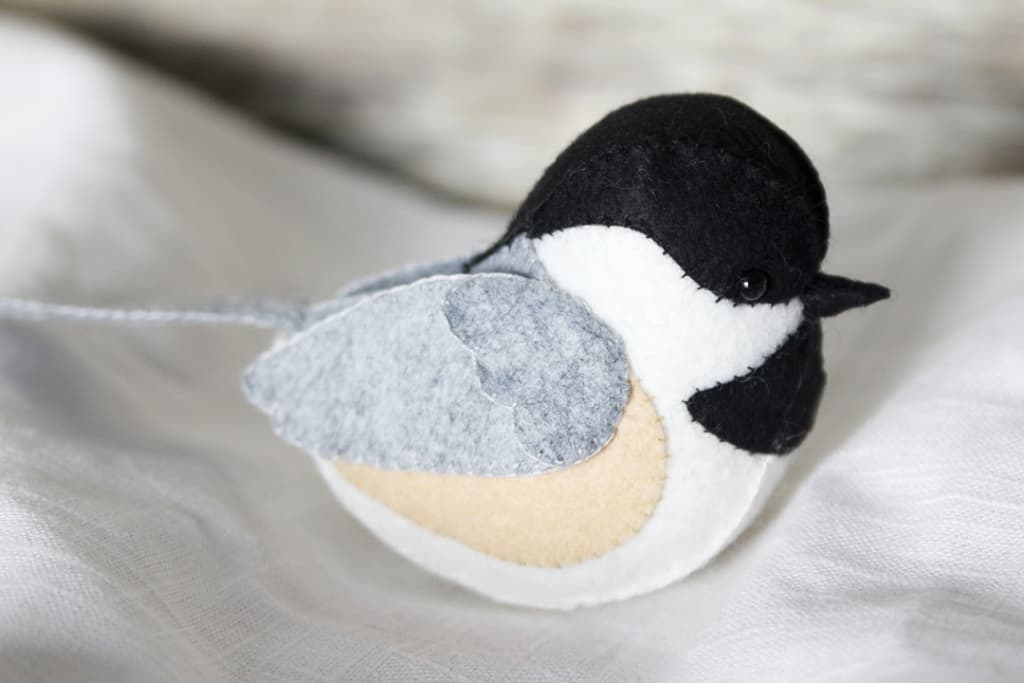
Note: I used the recommended colors for the chickadee, but for the dragon I substituted Sea Green for Malachite on the body, and Spruce instead of Dewey on the spine.
Sewing Tips
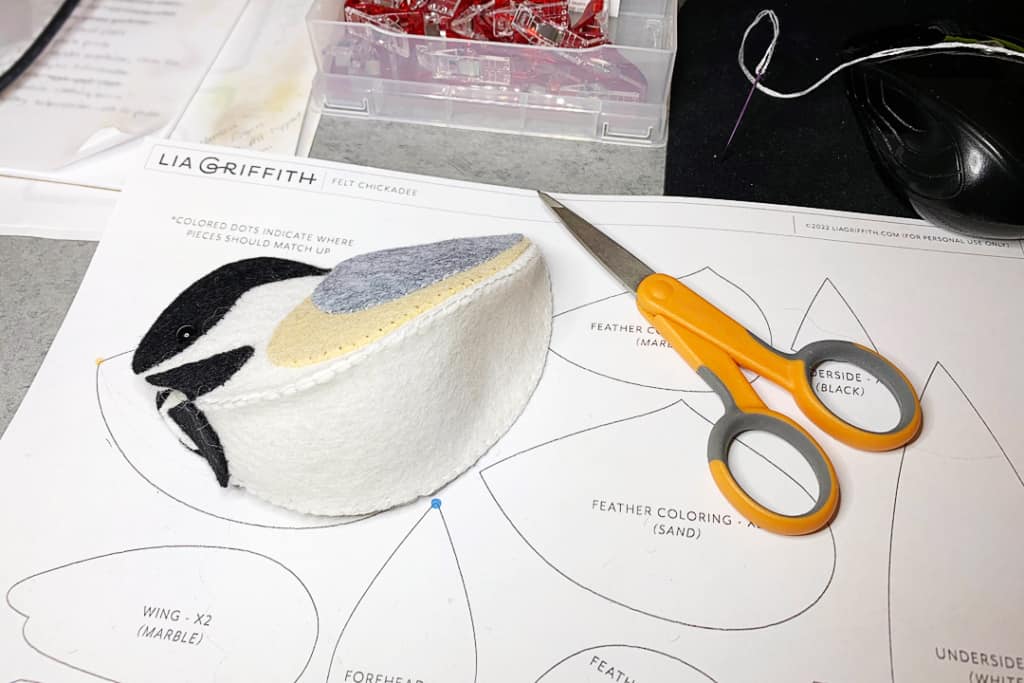
I don’t have much more to add to what Lia Griffith teaches in her felt stuffie mini course. I will say I use the photo tutorial for my primary reference, but make sure to read the fine details in the written PDF tutorial. The PDF tutorial provides more tips (like thread color and number of strands) than what are included in just the photo tutorial.
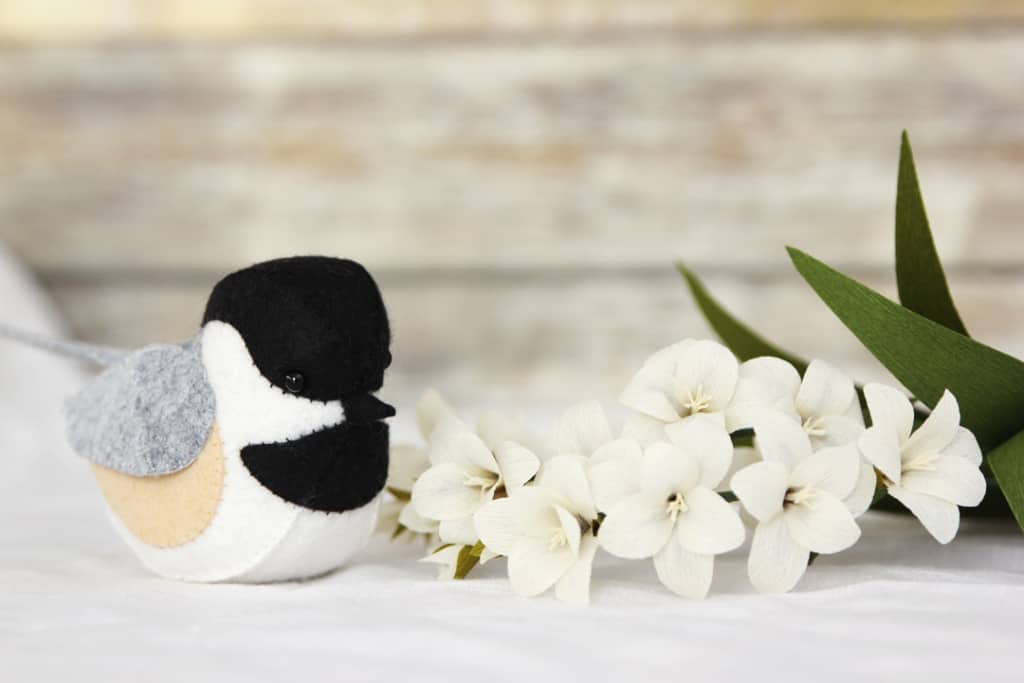
If you’ve never made a felt stuffie before, I recommend this chickadee, or another project on Lia’s site listed as “beginner”. The dragon is not a beginner project.
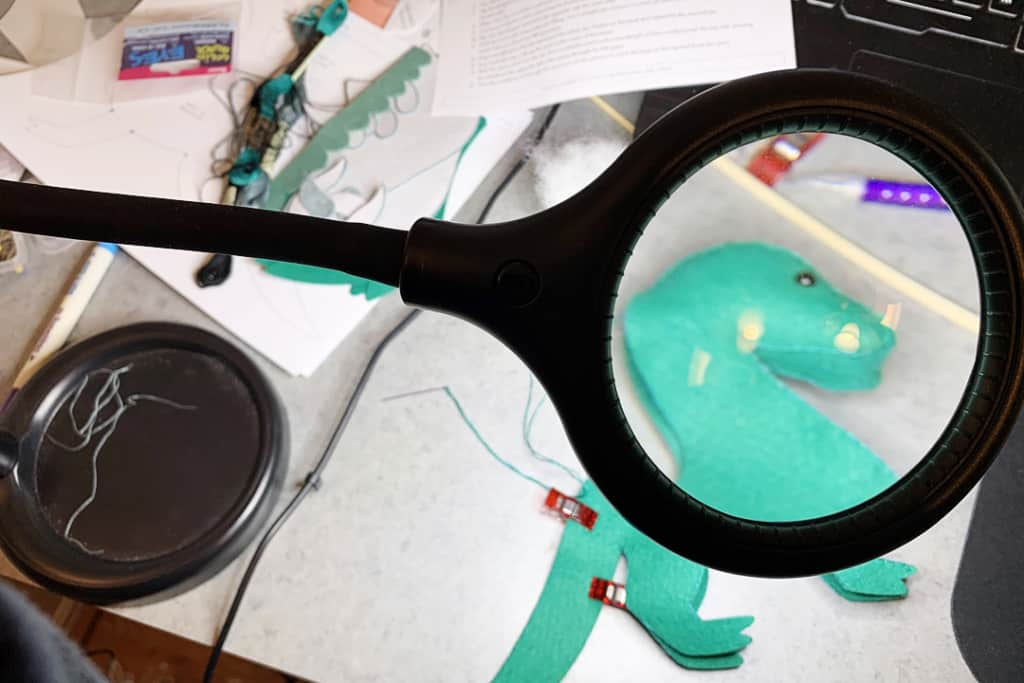
For the dragon spine, I could not figure out how to do a blanket stitch while inserting the spine, so I finally had to get help on YouTube. Here’s the video that helped me. It’s not amazing, but it helped me figure out that I was only going to see the blanket stitch on one side of the spine. And that the needle gets poked through the spine from the back, just above the body.
You may also find this embroidery stitch guide to be helpful, especially when creating special stitched details.
My last sewing tip is to get a magnifier lamp if your eyesight is getting worse as you age, like mine! This really reduced my eye strain, even though I typically wear reading glasses when I craft these days.
I hope you find these tips and tricks helpful! Let me know if you have any questions.

List of References and Supplies
- Lia Griffith membership for full access to all her designs and classes
- Felt Stuffie Mini Course
- Embroidery Stitch Guide
- Lia Griffith wool blend felt
- Sharp detail scissors
- Embroidery floss
- Embroidery needles
- Pen holder for Cameo 4 / Portrait 3
- Pen holder for Cameo 1-3 / Portrait 1-2
- 12″ x 24″ Cameo cutting mat
- Chickadee felt stuffie
- Dragon felt stuffie
Read my thoughts on Lia Griffith’s Crepe Paper Masterclass and her Frosted Paper Masterclass

This post contains affiliate links. Your price is the same, but I may receive a small commission when you use my links. Thanks for your support!

Kelly,
These are so cute! I especially like the flying dragon. You have so much patience to do these things! Bless you!
Thank you, Julie!