Floral Wreath with Paper Flowers
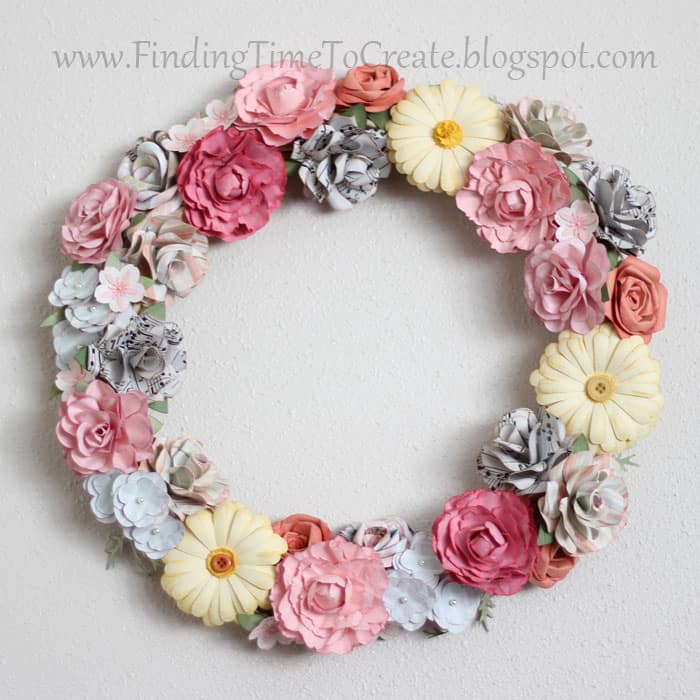
Here it is! I can’t tell you how long I spent on this project because I’ve been thinking about it for a couple of months, collecting ideas and watching/reading tutorials, and gathering flower files. The actual cutting and assembling I spread across a couple of weeks. Inking and shaping was easy to do while watching movies in the evenings.
I’m not going to give a full tutorial on each flower, but I will give some tips and direct you to the files I used for cutting, along with links to others’ tutorials at the end. It’s not a quick project, but it’s worth the effort!
First I made a bunch of flowers:
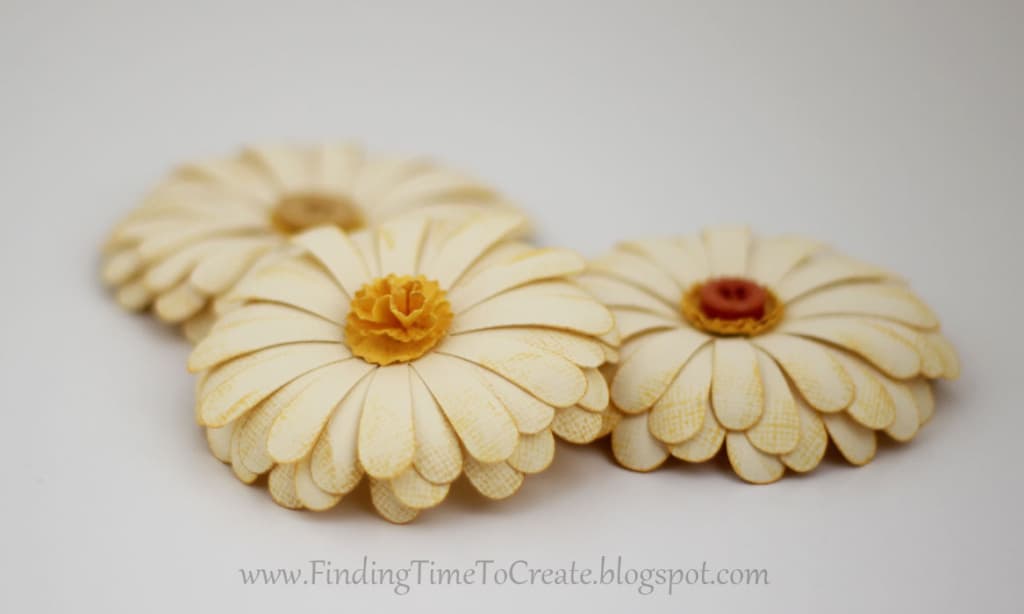
Daisies
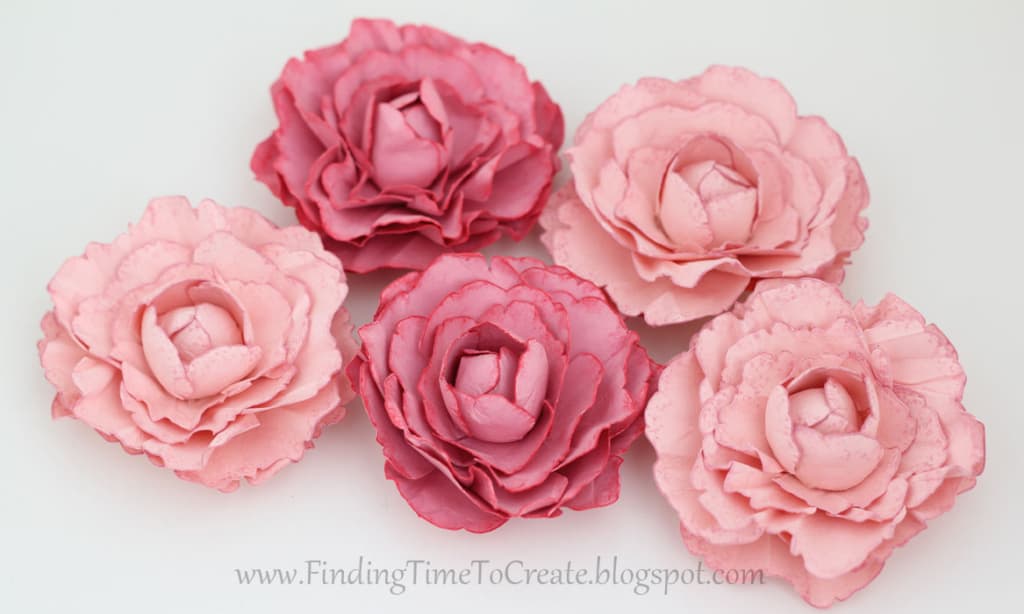
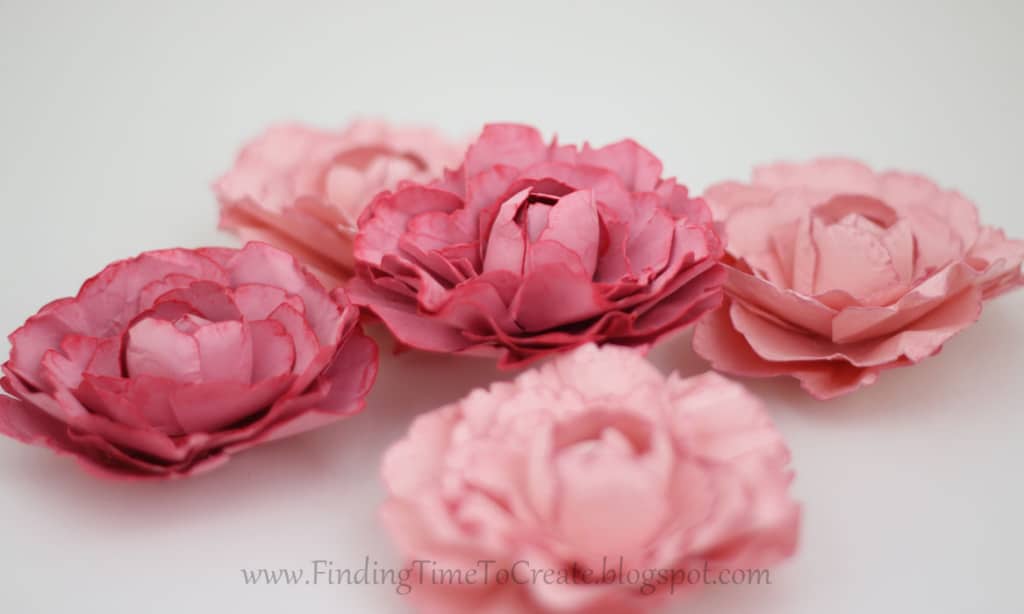
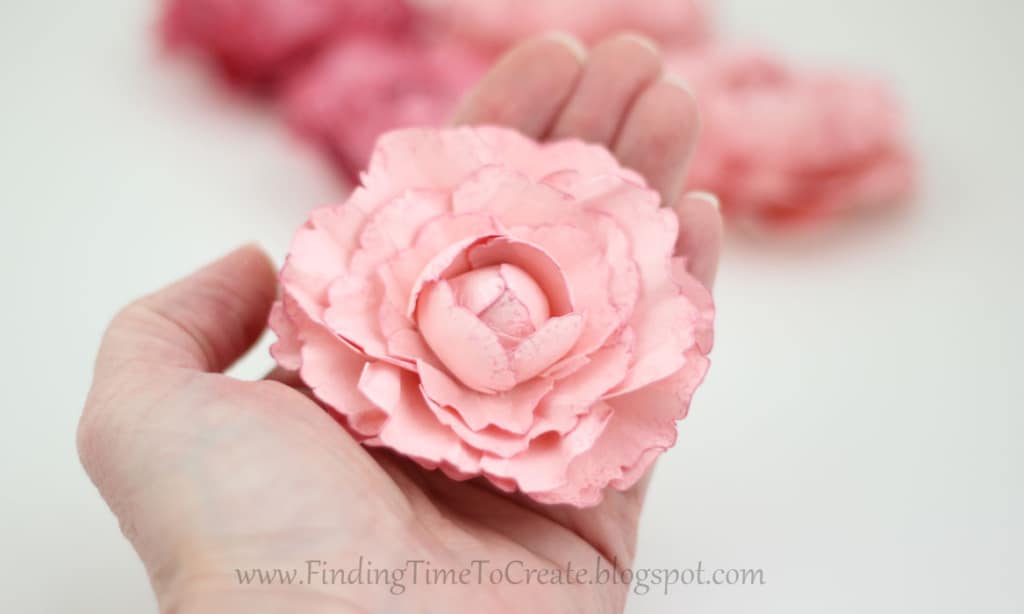
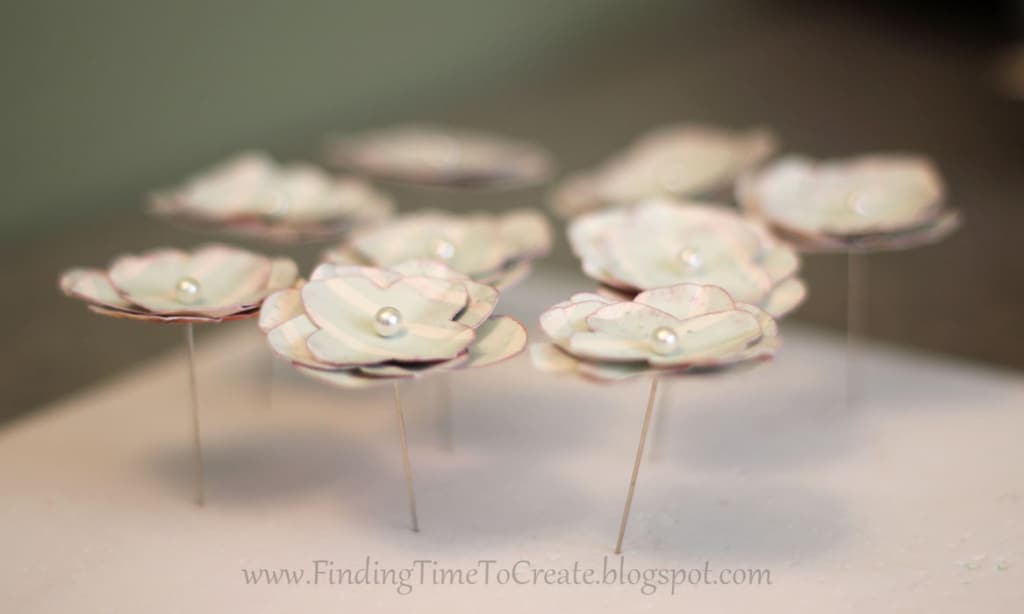
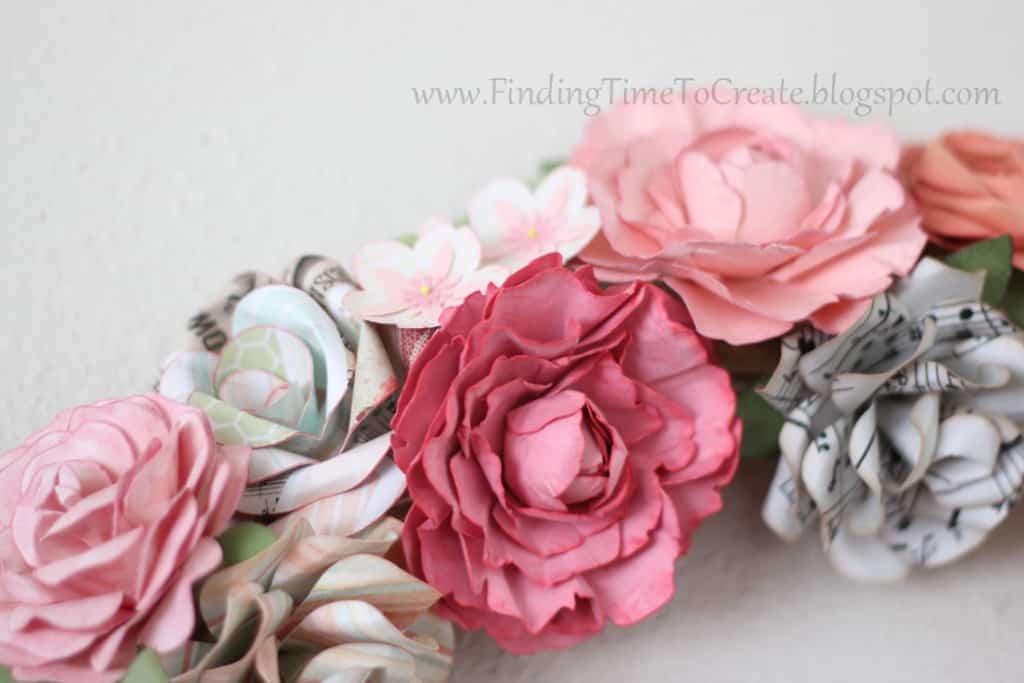
Peonies (can you tell I’m really proud of these?)
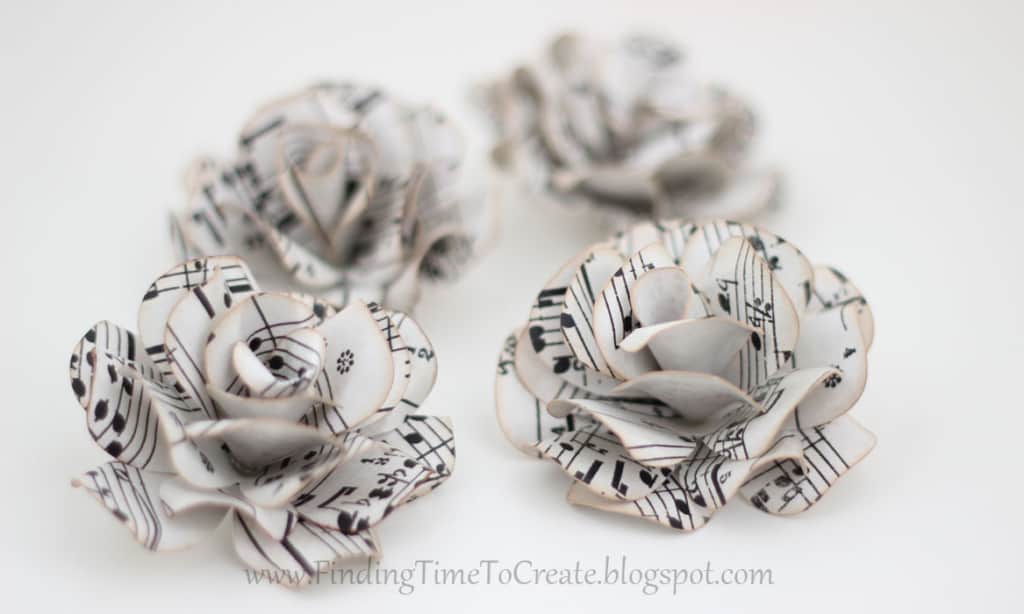
Roses by Ellinee

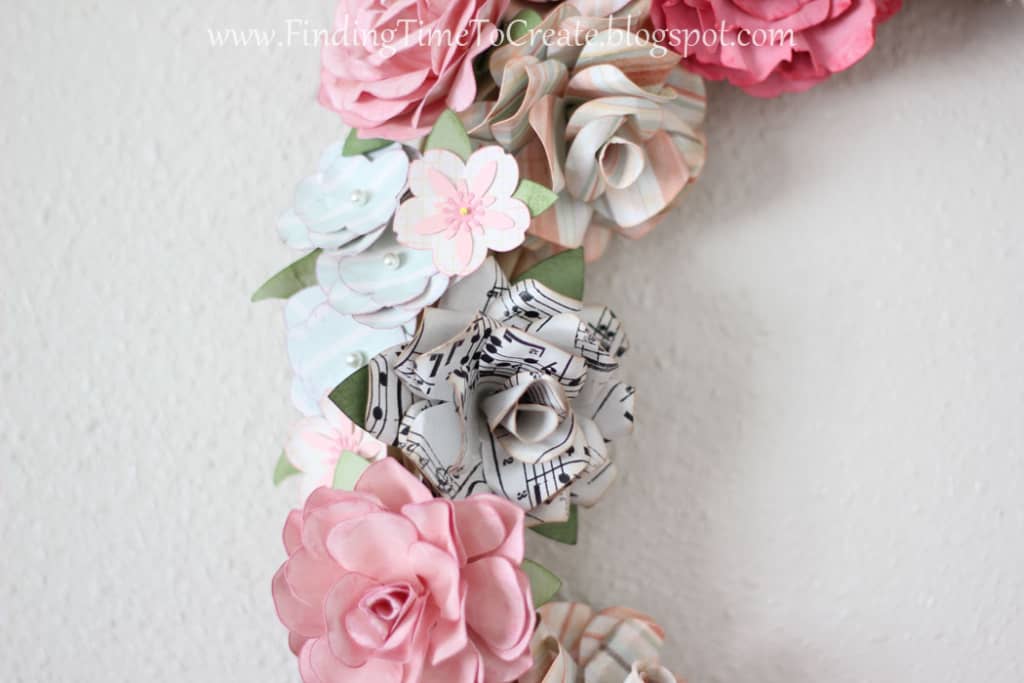
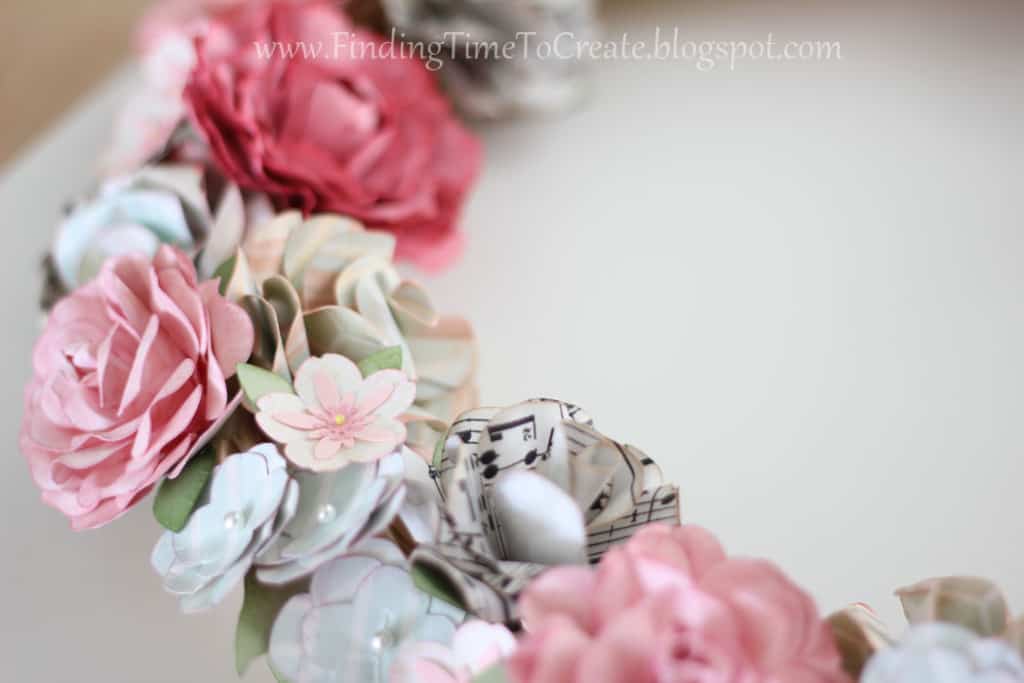
Hydrangeas
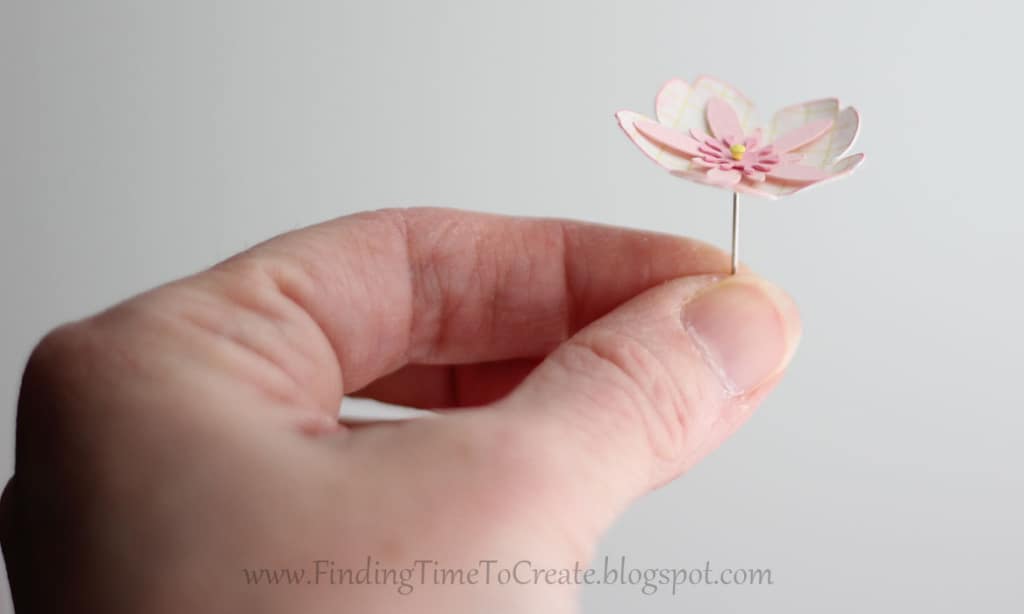
Cherry Blossoms

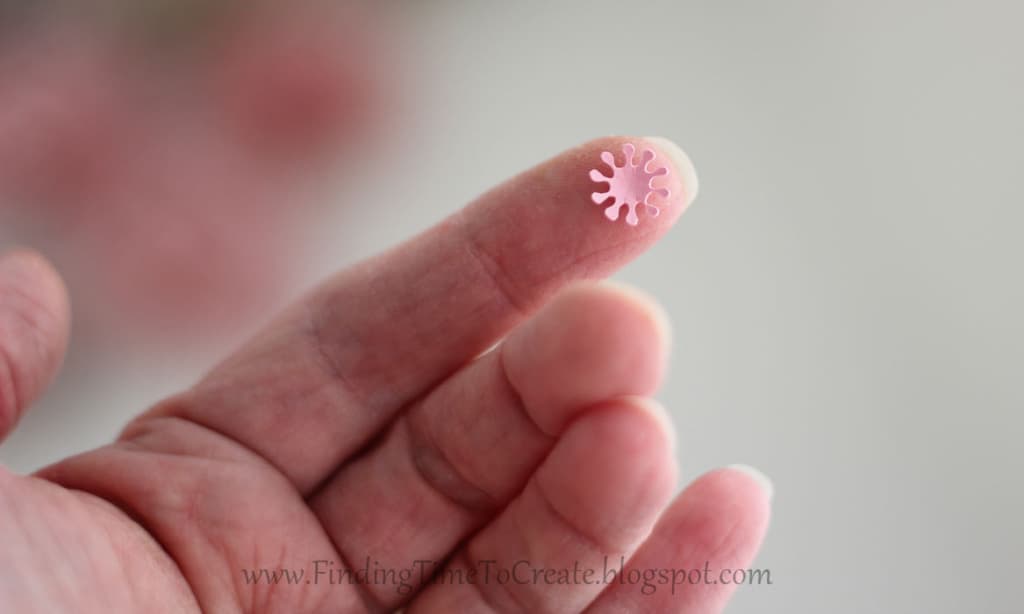
(I just had to include this last photo. Look how tiny my Cameo cut these centers for the blossoms! I didn’t realize how small they would be until I unloaded the paper and saw 16 perfectly cut little flower centers. My Cameo really loves Bazzill Smoothies cardstock, apparently.)
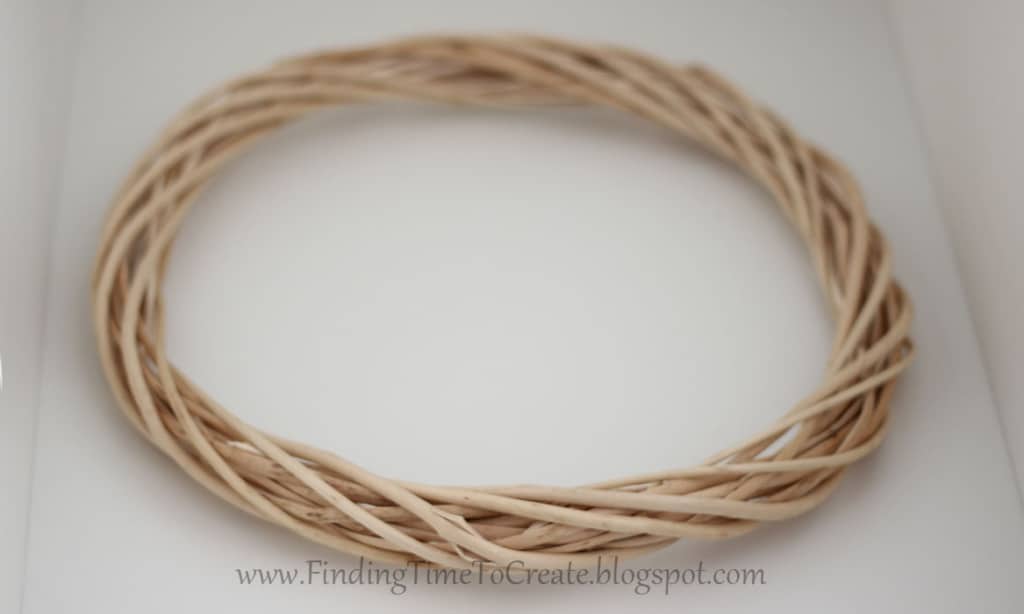
I bought a 13″ willow wreath from my local Dollar Tree Store. Since most of it will be covered, you can use whatever kind of wreath you can find (grapevine, styrofoam, even make your own by taping rolled paper into a wreath shape). You can make this as full as you want by adding more flowers, or fill in the gaps with leaves. The shape was a little skewed, but I just compensated as I added flowers to make it look round again.
I made 28 large flowers (peonies, daisies, roses) and 25 small flowers (hydrangeas, cherry blossoms). I had a few left over, but not many. I also made plenty of leaves from two shades of green cardstock.
The daisies I cut from Bazzill “Chiffon” cardstock using the free Silhouette file flower ID# 16697. I made three sizes and layered a couple of each size. The centers are from another flower shape’s center, 3d 6-petal flower. I added buttons to a couple of them.
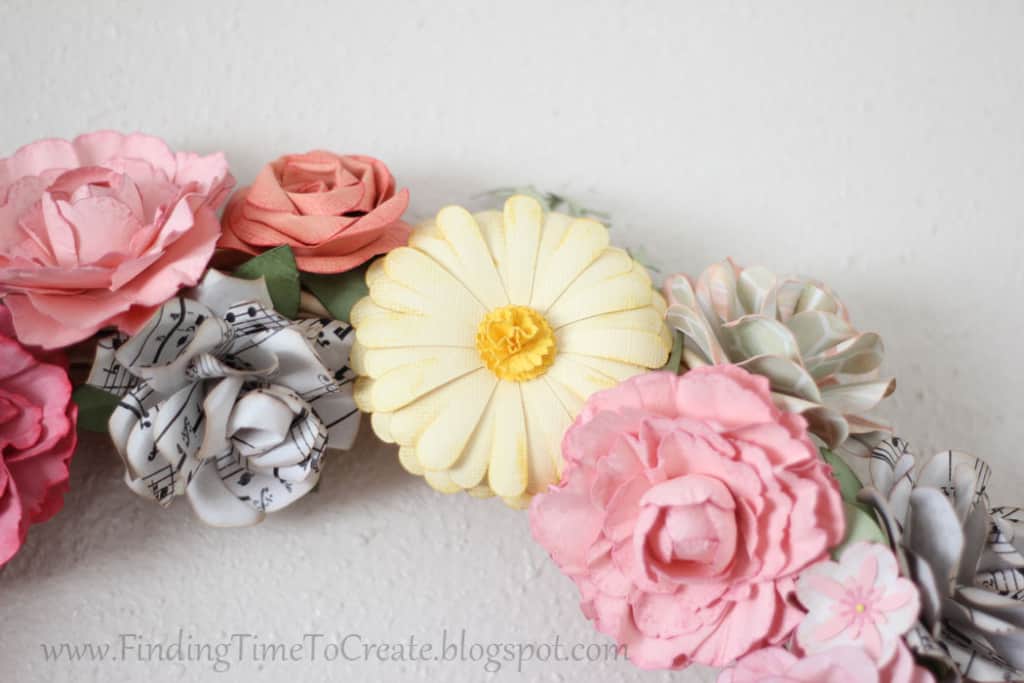
The peonies I created in Studio, and you can download the Studio file here. I used “Strawberry Splash” Bazzill Smoothies for the darker pink and another light pink cardstock.
The top two roses above are from a beautiful free rose PDF file by Ellinee. I opened the PDF in Photoshop Elements, erased the background, saved it as a PNG, then opened and traced the pieces in Silhouette Studio. The music-note paper and striped paper are from My Mind’s Eye “Follow Your Heart” collection.
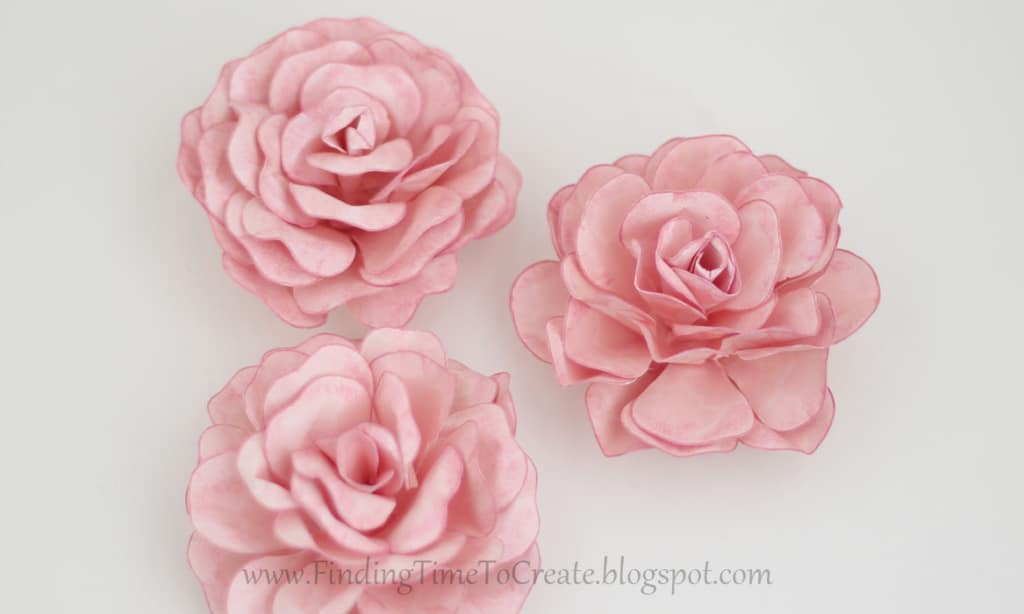
The pink roses are cut from Echo Park “Style Essentials” Lt. Pink pattern paper. This was sort of my design, edited from my friend Debbie’s cutting file. I took the shapes she provided and welded them in the center so they would be easier to assemble. I glued four individual petals for the tight center, four individual petals to surround the center bud, and four layers of the welded flowers for the outer petals. Here is the cutting file. You really could make the whole wreath with these roses, they’re so easy!
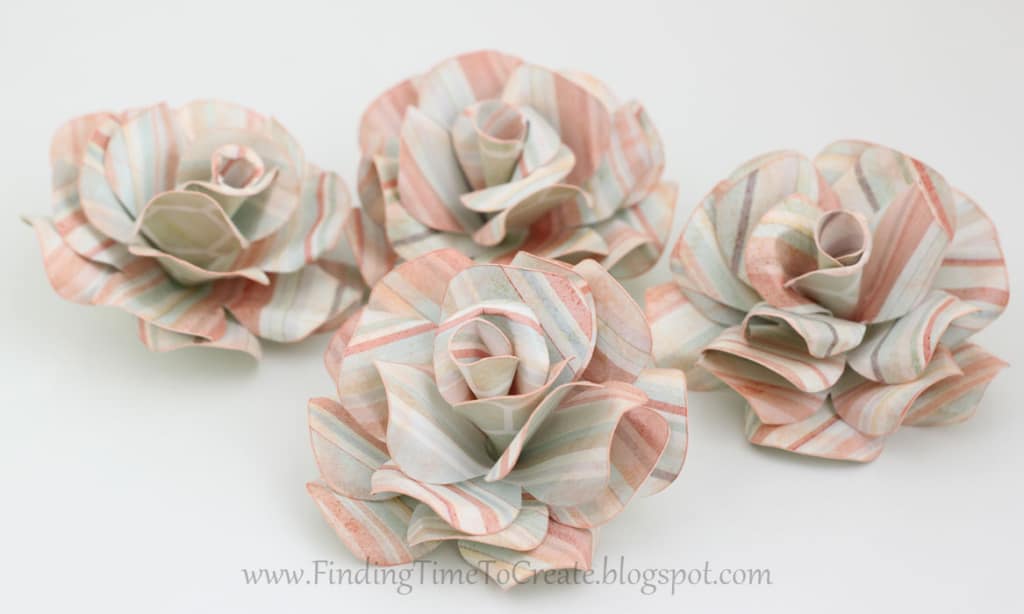
Next are the rolled roses. This was a freebie Silhouette shape a few weeks ago, which you can get here if you don’t already have it. I made four roses at the default size on My Mind’s Eye “Follow Your Heart” paper and four smaller light-orange roses with Bazzill “Arizona” cardstock. I made them smaller so I could fit 5 on a 12×12 paper instead of 4, but I really couldn’t see a big difference in the finished size. The technique I mostly closely followed is shared here by Lisa Barrie.
The hydrangea shape is here on the Silhouette Store. The cherry blossom shape is here on the Silhouette Store. I resized both to make them about an inch or so in size and cut them also from My Mind’s Eye “Follow Your Heart” pattern papers. I used a pearlized-top stick pin for the hydrangeas and I dipped the head of a regular straight pin in yellow acrylic paint for the cherry blossom centers.
For shaping the flowers, I used the Paper Blossom Tool Kit by McGill. The tweezers are great for the rolled roses. My tweezers broke, but I was able to get a replacement pair from McGill and I’m happy again! The largest McGill stylus is great for most of the shaping. Just having a large round-ended tool is helpful (I used the rounded cap of a gel pen before getting this tool kit, and I know people who are using their cake-decorating tools for these paper flowers). Actually, my most-used tool was a pointed wooden skewer stick. The biggest key is misting your flowers with water so they are soft and pliable while you work. Then, even your fingers work great for shaping. I didn’t even let everything dry completely before gluing the pieces, in many cases.
I used a low-temp glue gun throughout the process and was very glad I did. It took a while for some of the glue to set when using large amounts, but I got plenty of glue on my fingers and never got burned.
Once I got all the large flowers glued on, I was able to see where the gaps were and I added the smaller flowers and “greenery” for a more realistic effect. The leaves came from the cherry blossom file, my rose file I’m sharing, and a pine branch file by Doodling Debbie.
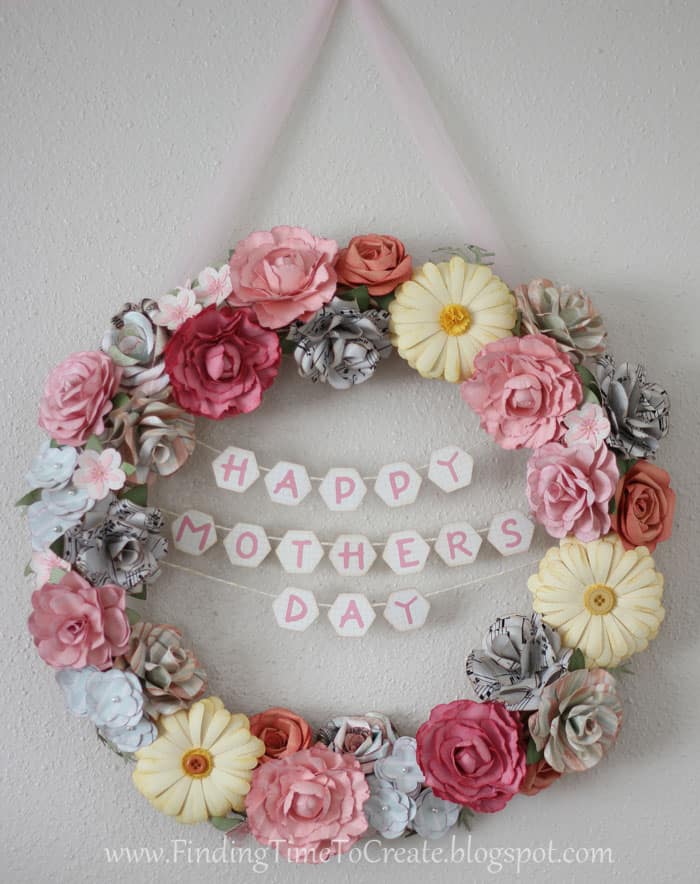
And finally, I turned this into a Mother’s Day wreath by cutting hexagon shapes and adding letters for a banner. I actually just taped the baker’s twine to the back of each hexagon with clear tape so it was easier to position. Here’s a view of the back, just so you can see a little of the mechanics. Here’s my hexagon cutting file for you.

And the finished product:
Here are a few more tutorials that are helpful for making paper flowers. Most of them use punches or cut with scissors, but of course I had my Silhouette Cameo cut everything for me. I love being able to weld and resize as necessary in the Studio software before cutting.
McGill Rose Tutorial
Ellinee Paper Roses: See the section labeled Paper Flower Templates for the PDFs of her paper roses and her instructions.
The Six Inch Square: Paper Flower Technique No. 1
Products and Supplies:
Pattern Paper: My Mind’s Eye “Follow Your Heart collection” (4 pgs)
Echo Park “Style Essentials” Lt. Pink (1-2 pgs)
12×12 Cardstock: 2 shades green, 2 med. pink, 2 lt. pink, 1 cream, 1 lt. orange
Buttons: My Mind’s Eye “Follow Your Heart” collection
Yellow baker’s twine (approx. 1 1/2 yds)
Light pink tulle for hanging (24”)
Wreath shape—I used 13” willow wreath
Hot glue gun & glue sticks
Stick pins
Ink pads for edges (multiple colors)
This post may contain affiliate links. Your price is the same, but I may receive a small commission when you use my links. Thanks for your support!

this is amazing and so are you!! thank you for sharing so much information with us so that we could even dare to attempt to create something so fabulous:-)
http://teachdanz.blogspot.com
Oh my goodness! This is absolutely amazing! Thank you so so much for sharing all the information about the flowers. I have been wanting to make a wreath like this forever… hopefully when I finally get brave and do it then it will look as wonderful as yours!
http://gettincraftystarkie.blogspot.com
Kelly you did it again. Beautiful, gorgeous, fantastic. So much work you put into it. Your Mother will be so thrilled with this special gift.
April
lovely
gr corinne
Stunning, Kelly. Absolutely beautiful. Thanks so much for sharing this with us. A summertime project for me.
Wow! Wow! and Wow! not only this wreath is stunning the post is also so informative. Thank you so much for taking the time to explain everything – this post goes into my favorites links for future reference. Thank you!!
Thank you! I'm glad the time I spent explaining things is helpful. It was hard to know how much to include.
Amazing! The peonies are my favorite, I'd love to make a wreath with just those. The centers look so solid and round… did you wrap the petals around a bead or something?
Thanks! The peonies are my favorite, too. I'd really like to make a tutorial just for those, but in the meantime I'll tell you I did wrap the center petals around a 1/2" pom-pom. Anything about that size (even a wad of paper) would probably work the way I did it.
I would LOVE to know how to do these as well!!!
This is truly amazing. Those peonies are beautiful. This truly was a labor of love. You are so generous to take the time to share the files, links, directions, etc. You are inspired me to create a flower wreath. And,thanks so much.
Thank you, SueZee! I really hope you do make a flower wreath. Glad I could inspire you. 🙂
I agree, this was definitely a labor of love…and an absolutely stunning one at that! Your flowers are just all so beautifully done. And hey, pffffbbbththth! Who's talking about great photography? Your pictures are lovely and look so pretty! Love love love the peonies!!!
Ha ha ha! Your photography has inspired me, Shelly. I'm getting better…
This projects seriously takes my breath away, well worth waiting for! The colors you chose are beautiful..LOVE!
Ps. You were so sweet to mention my tutorial, thanks a bunch.
You betcha, Lisa! Thanks for the compliments!
WOW!!!!
The wreath is outstanding!! I can tell why you are so proud of your Peonies, they really look real, the rest of the flowers are pretty neat too, but the peonies are the winners for me.
I want to be your Mother so that I can have the wreath
Mandy
I didn't think to do such a pretty thing with my handmade flowers, but it would be so much fun to make and the perfect accent for my room. Thank you so much for your inspiration. You've done such a lovely job, it's just beautiful.
This is so gorgeous!
Breathtaking! Pinned it!
Absolutely beautiful thanks for the exact how to, so helpful!
Really beautiful! Thanks for sharing your files and how you put your wreath together.
Just had to leave you a comment here too Kelly. Awesome florals and I agree, the peonies are absolutely gorgeous.
Christine (Addie24)
I love this project. I also own a Cameo and would love to try this project out. I was wondering if you could email me your silhouette file you made for Roses by Ellinee if that's okay. I know it's a free Adobe file print but I don't have photo shop to do what you did and erase the backgroud leaving just the petals. My email is yer_m_vue@yahoo.com. Thanks in advance whether you can or can't email it because the post alone was such great inspiration.
Yer Missi Vang
Hello Kelly,
My sweet husband suprised me for my birthday and ordered me a cameo but it hasn't arrived yet, but I'am sooo excited about it!!! So I have just been checking out websites and came across yours and just fell in love with your beautiful wreath. Although my Mother is deceased, I would love to make this beautiful wreath for my sister who is a treasure to me. Thank you so much for sharing your labor of love with us all. God Bless You Kelly!
You're going to love your new Cameo! What a sweet thought to make a wreath for your sister. She'll love it.
WOW!!! This is an awesome wreath! Although a video tutorial would have been great, your written instructions are fantastic! TFS
beautiful I love it, I like the banner in the center and the tiny cherry blossoms are a nice touch.
I made a wreath in the fall not a fall wreath though with my daughter and it took us a few weeks, then I did a quick one with the rolled flowers and I didn't curl the ends and it looks pretty gorgeous.
I have started cutting for my next wreath already for summer. I Love making the flower wreath's one of my favorite paper crafts. Have a great Friday and thanks for sharing.
Oh thank you, thank you, thank you. You are the best for sharing this incredibly beautiful wreath that you made yourself. I love, love, love it. I can't get superlative enough about how beautiful it is. Oh and your peonies are rocking my world.
LOL! You crack me up, missmacymay! Thanks for the compliments. 🙂
That is a beautiful project! Thanks for the amazing set of instructions and links.
This is breath taking Kelly! Really, really gorgeous!
Your peonies are just lovely – the roses too – the entire wreath is gorgeous – but the peonies – and the roses!
Many years ago on one lovely Mother's Day, I planted two peony bushes at our home in Ohio. They were in honor of my mom and my husband's, both of whom had passed away. I knew they were a fovorite of my mother's, and I was sure that his mom would have liked them, too. Every year afterward they bloomed magnificently and got quite large. They have always been a great favorite for both beauty and scent. I no longer live in that Hudson home, but I still love peonies, and I love that you've shown me how to make some, because I don't believe they grow successfully in Florida. Thank you, Kelly. You're an amazing talent. Your wreath is so sweet and feminine that it reminds me of my mother; and that is high praise indeed. It's breathtaking.
Thank you for the sweet comments, Barbara. I have never had real peonies, but in looking through photographs in search of lovely spring flowers for this wreath, the peonies really caught my eye. Now I'll have to find some real ones just to smell them!
What a lovely wreath. The paper flowers are so pretty, especially the peony.
Wow, that's incredible! You were always so good at putting a lot of time into your handmade projects. It certainly pays off!
About McGill… I had a special sized hole punch that I couldn't find in stores stop punching paper (before my silhouette, fun times before that, NOT!)… but McGill had a new free replacement punch out to me within a few days, so I'm not sure if customer service has gone down, or not.
The wreath is amazing… I've been looking to do one for my mom.
I'm glad McGill was helpful for someone, then. 🙂 I hope you do make a wreath for your mom!
This is beautiful you did a wonderful job…:)
Hi Kelly,
I'm so sorry to hear that you had a problem with your Paper Blossoms Tweezers. I'm very surprised that they broke, this has never happened before. I'd like to send you a replacement. Please send me your mailing address and a new pair will be on the mail ASAP.
Kind Regards,
Janine
Creative Coordinator, McGill Inc.
Thank you so much, Janine! I love happy endings. 🙂
This is stunningly gorgeous!! I am so going to try this…. someday… when at least 2/3 of our kids are school age! I recognize my little cherry blossom in there, too… so cool! 🙂
It will come someday, Jennifer! I've got 2 1/2 out of 4 that are school age; next year with 3/4 in school all day will be a dream! I love your cherry blossom; thanks for commenting on my blog. 🙂
BELLISIMO !!!!!!!!!!!!NINA
GORGEOUS!!!
The wreath is beautiful thanks for sharing the direction on how to make some flowers.
Blessing's Jocelan
great picture how beautiful your post is thanks for sharing..!!
Absolutely gorgeous! Can you see me your silhoutte file for elli roses?
Vonica, are you asking me for the Silhouette cut file I made for the Ellinee roses? I’ve updated the link above so it takes you straight to her PDF download, but I can probably find that Silhouette file for you. Please use my Contact Form to send me a request. 🙂
What a beautiful wreath! I would have never thought to make paper flowers to create a wreath.
Thank you, Dawn! I love paper flowers for anything. 🙂
Hiya. These floweres are fab. So pretty. What weight is the card you have used?
Hi, Thyme! Some of these are heavy smooth cardstock (Bazzill Smoothies), some are textured cardstock (Bazzill), and many are double-sided pattern paper by My Mind’s Eye and Echo Park. I’m not sure of the official weight of any of these, but from what I can tell the range of these papers is between 65# and 80#. I almost always get excellent cuts from double-sided pattern paper from main-stream manufacturers. I hope that helps. 🙂
Thanks very much for your speedy reply. I am very new to the silhouette and am experimenting but am hoping to do some paper flowers for a friends wedding! is 65# 65lb? i think thats around 170 gsm so that’s very helpful. 🙂
Yes, 65 lb. 🙂 Good luck!
Love this wreath! I tried to download the peony file but my computer said it needs a program to associate with the file. Looks like it is *.studio file. I have a Pazzles. Do you know how to get it to open? Thank you so much!!!