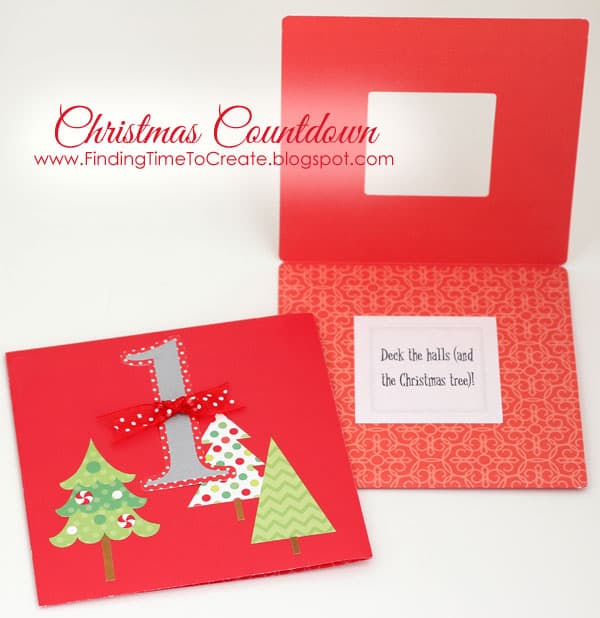
Christmas Countdown
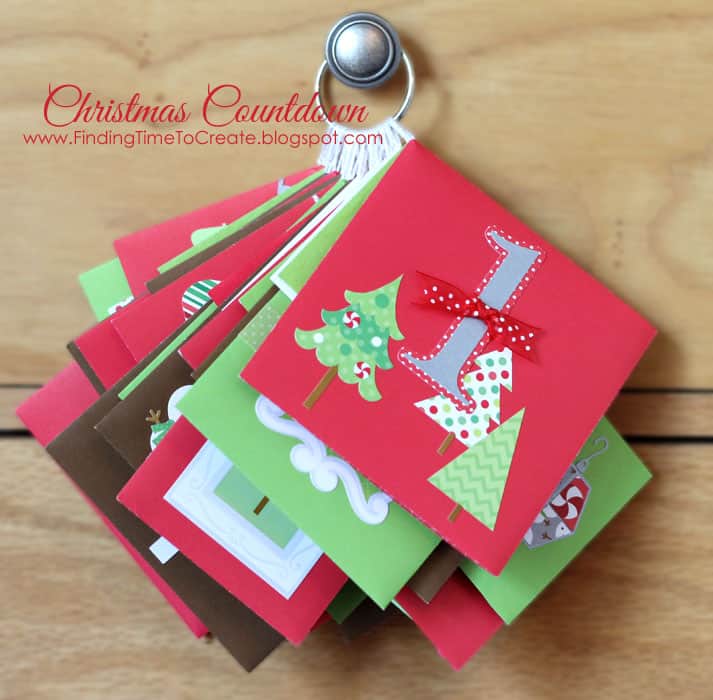
Here’s a Christmas Countdown project I made for Heartland Paper’s design team. I had a lot of fun decorating each envelope a little differently for 25 days in December. The star of the show (besides the adorable Doodlebug Design envelopes, cards, and new North Pole collection of paper and stickers) was the Silhouette Adhesive Cardstock. I loved cutting out so many numbers, words, and shapes, and not having to apply my own adhesive! It’s good stuff. I’ll say more about it towards the end of the post.
Here are the supplies and instructions if you want to re-create this project yourself.
- Silhouette Adhesive Cardstock: white (Essentials set), silver (Winter set), light and medium green (Spring set), light and dark brown (Autumn set)
- Doodlebug Design envelopes and matching cards: 9 red, 7 bright green, 5 brown, 4 white (25 total)
- Doodlebug Design paper: “North Pole” collection (Playful Pines, Holiday Lane, Frosty Friends, Sweet Tweets)
- Doodlebug Design “North Pole” cardstock stickers: Icons and Frames
- Bella Blvd Designer Tape: “Pickle Juice Dot”
- Red polka-dot sheer ribbon: 1 yard for embellishments
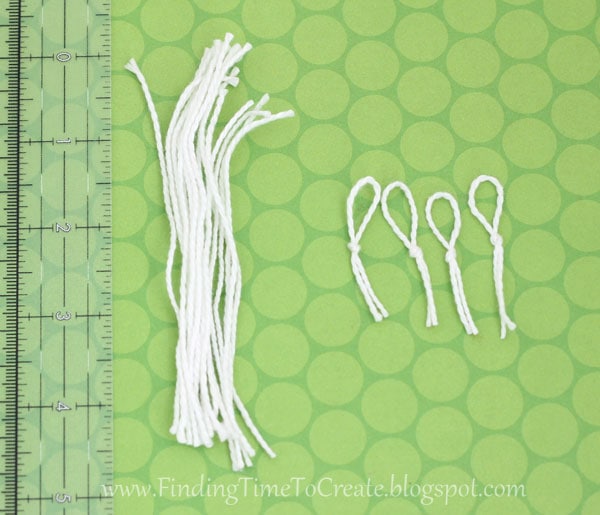
- Baker’s twine, embroidery floss, or thin yarn: 4 yards for hangers and embellishments
- Stickles Glitter Glue: “Xmas Red”
- Die cutter of any type for letters, numbers, decorations
- Adhesive/Glue
3. Add red Stickles glitter glue to any red accents as desired.
Here is how I decorated mine:

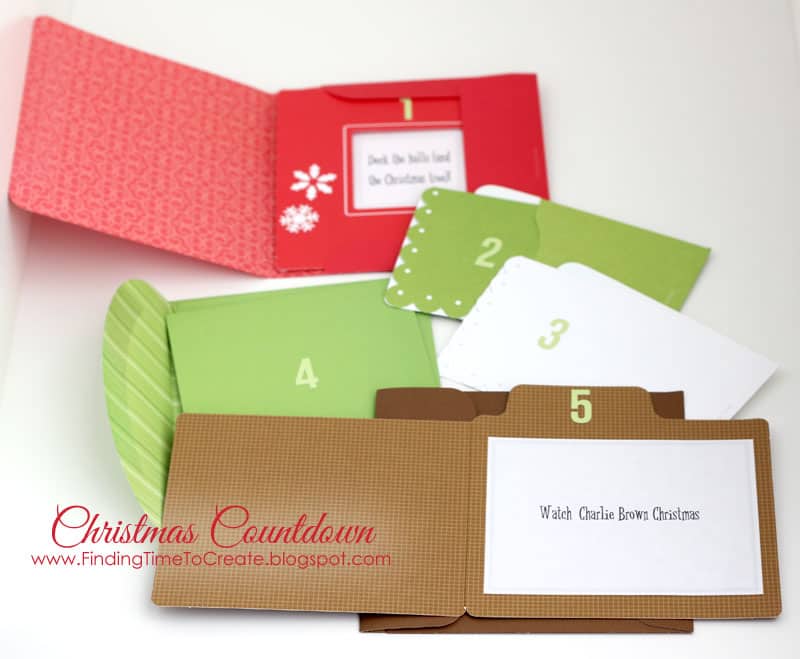
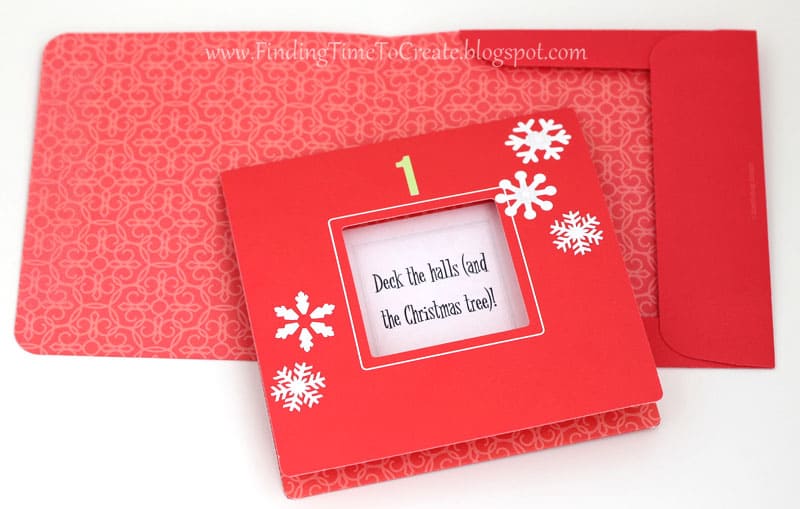
As an alternative to Doodlebug cards for each envelope, you could cut your own simple cards or a basic tag in the appropriate size for each envelope.
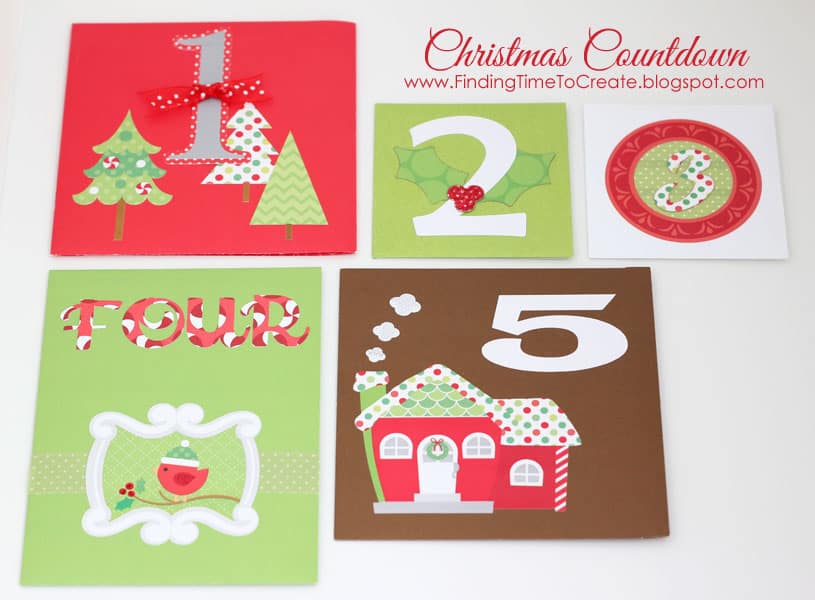
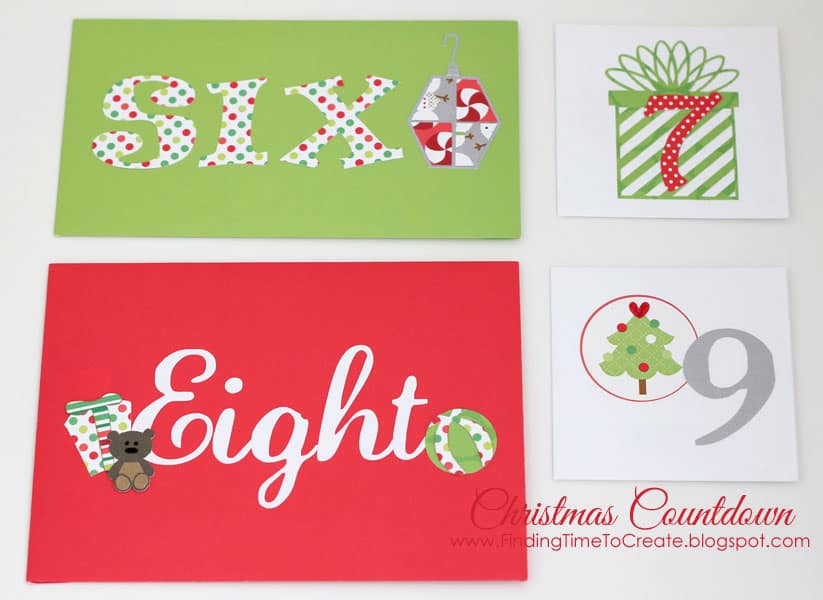
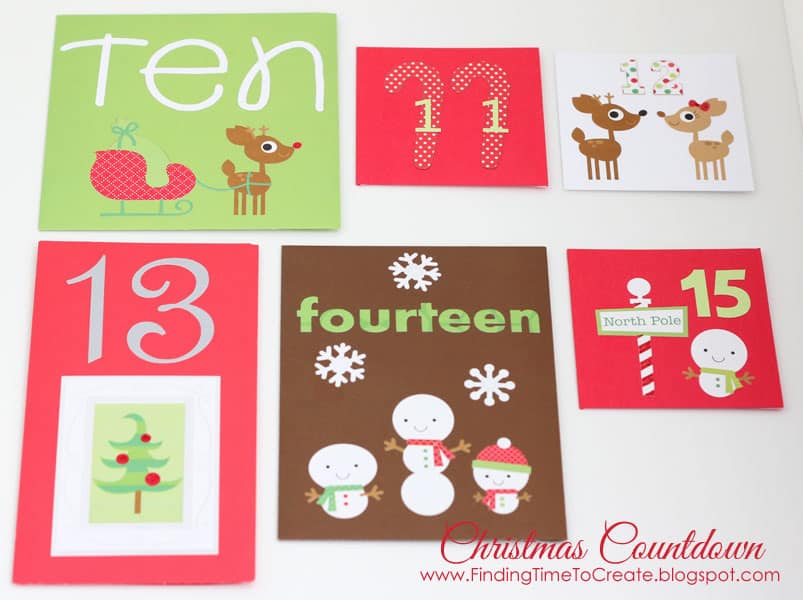
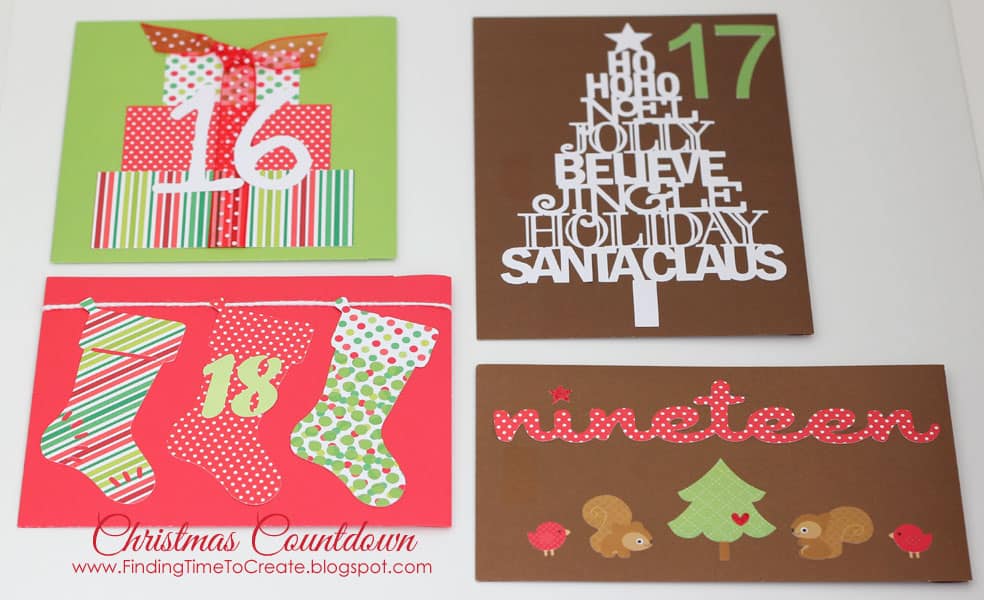
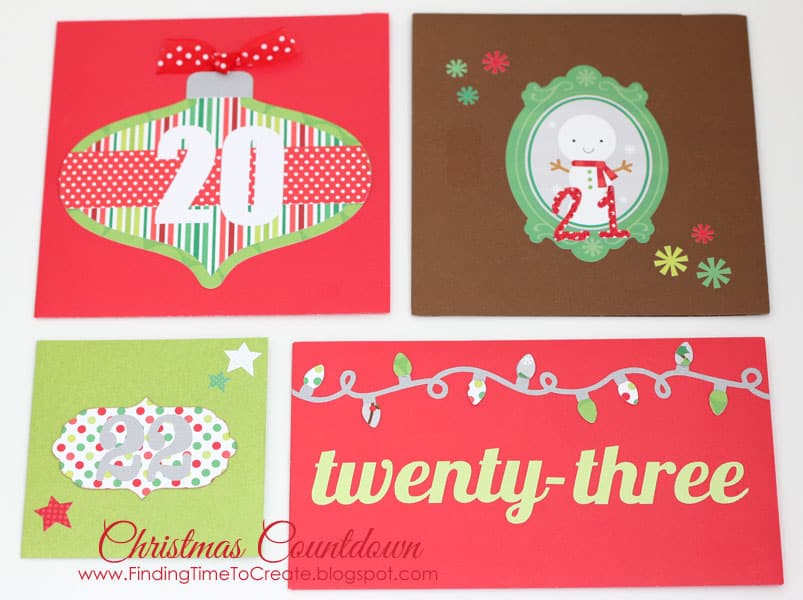
I simply put a number on each card to match the day on its envelope. Well, I did add a few snowflakes to day one. 🙂
tiny crochet hook to pull twine through each corner.
knot in the center to make a loop with each piece.
7. Snip a very tiny piece from the upper left corner of each envelope (when viewing the flat decorated side). Flip it over to the flap side and it should look something like this:
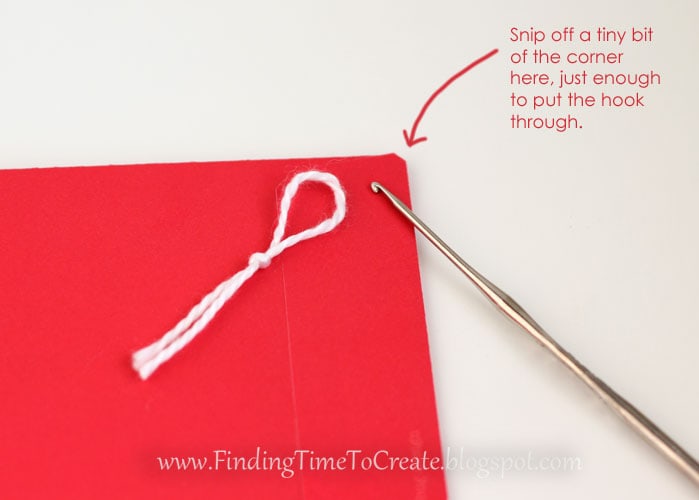
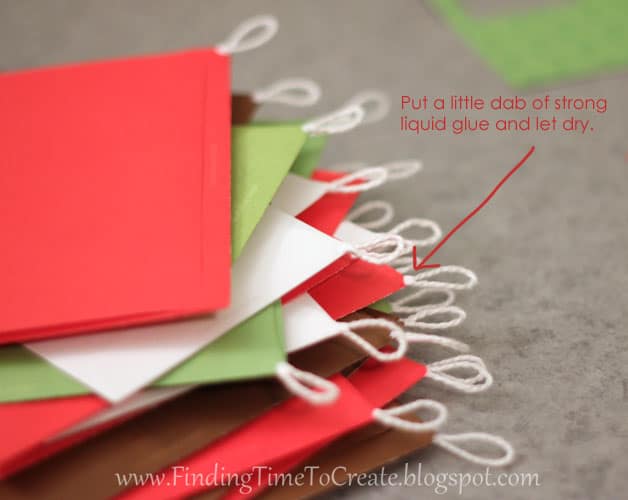
Add a dab of clear-drying glue (I used Scotch Quick-Dry glue) to the point where the paper meets the twine on the flap-side of the envelope.

A final word about Silhouette Adhesive Cardstock…
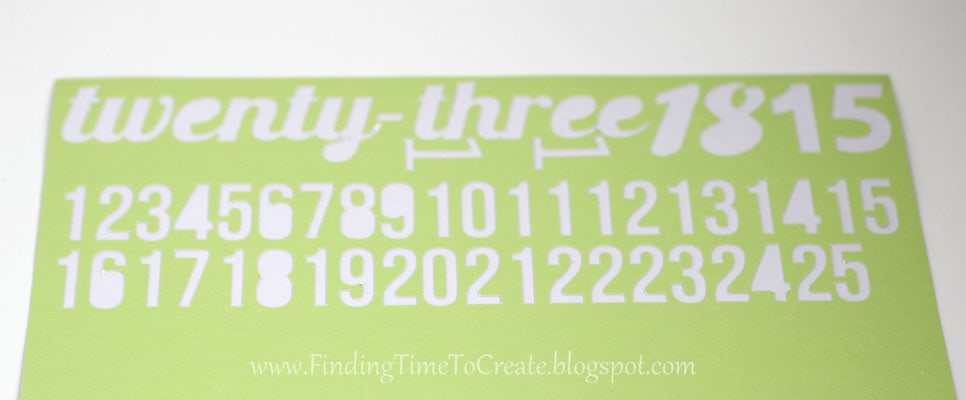
When I first saw it I thought it was a bit pricey, considering I can add my own adhesive to cardstock after I cut it. But for a project like this, it was so worth it! It’s like having your own cardstock sticker alphabets/numbers/embellishments, but you only cut exactly what you want!
I used most of a page of white, but all the other colors used only a fraction of a page for this project. I used my Silhouette Cameo to cut it, but you can use any die-cutting machine with it, I’m sure. I set my machine on medium cardstock settings so it only cut through the paper and not the backing. Here is how it looked after pulling the pieces off the page:
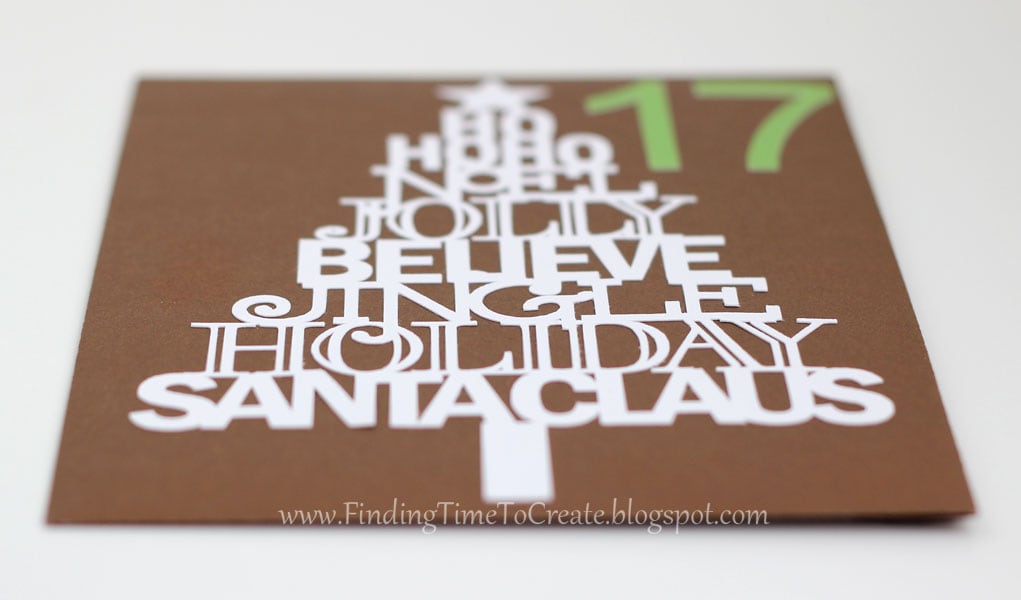
And I think this stuff is almost as good as vinyl for intricate cuts. Look at how nicely it cut this Christmas shape:
Thanks so much for visiting! Don’t forget to join my followers to help me reach the 500-mark by my blog’s 2nd anniversary on October 7th!


wow Kelly, what an impressive project, a lot of work, love your details, hugs
What a fun project!!!
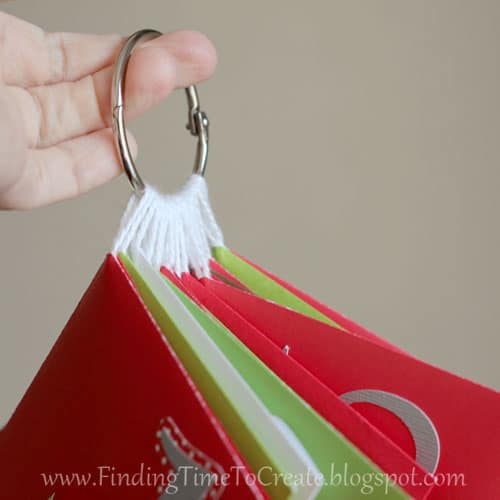
I love this. Some of these could be used for things other than Christmas. I love the loops on the ring!
Beautiful project! What a fun alternative to a "traditional" advent calendar!
This is so, so cute! What a fun way to countdown. Thanks for sharing, Kelly.
I want these countdown cards because, I can't wait any more 🙁
Ha-ha! Your stack will be a lot thicker than mine, because there are still 83 days until Christmas. 🙂 My husband plays Christmas music year round in our house via Pandora Radio. It never really goes away. 🙂
LOVE this project… Love the envelope system to designate a fun thing to do that day! thanks for sharing 🙂 Kathi
Lovely!
There's a way to create digital countdowns like this one https://www.AreWeThere.YT/Christmas-is-coming-in/223.htm
Nice!