Dial Calendar

When I saw this calendar design by Samantha Walker on the Silhouette Blog a while back, I had to have it and snatched it right up! Paid the whole 99 cents for it…didn’t even wait for a sale. (Big spender here, I know.)
With my first version I spent a whole 5 minutes, one piece of cardstock through my printer, and one piece of double-sided pattern paper to whip it together. Can you say “easy”?!
Of course I spent a bit more time making this one pretty, and I’ll share my tips here with you. First, the supplies and basic instructions:
Supplies:
Teresa Collins “Now & Then” Designer Paper (Woodgrain and Clocks)
Teresa Collins “Now & Then” Die Cut Accessories
White cardstock (2 letter-size pages)
Red cardstock (minimum 2” x 9” for rosette and heart border)
3 coordinating brads
Button
Baker’s twine: Brown, approx. 1/2 yd.
Ribbon: Crepe (cream) by Creative Impressions, 1 yd.
Chalk ink for edges
Digital cut files: Silhouette “Dial Calendar” file by Samantha Walker, “Heart Border” by Kerri Bradford, “Enjoy” .png image by Heidi Swapp, “Rosette Strips” by Bird
“LIFE” font = Playbill
Instructions:
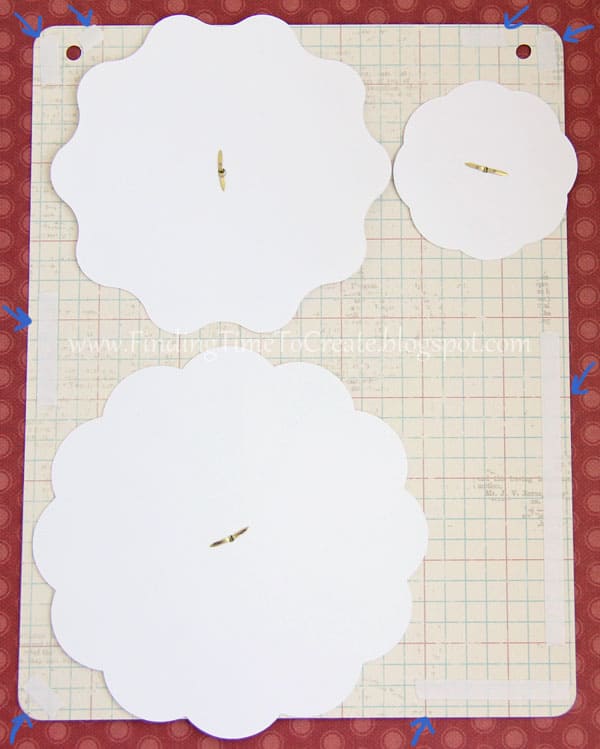
1. Open Dial Calendar file in Silhouette Studio. Ungroup and rearrange to print & cut dials on white cardstock with printer and Silhouette machine (see video below).
2. Cut remaining Dial Calendar pieces from designer paper.
3. Cut additional back from white cardstock, with all but top holes removed in Silhouette Studio (see video below).
4. Attach dials with brads.
5. Ink edges and embellish front as desired with Teresa Collins Die Cut Accessories and any other words or cut files you wish.
6. Adhere the back, making sure to leave room for the dials to spin freely.
7. Attach ribbon for hanging.
Now the only tricky thing you may run into with this calendar file is that it is all grouped together when you open it in Silhouette Studio, and you can’t ungroup the printable part easily to adjust the position of the dials for printing. You could resize the whole thing smaller, but if you want to print and cut the dials on letter-size paper at their default size, I’ve made a video tutorial to help you use the knife and eraser tools to cut it apart and rearrange the pieces.
This second video shows how to trace the .png “enjoy” image by Heidi Swapp to turn it into a cut file and how to remove the extra holes when you want to cut a back for the calendar that hides the mechanics.
When you do add the back, make sure you don’t put the adhesive too close to the dials; you want them to spin freely. I used Scrappy Tape (just like Scor-Tape), which is great stuff!
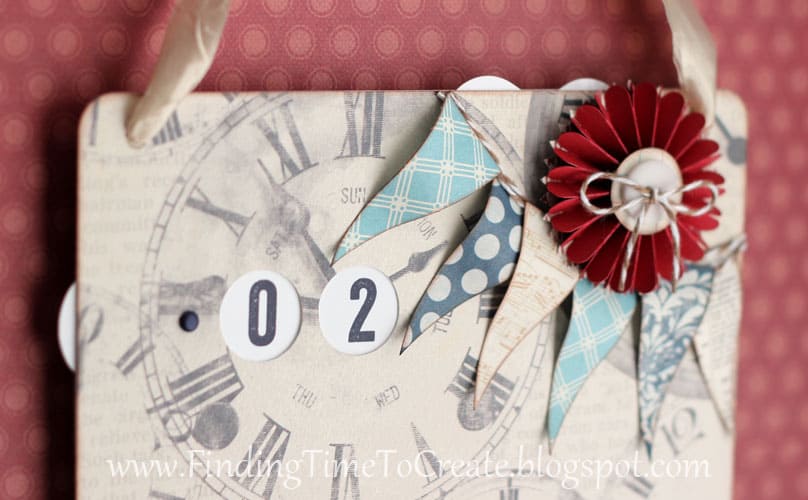
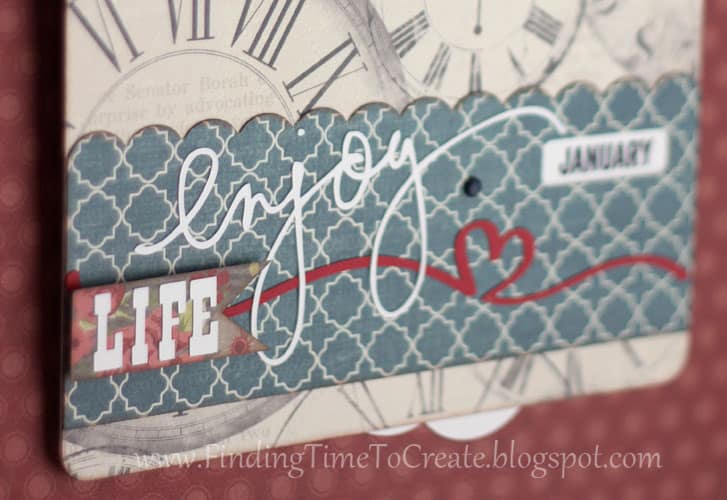
And here are some close-ups of the embellishments on my calendar. This was such a fun project to make for the Heartland Paper Design Divas. I may be making these for neighbor gifts because they go together quickly, they take little in the way of materials, and they are actually useful as a perpetual calendar. Nice to look at, too. 🙂

Kelly beautiful job on the clock, love the colors you used and great detail, hugs
I love it! And, what a great idea for a neighbor gift. Since I don't live in your neighborhood, I may just borrow your idea and do the same.
This is just smashing! I bought that file and haven't done a thing with it, but I'd sure like to after seeing yours!
Kelly, your calendar is superb! After seeing what you've done with these cutting files it has me going to the Silhouette store. I hope I can one half as beautiful as the one you made. Thank you for all of the time you took to make the video tutorials and for sharing. You're the best!
Hello, I love it but i cannot to find dial calendar in silhouette online store ?! can you help me please.Nathalie from Switzerland
Sorry, Nathalie. I've updated the link in the Supplies list above, but you can also find it as shape #32429 in the Silhouette Store. Good luck!