Lucky to Have You

Hello, friends! I made every bit of this “Lucky to Have You” card with my Silhouette CAMEO. (Well, not the baker’s twine or the brads. But the gold brads were made by dipping plain silver brads into fine gold glitter.)
Here is my post originally found on the Silhouette Blog on 2/21/2014. I love the vellum shamrock charm, don’t you?
This is a card you can make for anyone who blesses your life. I went with a green/gold color scheme since we’re getting close to St. Patty’s Day. Window cards are a favorite of mine. This time I used my sentiment as the see-through window. A pop of glitter and gold, plus some soft vellum as a little paper charm…what fun!
Software
The card parts are very easy to make using Silhouette Studio. For a standard A2 card (5.5” x 4.25”), create the following in Silhouette Studio:
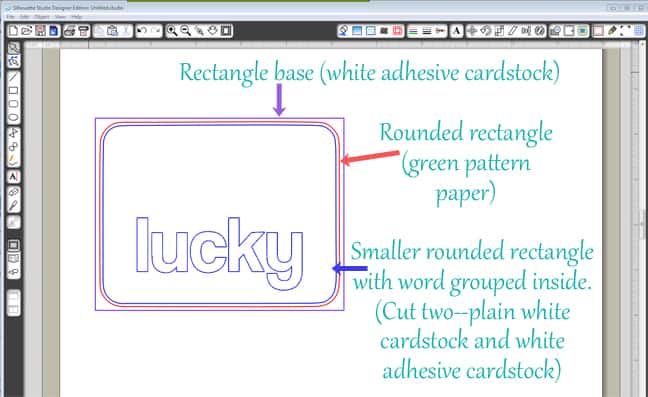
1- Draw a 5.5” x 4.25” rectangle to cover the folded card base of a 1/2 letter-size page. (I cut this out of Silhouette white adhesive cardstock to match my window front piece.)
2- Draw a rounded rectangle to fit inside the A2 rectangle and adjust the corners as desired. (I cut this out of green pattern paper; this is the color that will be seen through the cut-out sentiment.)
3- Create a smaller rounded rectangle with the drawing tool or make an internal offset of the rounded rectangle in Step 2.
4- Type and position your “lucky” (or other) sentiment within the lower third of the smaller rounded rectangle. I used the font Coolvetica Rg with a text size of 126. Group the word and inner rounded rectangle together.
5- If using white adhesive cardstock for the rounded-rectangle window piece, cut it once from adhesive cardstock and once from plain white cardstock. These two layers can be matched exactly and stuck together with the string ends holding the charm tucked in between. Use foam dimensional adhesive to make the window piece pop off the rest of the card.
Embellishments
On to the embellishments…
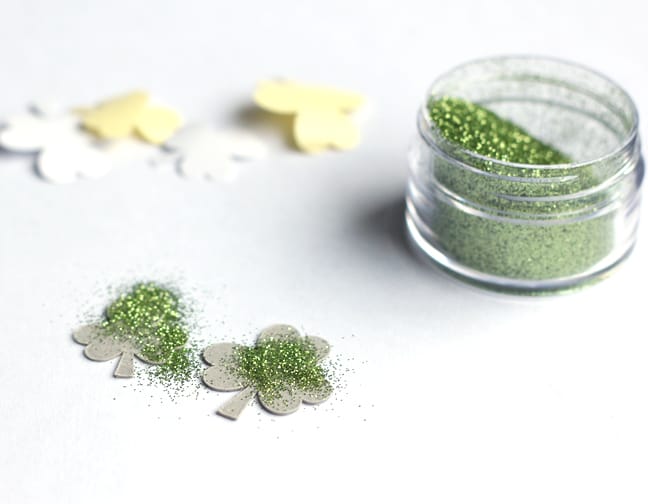
For my glittery shamrocks, I made my own custom chipboard embellishments by cutting the shapes first from Silhouette chipboard, then again with Silhouette double-sided adhesive. I put the double-sided adhesive onto the chipboard shamrocks and then sprinkled a little green glitter on top. {Love!}
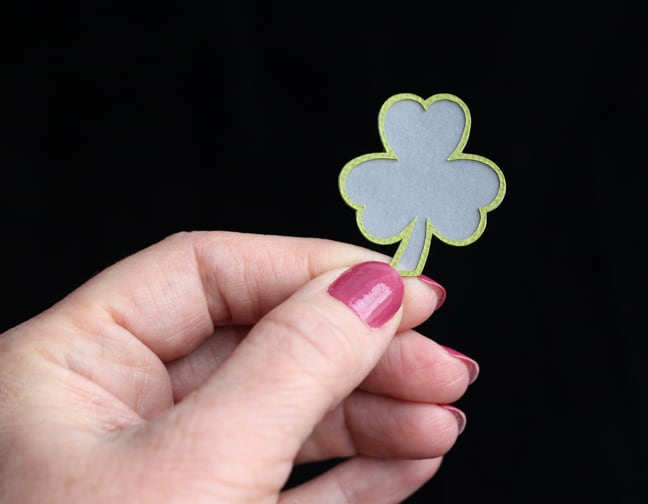
Here’s how I made the vellum paper charm. From the same shamrock set, I cut two of the outline shamrocks from leaf green Silhouette adhesive cardstock—one regular, one mirrored.

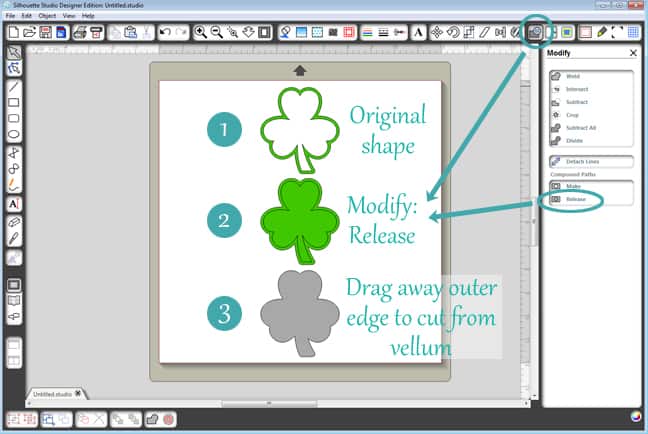
I cut a shamrock from Silhouette vellum to sandwich between the two green outline pieces. The outline design in this set is a compound path (has a hole in the center that can’t be ungrouped), so just release the compound path to get access to the outer edge only. Then cut that outer edge from Silhouette vellum.
Assembly
Assemble your shamrock charm by putting one thin outline cutout on the front of the vellum, and the reverse outline cutout on the back. It’s cute whichever way you hold it, and with the adhesive cardstock you don’t have to worry about glue on those skinny little pieces creeping onto your vellum!
I cut the subtitle from Silhouette printable gold foil with LD Charming Bold font. For a little more gold I brushed two plain silver brads with clear nail polish and dipped them in gold glitter.
I hope you try a fun window card like this and use your Silhouette machine to make your own custom embellishments! If you need more St. Patty’s Day ideas, check out this post on my “spring” shamrock arrangement.

Silhouette Shape: Shamrocks Set (Design ID #39419)
Fonts: Coolvetica Rg, LD Charming Bold (Design ID #14116)
This post contains affiliate links. Your price is the same, but I may receive a small commission when you use my links. Thanks for your support!

LOVELY and I have grown to expect no less than that from you. hugs, Patty
Thank you, Patty! You know I'm lucky to have you to always leave me sweet comments!
Great card, especially as St. Patrick's day is looming (17th March) and I live in Ireland.
Hi Kelly,
You always amaze me, this is sooooo pretty! I guess this is a good cue to be thinking of St Patrick's, thanks!
Blessings,
Barb