3D Haunted House
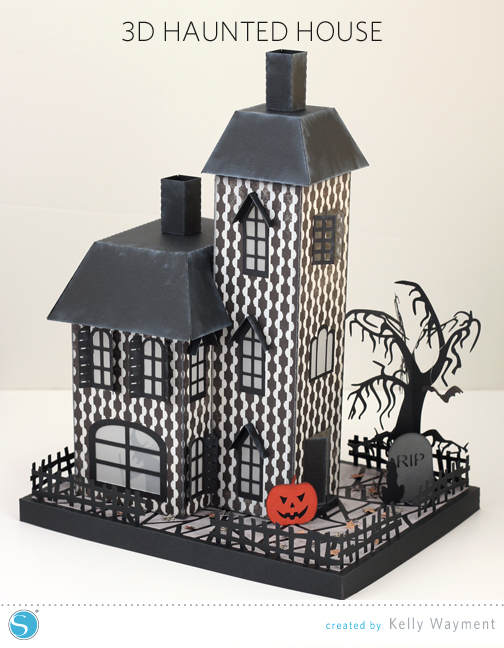
The first large project I made when I bought my CAMEO in 2011 was a haunted house, and I thought it would be fun to revisit this project and create a new house for my fall decorations.
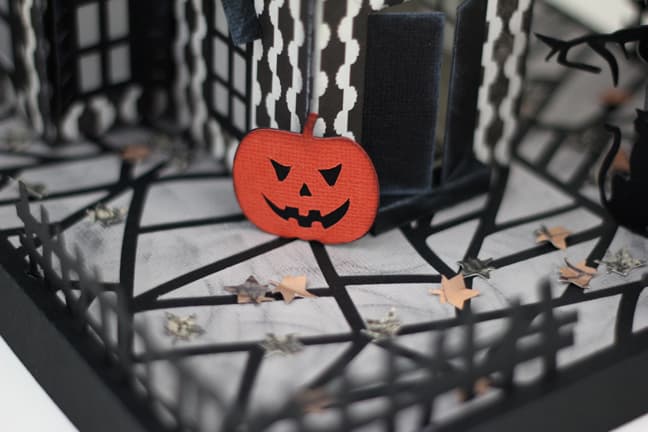
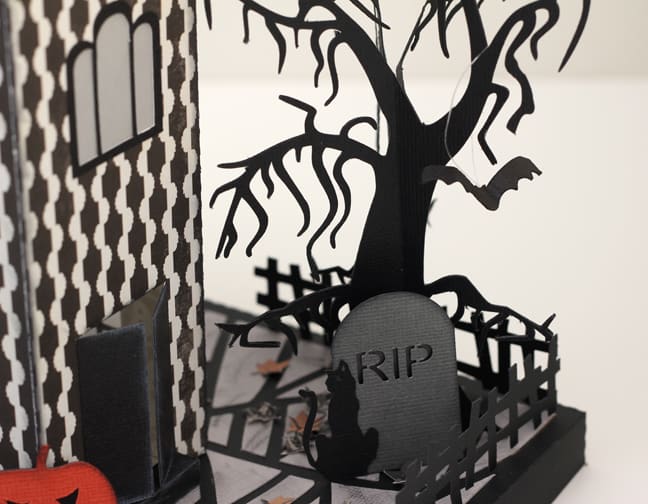
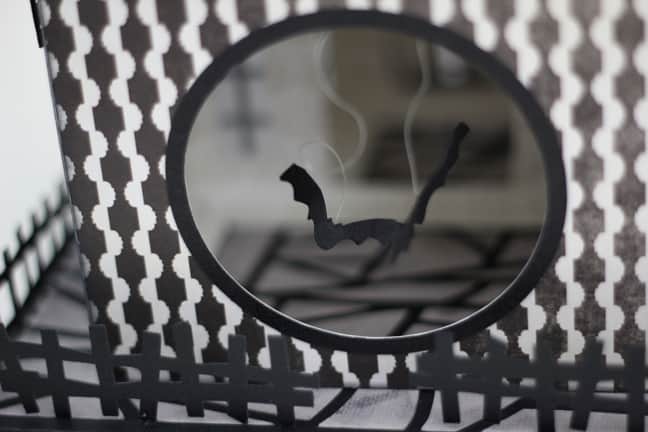
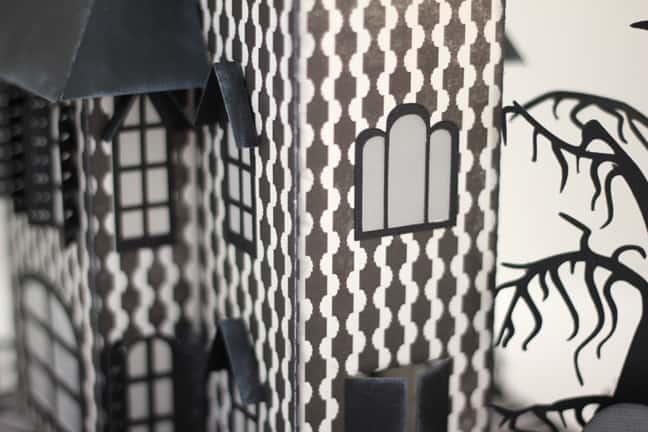
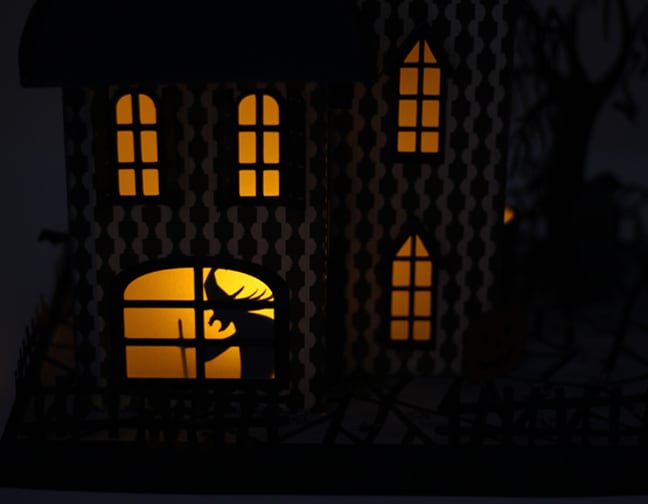
I started with the luminara haunted house in the online store and just kept adding details until I was satisfied. You can see I included a tree, a black cat, a jack-o-lantern, a tombstone, a fence, leaves, bats…even a witch silhouette that only shows up in a window when it’s lit at night.
You can find my full assembly tutorial HERE, but here are some highlights:
I enlarged everything at the same time in the luminara house file so the largest piece (the taller house sections) could still be cut on my CAMEO mat. All the other elements I used were resized to fit that scale. The finished size of this whole house and base is about 8” wide x 10” long x 13” tall.
One of my favorite details is the stone-covered base.
- I removed the outer box edge from this geometric file and sliced off the extra portion with my Knife tool in Studio, using the house base piece as a guide for size.
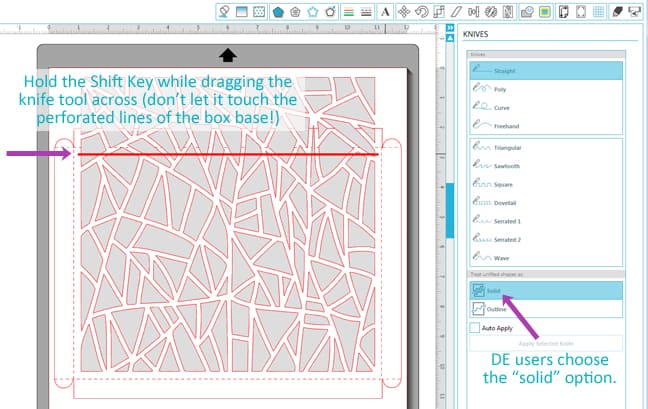
- After grouping the desired geometric portion and deleting the part I sliced off, I then centered it inside my base shape and grouped them together.
- I used a sketch pen to sketch the outline of the “stones” directly onto the base and then cut the base out with the blade.
- Then I cut that same geometric pattern out of grey adhesive cardstock so I wouldn’t spend a long time gluing every piece.
- I dabbed a dark inkpad all over the grey adhesive cardstock to give it a weathered look.
- Finally, I used the sketched lines on the base as a guide for placing the adhesive cardstock pieces (with no glue).

Here are a few more details I included for fun…
Bats dangling in the opening meant for inserting a light.
Vellum behind all the closed windows and “aging” with a white inkpad on all the roof and gable pieces.

A witch silhouette that shows up best in the dark while the light is on inside.
If you’ve never tried a 3D paper project with your Silhouette machine, this is a great time to do it! The 3D files in the online store are often very easy to assemble, and then you can let your creativity flow to add all the fun details and turn it into a work of art.

Click here to go to my haunted house assembly tutorial.
Shapes Used:
- Luminara haunted house (#48689)
- Black cat Halloween set (#49278)
- 3D ledge village haunted mansion accessories (#47577)
- Witch hag (#48537)
- Geometric (#53789)
- Branch wreath frame (#34268)
This project was originally featured on the Silhouette America blog for the 2014-2015 design team.

very nice 🙂
Thanks, Anja. 🙂
I love how you have decorated this haunted house! I am trying to recreate this but I am having the hardest time trying to assemble it! When I click on the link above that says you will post more assembly tips, it just goes to a blank page. Can you please help me?! Thanks 🙂
I'm sorry, Lisa. The Silhouette America blog has been down for the past several hours, which is hopefully just a temporary problem. I will have a bigger blog post here with all my tips and tricks for assembling this house next week.
Where are you getting stuck? (There is one flaw in the design of the house where I had to add a tab, which could also be fixed with a strip of single-sided tape if you've already cut it out.)
I love this haunted house, Kelly. Looking forward to your post for assembling it next week!
Thanks, Gilda. 🙂 I'm just finishing up a few projects with imminent deadlines, then on to the assembly post.