Swing in Tree Decor
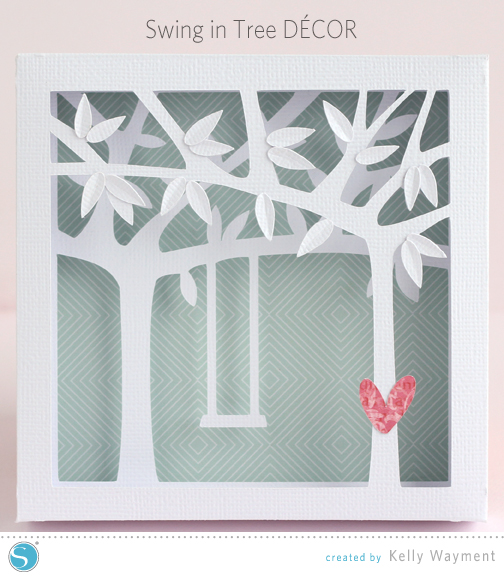
I’m sharing this sweet little swing in tree decor on the Silhouette America blog today. It’s a great piece of decor for Valentine’s Day, but I think it can be displayed year round. In fact, I made a second one and gave it to some friends for an anniversary gift.
Here’s the tutorial as it originally appeared on the Silhouette Blog.
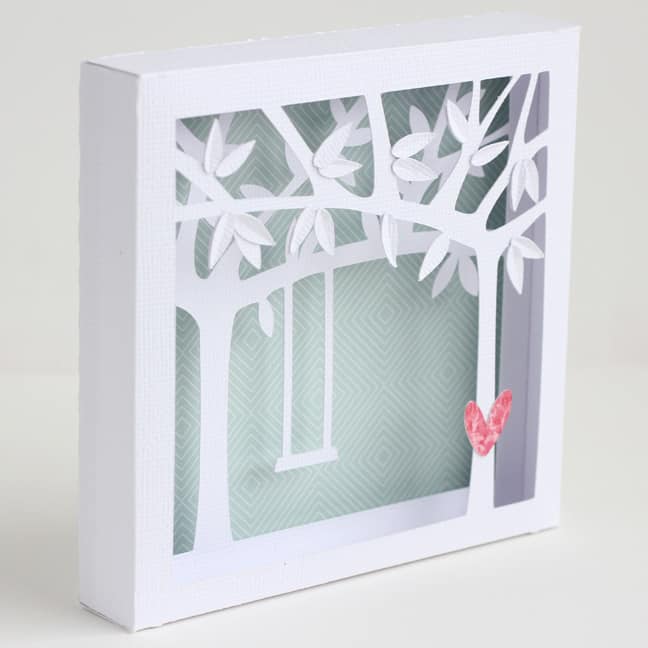
Don’t you love decorating for Valentine’s Day? I do. I made this little paper shadow box and added a heart so I could use it for Valentine’s Day, although really you could display this year round.
This tree and swing design is ready to be assembled and displayed as-is, but I added a few extra elements like the shaped leaves and the heart…just because I love a little extra detail. There are several wall-art boxes similar to this design in the Silhouette design store.
I found no assembly tutorial by the designer, so here are my tips for assembling one of these boxes. I resized the design larger so the two tree box sections could be as large as possible to both be cut on a 12″ x 12” page.
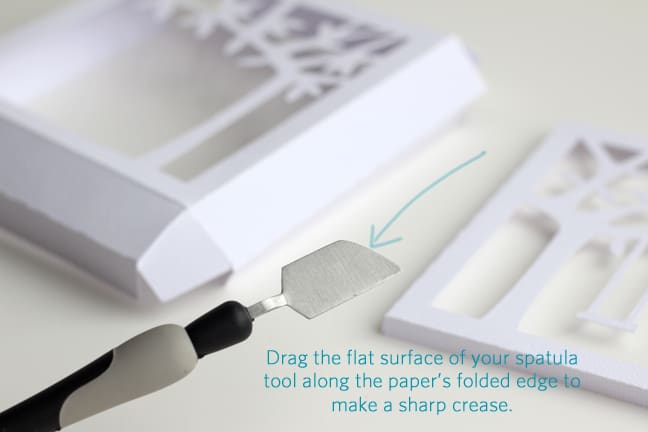
1- Cut out the box pieces from cardstock and fold on the perforated lines. The taller box only has score guides for the upper folds in order to get a clean crease with no perforations. Use a scoring tool to gently score a fold line and then use a flat object to press those creases for sharp fold lines. (You could use a bone folder, but I like to use my Silhouette spatula tool for firmly creasing my fold lines. Drag the flat edge along the fold.)
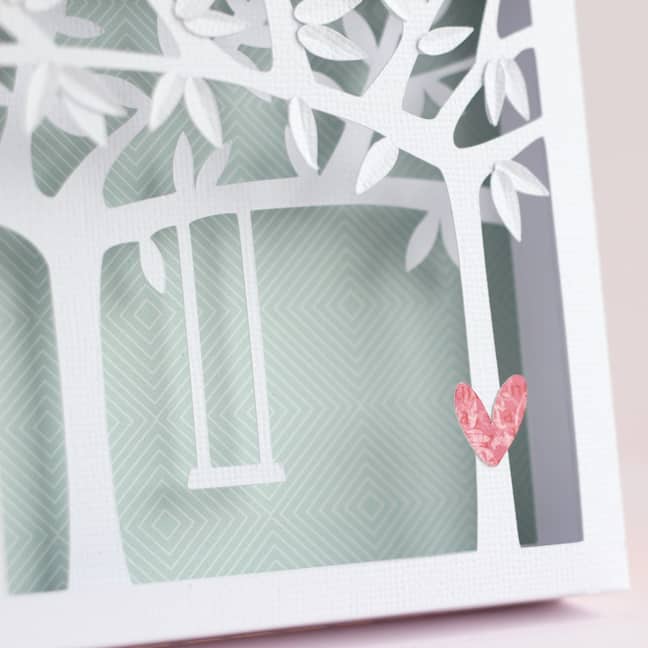
2- Choose leaves and a heart to add to the design as extra elements. I used the simple leaf from this leaf and tree design; I stretched, resized and replicated a bunch of leaves in a couple of sizes, slightly larger than the leaves on the tree design. I cut a lot more than the 18 I actually used.
The extra leaves are for added texture and dimension, so place a crease in each leaf. They are tiny, so the quickest way is to again use something like the spatula tool to press each leaf along its center into the palm of your hand. I’ll bet you didn’t know the spatula tool was so versatile for paper shaping and folding, did you?

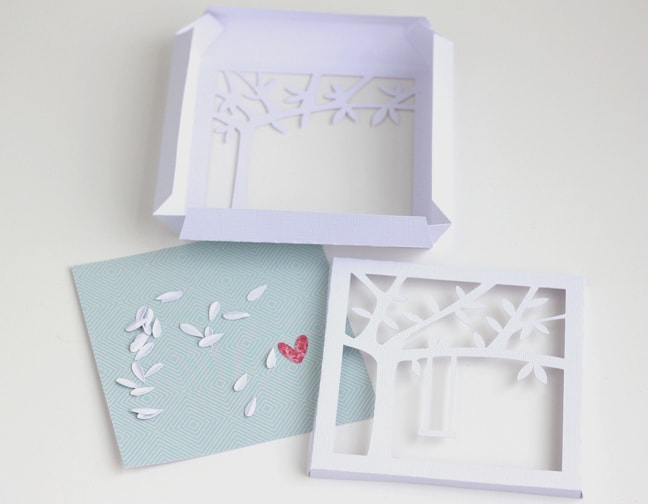
3- Your cut pieces will include the two box parts with trees, plenty of leaves, a heart, a background solid or pattern-paper square, and a solid square of more white (not shown).
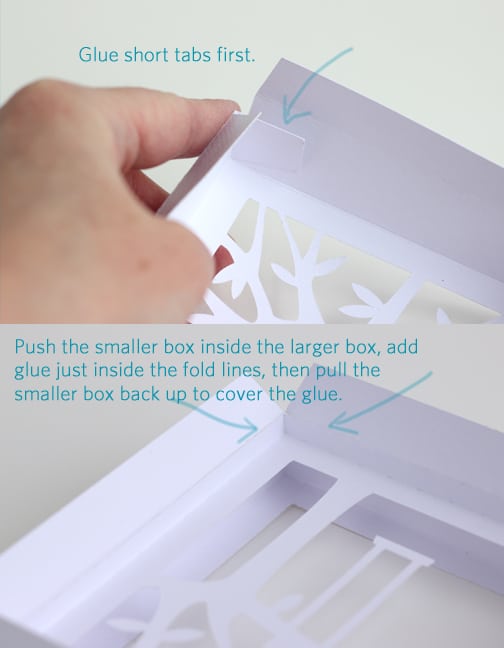
4- To assemble the box pieces, first attach the short tabs at the corners of the larger box. Once those are set, you will glue the smaller box in place. I pushed it into the larger box, added a strip of liquid glue just inside the fold lines near the long tabs, then pulled the smaller box back up to attach to all that glue. It helps to fold the larger box flaps out (the wrong direction) during this process. The edges of the smaller box should lay right along the fold lines of the flaps of the outer box.
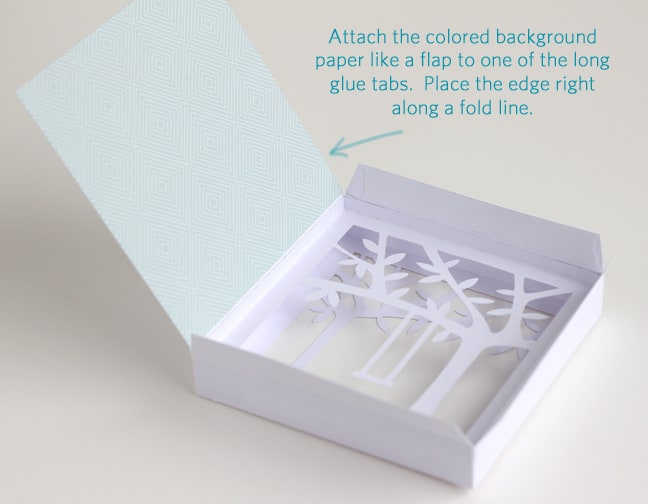
5- Attach the pattern paper square to one of the flaps of the box. The edge should lay right along the fold line.
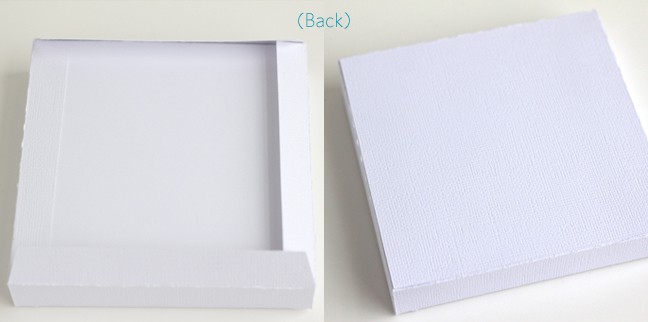
6- Fold in the flap with pattern paper, then fold down and glue the other flaps to hold the pattern paper in place. Then put a finished back to cover the flaps. This can be cut from any paper, as it won’t really be seen unless someone is picking up the box and admiring it.
7- Finish by individually gluing on the shaped leaves and the heart.

What a pretty little box to display on an easel, attach to the wall, let stand on its own, or even place inside a wreath!
Designs used:
- Tree and Swing Wall Art (Design ID #26769)
- Leaf and Tree (Design ID #10065)
- Rectangle Heart Tissue Box (Design ID #74585)
This post contains affiliate links. Your price is the same, but I may get a small commission when you use my links. Thanks for your support!

Well done my dear, well done.
I love that you found and used an old file.
This artist is no longer designing for Silhouette, she has gone out on her own.
But you made her proud today with this project.
It is at the top of my list for my mom (Nana)
**U**
Nance
Thank you, Nance! 🙂
So pretty! So much detail in those trees and I love the soft background color you chose.
Thank you! I actually had about 6 background pieces that would have been just perfect for the job, but I finally decided on this one by Imaginisce. 🙂