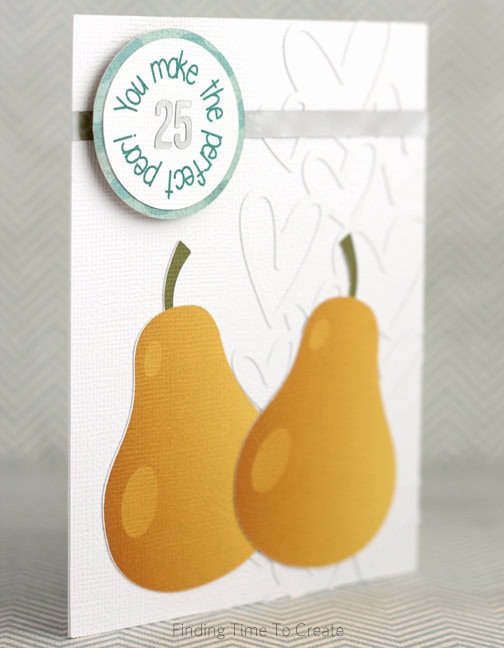
You Make the Perfect Pear!
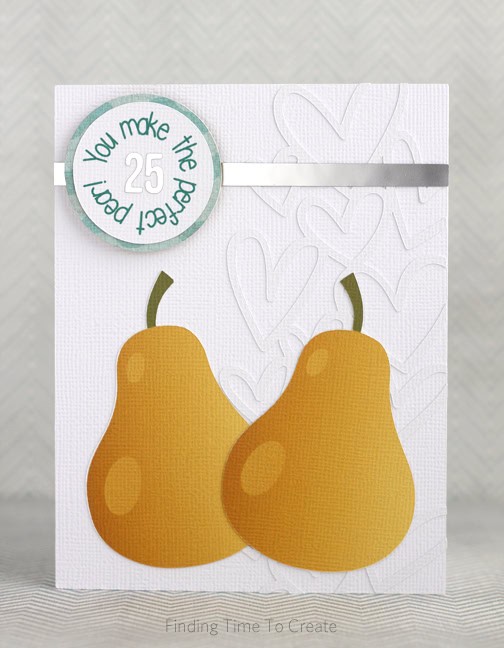
I made this perfect pear card to celebrate our friends’ 25th anniversary. The white hearts, the label, and the pears are printed and/or cut on textured white adhesive cardstock with my printer and my CAMEO.
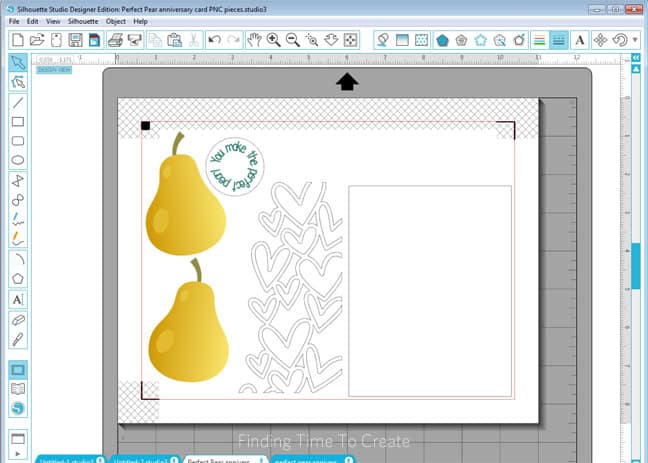
I turned this pear design into a print & cut in Silhouette Studio by filling the shapes in the Fill Gradient Window. I don’t use the gradient fill very often, but it was great for this application to get some shading. I used my Eyedropper Tool in the Fill Color Window to select a lighter shade of the same yellow for the highlight spots. (Did you know you can click and drag your eyedropper tool around a multi-colored area and watch the selected shape change color as you move the eyedropper? It’s pretty cool, and pretty handy to get just the right color.)
The heart background is duplicated and welded, then sliced with the Knife Tool to fit the card base exactly how I wanted, with no waste to trim off. The label uses LW Perfect Print font with the Text-to-Path function to make it wrap in a circle.
As I mentioned, I printed the pears and label on a piece of letter-size white adhesive cardstock (trimmed down to fit my printer). On the same sheet with registration marks I also had the cut lines for the rectangle card base and the heart background. They had no color to print, but this way I could cut all the pieces in one pass after printing.
I added a narrow strip and the tiny number 25 in silver printable foil. The green-blue background circle was the only thing I had to add adhesive to, and I used foam dots to make it pop off the page.
Our friends enjoyed this card, and I hope you do, too!
Designs and fonts used:
Fall set (#65765)
Hearts background (#65661)
LW Perfect Print (#55154)
This post may contain affiliate links. Your price is the same, but I may receive a small commission when you use my links. Thanks for your support!

Such a great card Kelly, I love all the different techniques you used to create this card. Your friends will love it and thank you for sharing with us!
Thank you, Marilyn!
What a great card! I love that the hearts are the same white cardstock as the card itself, but the dimension looks wonderful 🙂
Thanks! I'm pleased with that look, too. 🙂