Family Home Evening Board

Do you have any of those projects you’ve been meaning to get to for a very long time? (The kind that you live without but really want to make but never find the time?) This Family Home Evening board was one of those projects for me.
We are LDS (Mormon) and believe that family is extremely important. We set aside one night each week where we gather as a family (no TV, no play dates, no computer, no devices during that time) and spend time doing lessons, songs, and fun activities together. My husband and I have usually been in charge of the lessons over the years, but the kids are old enough now to fully plan and participate with their own ideas, so a chart for keeping it organized is helpful. I put together this Family Home Evening magnet chalkboard to help us be consistent in involving everyone. Of course I enlisted the help of my Silhouette CAMEO.
Supplies:
Magnet chalkboard (18″ x 12″) purchased at JoAnn’s.
Adhesive vinyl (to be used as a stencil and then discarded, so pick whatever is least pretty or most plentiful in your stash)
Flocked heat transfer material (I used grey to fit best with my color scheme)
Adhesive cardstock (I used pink and mint)
Pattern paper
Colored chalk markers (these are from Recollections at Michael’s)
Sponge and water
Instructions:
1. I found a magnet chalkboard from JoAnn’s, so the hard part was done. The chalkboard inside the frame measured approximately 16.5″ wide x 10.5″ tall. My vinyl was only 9″ wide, but that was fine because I could still fit all the cut-out words inside that space for stencil use.
2. In Silhouette Studio, I set up my page size as 16.5″ wide x 9″ height in the Design Page Settings Window. No cutting mat. That was to represent my vinyl cutting area.
3. I drew a rectangle to represent the chalkboard area to decorate (16.5″ x 10.5″) and filled it with dark grey color in my Fill Color Window. I moved it to match the upper left corner (when viewed horizontally) so my vinyl edge would match my layout. (In the image below, you can see the dark grey rectangle to represent the chalkboard and the red outline to represent the vinyl edge; I was using a roll, so the right edge was actually trimmed later to leave enough room for stenciling.)

4. Using the grey rectangle as a guide, I typed and welded the words in the fonts I had chosen. (Sweet Pea font and LW Skinny Type) These were to be cut out of the vinyl as a stencil so I could color it in with chalkboard markers. The layout and spacing against the grey rectangle is important here. Note I left room for my magnet letters to be added later.
5. To cut the vinyl, I made sure all my script text was welded, removed the dark grey reference rectangle (or you could change it to No Cut in the Cut Settings Window), adjusted my CAMEO rollers to fit 9″ vinyl, and fed the vinyl straight into my machine with no mat.
6. After the vinyl was cut, I removed and discarded all the letters, then used transfer tape to place the vinyl onto my chalkboard. Remember how I lined up the upper left corner while designing in Step 3? That made for easy placement of the vinyl; I just put the upper left vinyl corner in the upper left chalkboard corner.
You can see in the image below that the green vinyl does not extend to fill up the entire chalkboard area, nor did I have to try to worry about centering the vinyl and getting it perfectly straight. All that work was done in the design stage by centering the lettering on my dark grey reference rectangle.

7. Once the vinyl was in place, I colored in the letters with chalkboard markers, let it dry, then distressed it a bit with a wet sponge to give it kind of a messy chalkboard look. You can see in the detail shots that the lettering is not perfect (a problem with juicy markers when coloring in a stencil), but that’s fine with me for chalkboard art. Here’s a closer view of the distressing I did.

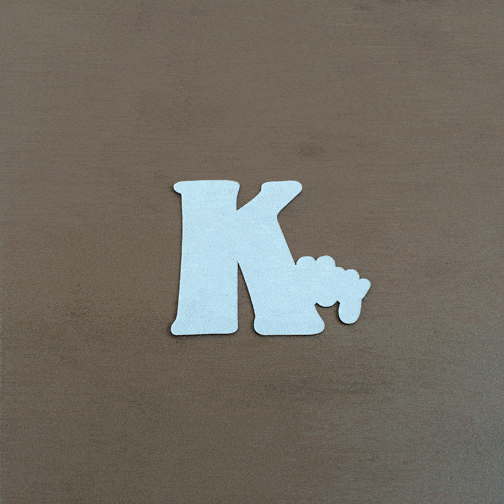
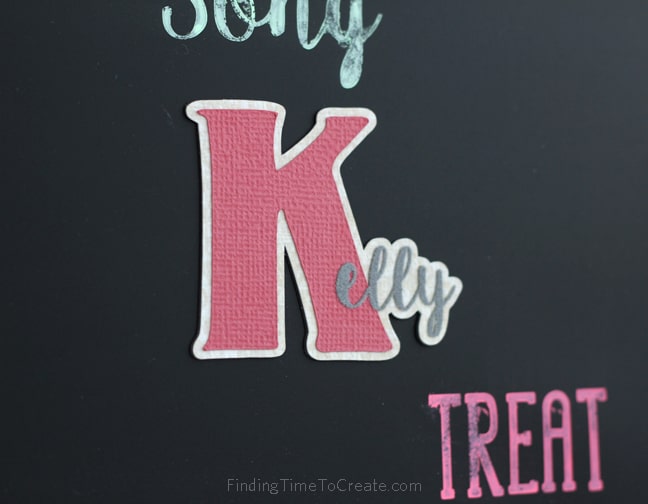
8. The next fun part was creating the magnetic name pieces. I chose adhesive magnet paper so I could add layers on top for the look I wanted. I chose a large initial for each family member (with LW Classic font) and added the rest of their name in smaller letters, with Sweet Pea again.
9. Once I had the initial and name where I wanted it, I created an offset so the full name would stand out. (See the image below.) I cut this offset from adhesive magnet paper and again from a neutral pattern paper (to cover the sticky magnet once its backing was removed).

10. I cut the initial (not offset) from adhesive cardstock, but of course you can cut it with any paper and glue it on.
11. Finally, I cut (in reverse) the remainder of each name from flocked heat transfer material so I could iron it on to the layers below.
Here are my various layers cut and ready to assemble:

Here’s a set of images to show the various layers of the name pieces: adhesive magnet paper straight from the CAMEO, magnet paper’s backing being removed, magnet paper’s sticky side exposed, pattern paper added, adhesive cardstock initial added, and heat transfer name ironed on.
 In case you’re wondering why I used flocked heat transfer material on paper, I have two reasons. One, because it’s so easy to cut with this much intricate detail, and two, because I just absolutely love the flocked texture. 😉
I am so happy with how this project turned out. The magnet names are easy to move from week to week, and the kids love seeing their names on display while they plan on their next week’s assignment.

Fonts Used:
LW Skinny Type #72101
LW Classic #50328
