PixScan and Stamps
 Hello! I’ve got a few Silhouette PixScan tutorials you may have already read, and today I’m adding to the list. I love this specialized mat because it can do quite a few things my CAMEO can’t do on its own.
Here’s my tutorial for using PixScan™ with stamps, originally posted on the Silhouette Blog:
Do you have a PixScan™ mat? Have you used it much? I love mine; it adds a whole new level to my CAMEO’s abilities. Kelly here, to show how to use stamps with a PixScan™ mat. I’ll be using a stamp I created with my Mint machine, but you can use this PixScan™ technique with almost any stamp you have. Did I catch your attention, stampers?
Stamp your Paper
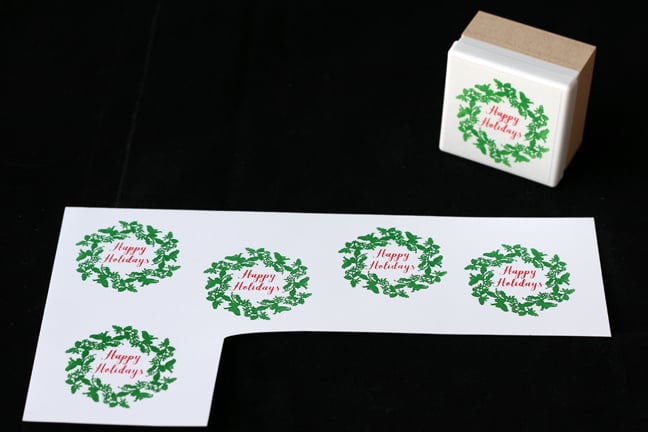
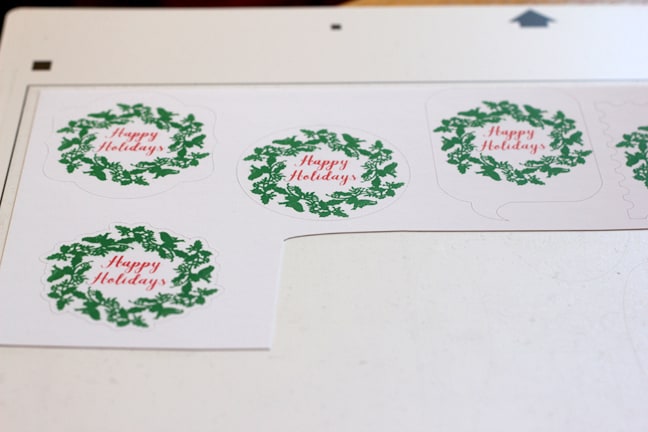
I had a scrap of white sticker paper that was too small to run through my printer as a print & cut, so it’s an excellent choice for the PixScan™ mat. I stamped my image several times, leaving room for cutting out around each stamped image.
Place on PixScan Mat and Import
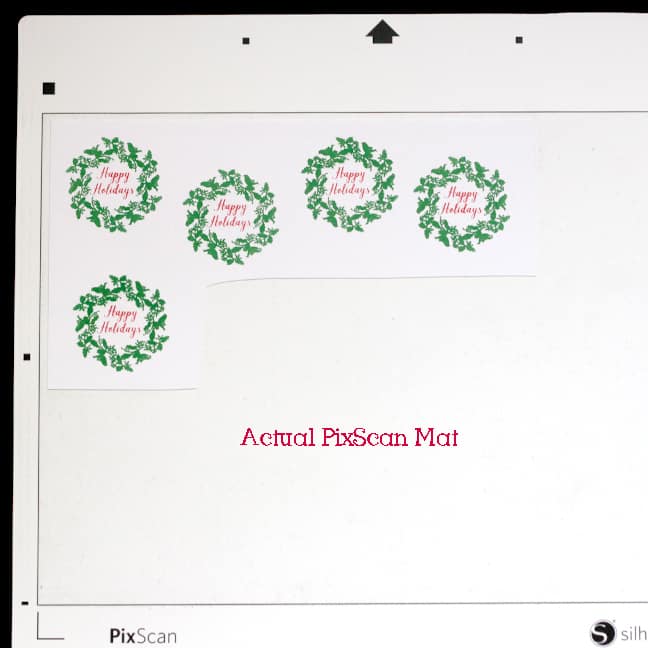
I like to scan my PixScan™ mat to import the image into Silhouette Studio. This is what my scrap of stamped sticker paper looks like on my PixScan™ mat before scanning (see below).
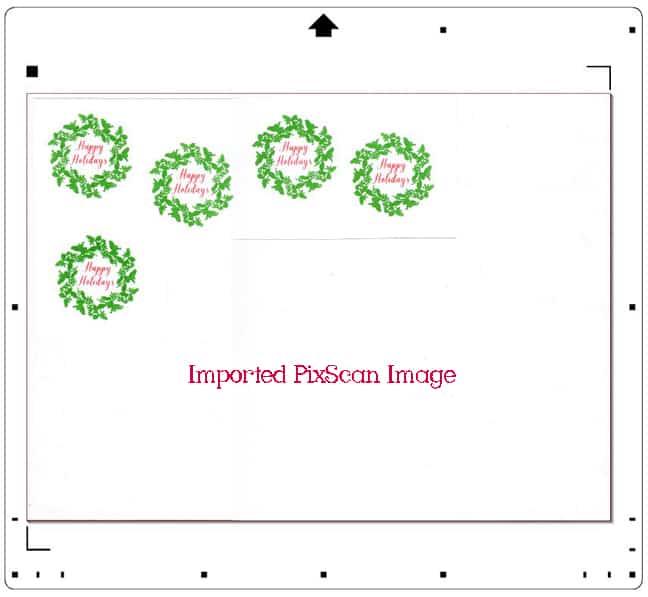
And this is what my PixScan™ mat looks like on my screen after importing through scanning (see below). Looks the same, doesn’t it? See the magic? Now I can assign cut lines and it will cut exactly where I want it.
Tips for scanning to import the PixScan image in Silhouette Studio:
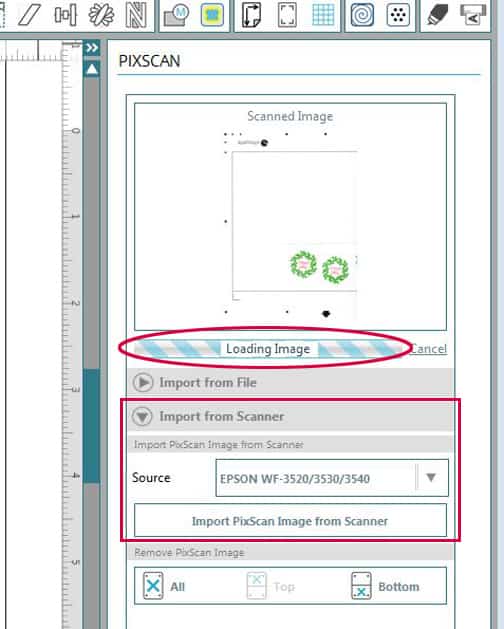
- Choose the PixScan™ icon or go to File>Open PixScan Image.
- Place the PixScan™ mat onto a flatbed scanner. If you have a CAMEO PixScan™ mat and a standard-size scanner, place as much of the mat as will fit on the scanner bed. Part of it will go off the edge, but you can scan a second pass.
- In the PixScan™ window under Import to Scanner, select your scanner that should show on the list, and then click Import PixScan Image from Scanner.
- Choose A4 size (not Letter size, if A4 is an option) when the scanner menu pops up to maximize the area of data collected and choose Scan. Give it time to load, and all or a partial image will show on your screen (depending on the size of your mat and scanner).
- For the second pass on a scanner smaller than your mat, simply rotate the mat 180 degrees, place it back on the scanner bed in the same spot as before, and click Import PixScan Image from Scanner. Once this second pass loads, your on-screen PixScan™ mat will show everything that is actually on it.
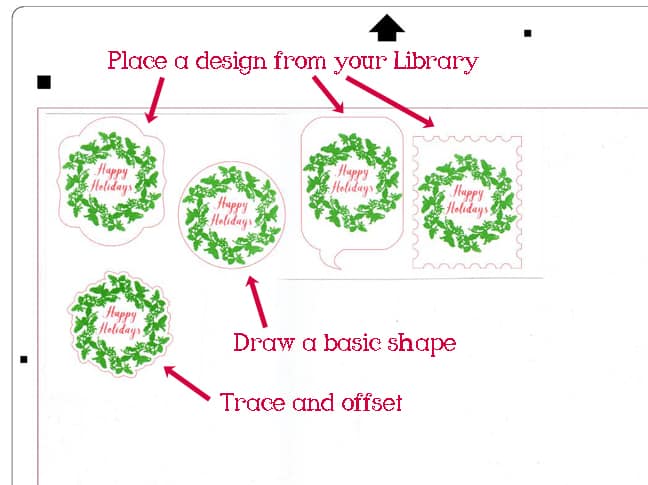
Assign Cut Lines to PixScan Image
Now it’s time to assign cut lines. You can (1) perform a Trace to cut exactly around the stamped image, then add an offset to the trace (and remove the original trace line) if you want a little extra around the outside. Or you can (2) draw a basic shape around the stamped image. Finally, you can (3) pick any design from your Studio Library to cut around the stamped image. The sky’s the limit!
Send to Silhouette
Now load the PixScan™ mat into your Silhouette machine and choose the appropriate material settings. The actual cuts you get will match what you set up on screen. Yay! Almost like magic.
I hope you’re excited about the possibilities of what the PixScan™ mat can do for your stamps. The PixScan™ mats are available for the Portrait, CAMEO, and Curio.
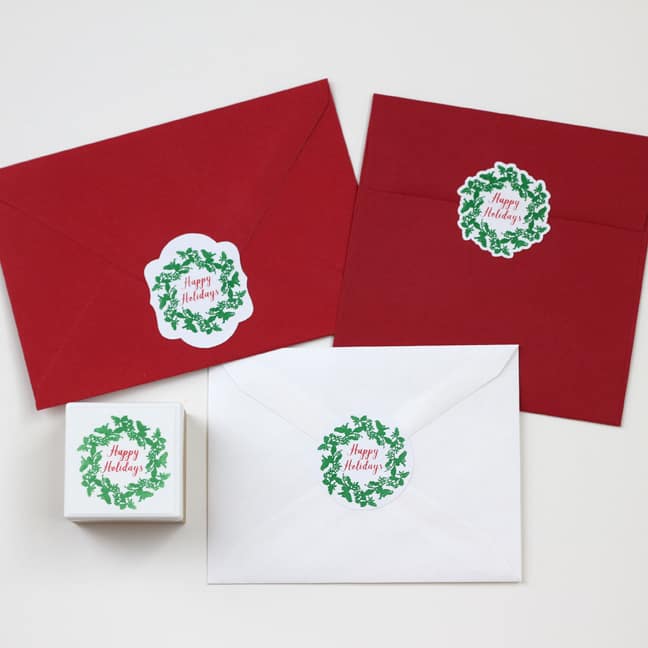
And if you’re admiring my cute little holiday stamp I made with my Silhouette Mint machine, you can check out my Mint tips and tutorials HERE and HERE.

Your “Mint” stamp is so cute! What a perfect finish to your probably already perfect Christmas cards. Going to go check out the other blog now – thanks!
LOL. I must confess that I haven’t started my Christmas cards yet! But this stamp on the envelopes will be so cute! 😀 😀