How to Make a Beautiful DIY Princess Sash

I had the opportunity to make a DIY princess sash for 26 teen and pre-teen girls last week. It’s a fun project that can be customized for birthdays or any occasion where you want to make a girl feel special.
This tutorial for a DIY princess sash uses glitter heat transfer material cut with a Silhouette CAMEO, but you can customize it to work for you.
Materials/tools needed:
- 4-in. wide 100% polyester ribbon
- Glitter heat transfer
- Coordinating rosette (optional)
- Heat n Bond Hem iron-on adhesive
- Heat resistant tape
- Large glue dots
- Silhouette CAMEO or Portrait
- Hook tool
- 12 x 24 in. CAMEO cutting mat
- Mini binder clips
- Scissors
- Rotary cutter
- Large self-healing mat
- Ruler or other straight edge for cutting
- Iron or heat press
Design and Cut Out Heat Transfer:
This is how I designed and cut my phrase for the sash and cut the glitter heat transfer with my Silhouette CAMEO 3. You can do this part your own way if you use another program or cutter. In fact, you can just buy premade iron-on letters if you don’t have a cutting machine.
1. In Silhouette Studio, choose a legible font that’s easy to read.
I used Andalusia because it was the perfect balance of elegance and legibility. It also was great for staying within tight borders and saved material when making 26 phrases.
2. Type the phrase “Royal Daughter” (or “Happy Birthday” or “Bride to Be” etc.) with the Text Tool.
My text looked perfect when resized to about 2 in. tall and 14 in. long.
You can see on the finished sash photo there’s room to go a little larger in either direction if your font or phrase choice is different than mine.
3. Weld and Group the phrase.
(I always save a copy off to the side before welding, in case I want to edit the text later.)
4. Make copies as necessary.
I cut my 26 phrases from five different colors of glitter heat transfer, so I only had to make enough copies for each color. I was able to fit 6 across a 12-in. wide piece of heat transfer.
5. Select all the phrases and flip them horizontally.
(Always cut heat transfer in reverse.)
6. Set your page size and cutting mat in the Page Setup Panel to fit your phrases.
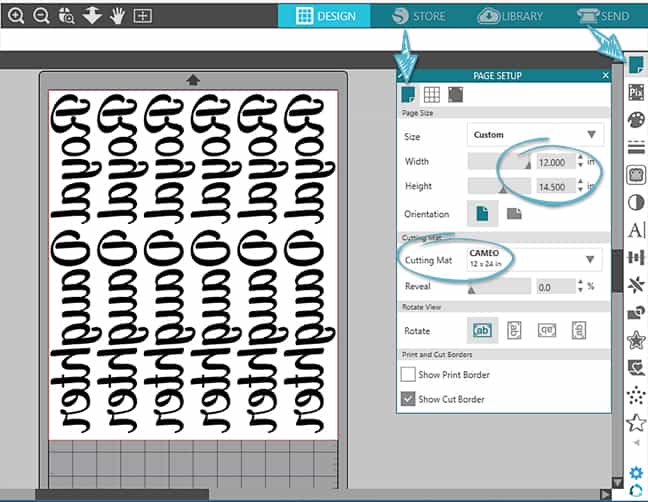
I was trying to fit a lot on my heat transfer, so I decided to use my 12 in. x 24 in. CAMEO cutting mat. That way, I could use the full 12-in. width and saved an additional inch at the end, which is required for the rollers when using no mat. I think every CAMEO owner should invest in one of these extra-long mats! I only use it once in a while, but when I need it, I love it!
I set my page size in Silhouette Studio to 12 in. wide x 14.5 in. height.

Note: You can cut heat transfer without a mat if you adjust the right roller. Make sure to choose “none” as your cutting mat selection.
7. In the Send Panel, choose:
- Material = Heat Transfer, Glitter
- Action = Cut
- Tool = Autoblade (if CAMEO 3 or Portrait 2) or Ratchet blade
- (I cut Silhouette brand glitter heat transfer with blade 3, speed 5, force 33.)
8. Load the heat transfer material onto your cutting mat, glossy side down.
9. Send to your Silhouette cutter.
Remember when cutting long material like this, especially when using the stiff cutting mat, to leave enough space behind your machine for it to move freely.
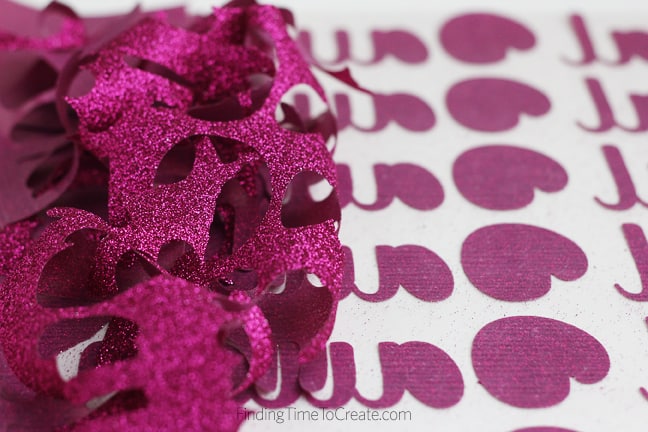
10. Weed the excess heat transfer away, so only the letters remain attached to the sticky backing layer.
Sash Assembly:
Once your phrases are cut, weeded, and trimmed apart so you’re working with a single phrase at a time, then you’re ready to move on to assembling the sashes.
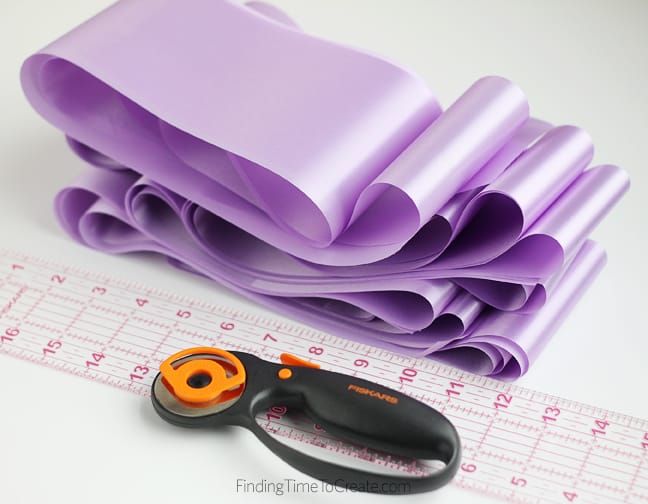
1. Measure out the 4-in. wide ribbon and cut in lengths of 65 in. or 72 in.
The 65-in. sash looks good on us shorties petite girls who are 5’ tall or less. The 72-in. sash looks good on taller girls and adults. (I may or may not have asked my husband to try on the sashes in order to see what they looked like on a normal-size person. No, I did not take a picture.) 😉
Note: If you are concerned about fraying, you may want to apply some Fray Check to each cut end.
2. Cross the ends so they hang evenly, and clip in place.

Use something like mini binder clips to hold the sash in place while trying it on to see if you like the length and look. These measurements worked for me, which you can use as a starting point for your own sash.
3. Position the heat transfer phrase onto the sash so it’s got an even amount of “white space” between the clipped crossover and the fold at the shoulder.

The sticky backing helps hold it in place while you try it on again. I had about 6 inches of space on either side of my phrase on the 65-in. sash.
4. Iron or heat press the phrase onto the sash.
- For 100% polyester ribbon, preheat the iron or heat press to 300 degrees (F). Even at that lower temperature, I could see a touch of warp/shrinkage of the ribbon, so do not get it too hot! (And no steam, if ironing.)
- If you’re doing multiple identical sashes, I suggest using one (still clipped with binder clips) as the template to show where to place the phrase on an unclipped ribbon. I found it easier to use my 15-in. heat press on a flat ribbon, as opposed to one already fastened. If using an iron, it won’t matter much.
- With the glitter heat transfer placed against the ribbon (words right-side up and glossy backing on top), use an iron or heat press to heat and activate the heat transfer. On my press, I used 300 degrees for 15 seconds. With an iron it will take longer (up to 45-60 seconds).
- Peel off the clear backing while still hot. If the heat transfer wants to come up with the clear backing instead of staying on the sash, then apply more heat.
5. Secure the crossover point with hem tape.

I wanted my sashes to last, so I used a 1-in. piece of iron-on hem tape to permanently attach the crossover point of the sash. It does show through a little, so I made sure it was at a point where the rosette would cover it. (Glue dots are a less-permanent alternative here.)
If using a heat press, use heat-resistant tape to hold the sash pieces in place while sticking the 1-in. piece of hem tape between the two layers, then press for 2-3 seconds.
If using an iron, place the 1-in. piece of hem tape between the two layers, then iron for a few seconds until bonded.
Note: I got some creases in the polyester ribbon when using the heat press, but those came right out with a quick swipe of an iron.
6. Attach a rosette or other embellishment.

This is to cover the mark from the hem tape, and to dress up the sash. My friend who helped me gather materials for these sashes had a large collection of these 4-in. rosettes left over from another project, but I have a tutorial for making your own fancy ribbon here that can be adapted.
I used a couple of large glue dots to attach the rosette, and they seemed to be plenty strong enough. I also used one more glue dot to attach the top of the crossover point to help it hang just right. It did not show through like the hem tape. Permanent or temporary glue dots both seem to do the trick.
This was such a fun project, and the girls (ages 11-18) were so thrilled to have their own princess sashes to parade around in. I hope to put up the post next week about the event where we gave these sashes to the girls, so come back soon!


This post contains affiliate links. This helps you by knowing which products I used, and it helps me because I get a small commission when you use my links. Win-win!

What a fun project! Your darling model looks as if she adores the sash. And who wouldn’t? They’re cute as can be!
Thanks so much, Michelle!