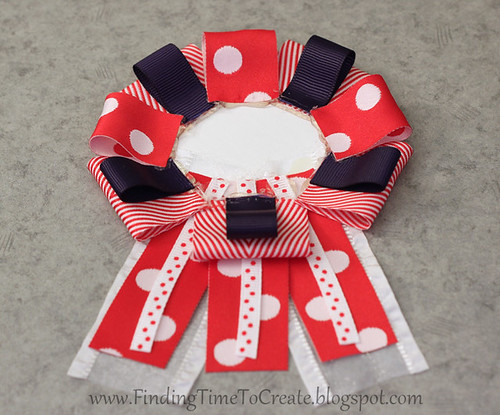
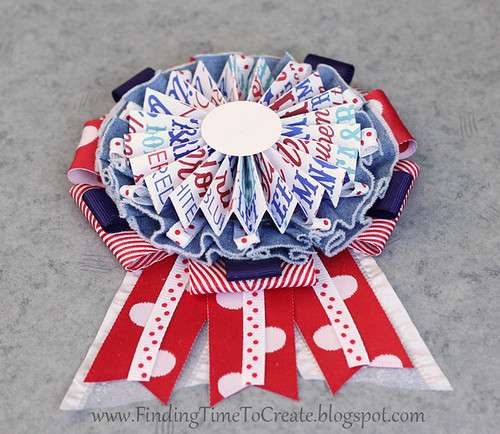
Patriotic Ribbon
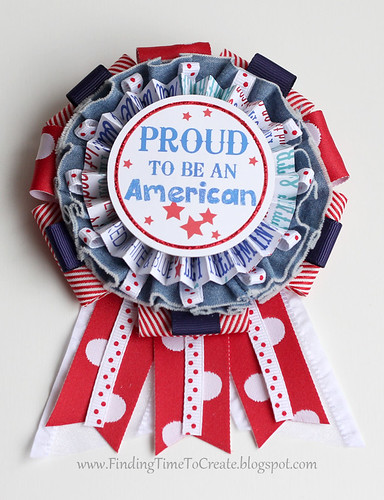
I made this ribbon to wear during 4th of July celebrations here in the United States, but you can adapt this ribbon for any occasion by changing the colors and making your own label for the front. My daughter gave me a ribbon similar to this for Mother’s Day, which was definitely the inspiration for this project.
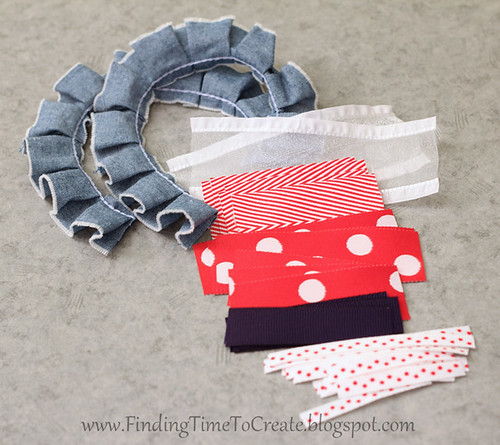
Supplies:
1 ¼” wide white ruffle ribbon by May Arts (4” segments x 2)—8” total
1 ½” wide red stripe ribbon by May Arts (2 ¼” segments x 5)—11 ¼” total
1” wide red polka dot ribbon by May Arts (2 3/8” segments x 3, plus 3 1/8” segments x 3)—16 ½” total
½” wide dark blue grosgrain ribbon by May Arts (2 3/8” segments x 5)—11 7/8” total
Pleated Trim Denim ribbon by Maya Road (7” segments x 1 or 2, depending on fullness desired)—7” or 14” total
¼” wide white-red polka dot grosgrain ribbon by May Arts (1 7/8” segments x 12, plus 3” segments x 3)—31 ½” total
Chipboard circles cut to 2 ¼” (x2) and 2 ¾” (x1). Heavy cardstock would probably work, too.
Paper circles cut or punched to approx. 1” (x2)
Decorative label on front (2 ¼”)—printable download included here
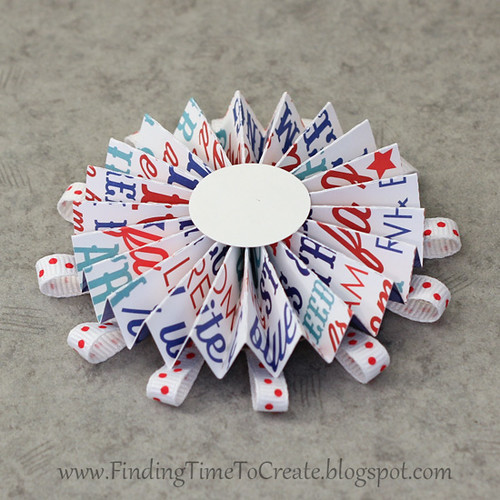
Pattern paper for rosette by Doodlebug Design (1 3/8” wide by 12” long—2 strips, creased and folded every ½”)—or use Silhouette Studio download included here
Red Stickles glitter glue
Hot glue gun
Fray Check by Dritz
Pin back
Instructions:
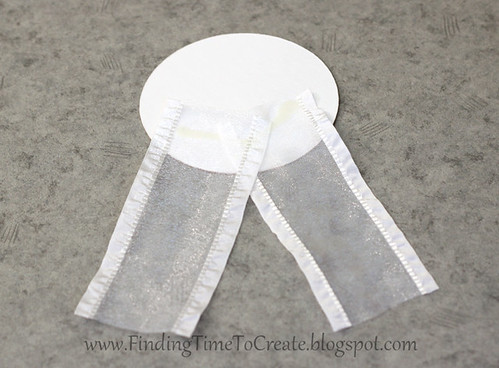
1. Cut ribbon strips and circles as outlined above.
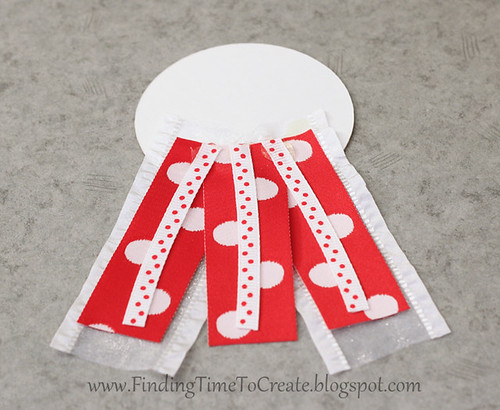
2. Hot glue the 2 wide sheer white ribbon strips to the lower part of the larger chipboard circle (2 ¾”) for the “tail” angling out slightly from the 6 o’clock position.
3. Hot glue the 3 3 1/8” red polka dot ribbon strips on top of the sheer white ribbon so two are at an angle and one hangs straight down in the center.
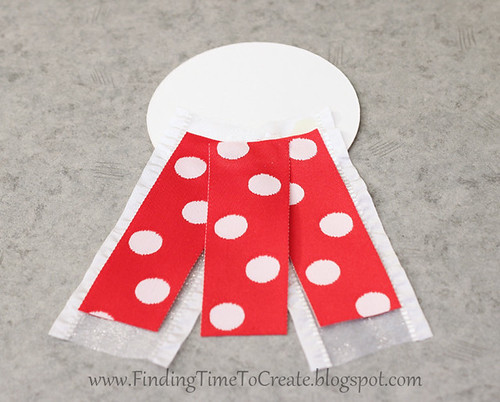
4. Hot glue the 3 3” skinny white polka dot ribbon strips on top of the three strips you just glued down.
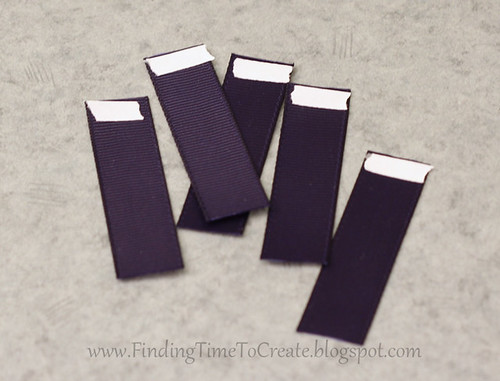
6. Fold the dark blue grosgrain ribbon strips in half and hot glue one on top of each of the folded red stripe strips.
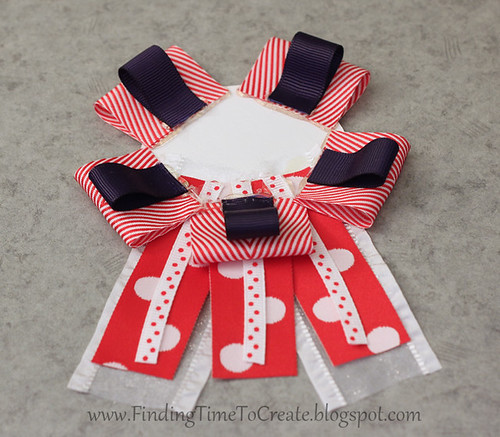
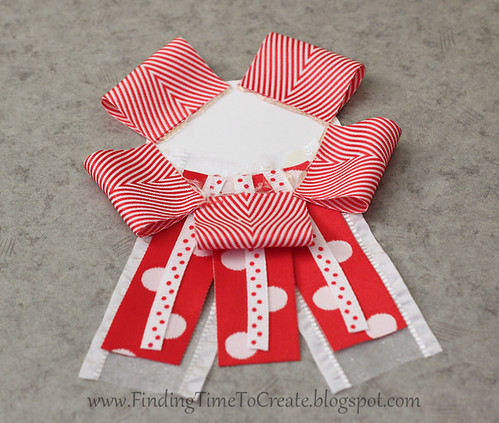
7. Fold the remaining 3 red polka dot ribbon pieces in half and glue one to the 12 o’clock position, one to the left and centered between the existing ribbons, one to the right and centered between the existing ribbons.
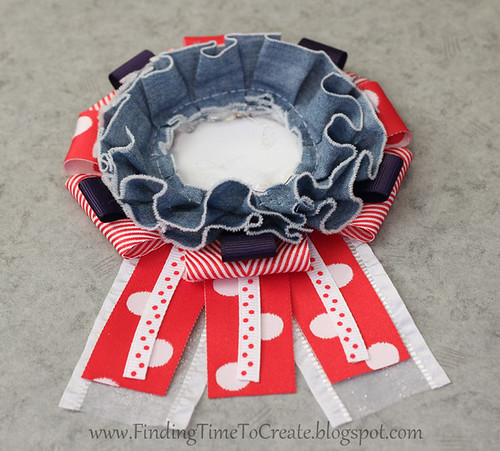
8. Take a 7” strip of pleated ribbon and hot glue it in a circle on top of the existing layers of ribbons. Add a second strip of pleated ribbon, if desired, for extra fullness.
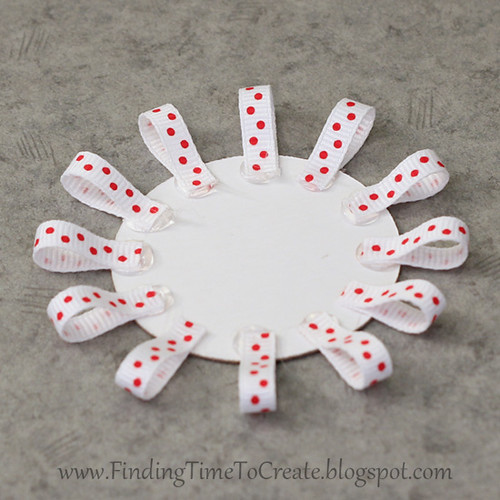
9. Fold the 12 remaining strips of skinny ribbon in half and glue them evenly spaced around a 2 ¼” chipboard circle. If you imagine putting them at positions on a clock face, start at 12 o’clock, 3, 6, 9, then fill in at the remaining hour marks.
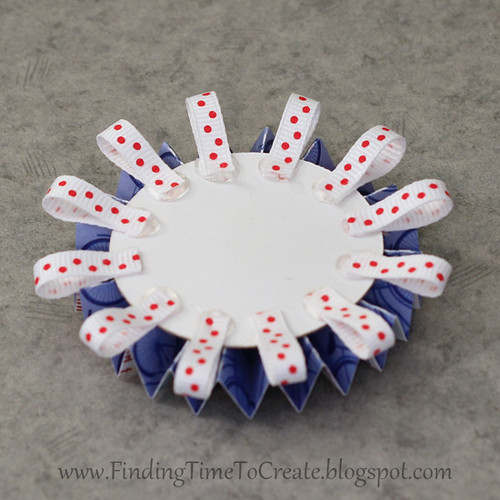
10. Make a rosette (instructions HERE). Hot glue the 2 ¼” chipboard circle with ribbons from Step 9 to the back side of the rosette.
11. Hot glue the rosette to the rest of the ribbon.
12. Print and cut (download here) the decorative label for the front of the project. The circle is 2 ¼” if you want to design or stamp your own. I recommend printing on Epson Premium Matte Presentation paper for crisp, bold colors. Add sparkle to the red border circle with a thin layer of red Stickles glitter glue and let dry completely.
13. Adhere the label to the remaining chipboard circle and hot glue it to the front of the rosette.

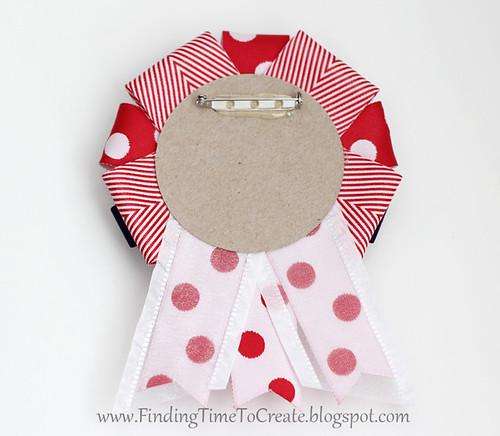
14. Trim the dangling ribbon ends and seal with Fray Check.
15. Hot glue a pin back to the back side (you can find these in the jewelry section of many craft stores).
Please note I have a single download that was referenced multiple times in this post. The download includes two Silhouette Studio files:
-A page of these labels ready to print & cut with a Silhouette machine
-A file that includes the rosette and circle cuts
There are also two PDF files:
-A page of these “Proud to be an American” labels anyone can print
-Instructions the same as above, but without pictures

Goodness! Are these ever beautiful! Thank you for all the wonderful embellishing ideas! They are much more festive than mine were a couple of years ago!
Hi Kelly,
What a fabulous and tasteful project – looks like straight out of a Martha Stewart mag! Wowza. Thx for the instructions. I hope all is well with you.
♥ Barb