Mother’s Day for Grandma
This is the project I made in 2008 for Mother’s Day. I just ran across the photos while scrapbooking and thought I should share this here. There are several versions out there for a word-shaped mini album. This is my version I created in Photoshop Elements. I created a “mask” for each letter with a rectangle and Cafe Rojo font. I used digital papers and stamps from Designer Digitals; and other rub-ons, flowers, and ribbons from my stash.
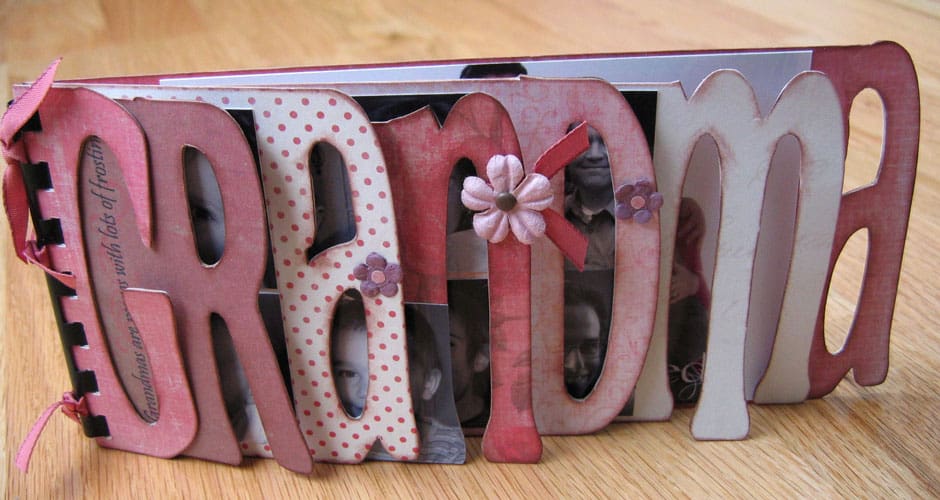
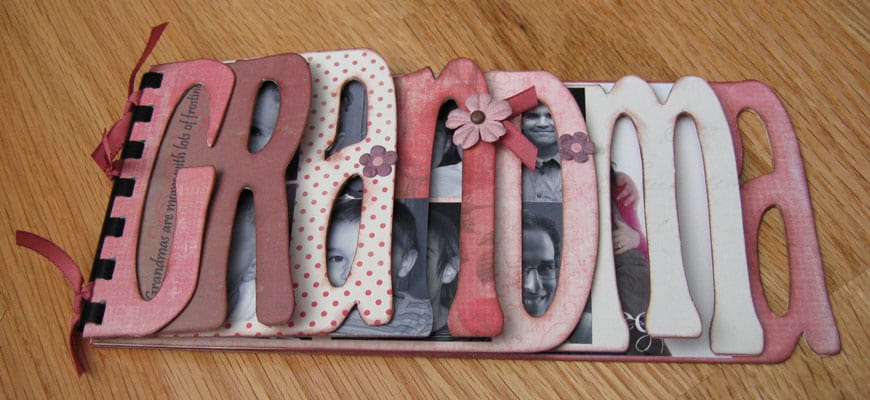
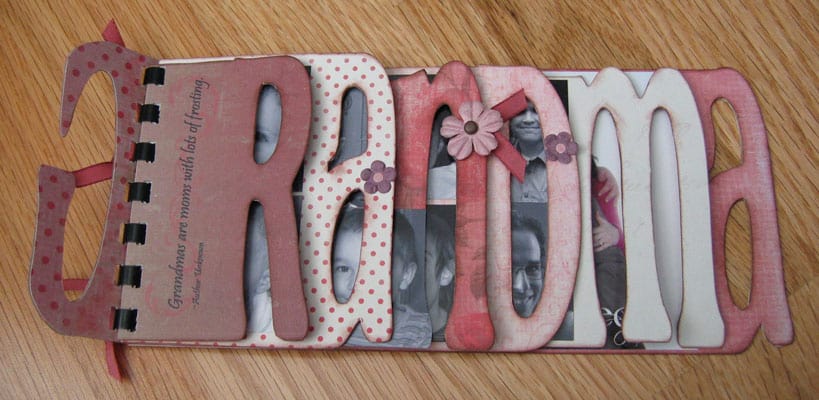
This quote says “Grandmas are moms with lots of frosting.”
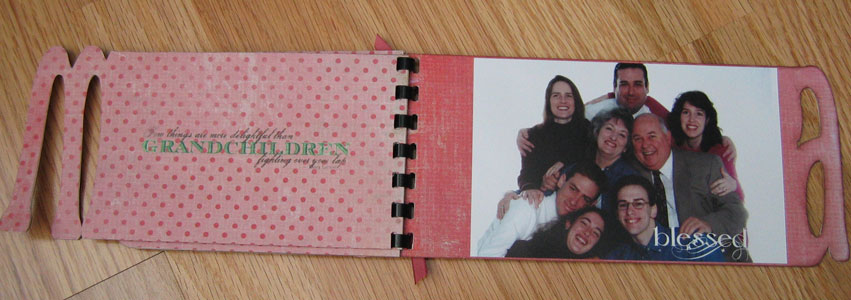
This quote says “Few things are more delightful than grandchildren fighting over your lap.”
This project involved a lot of cutting, I remember, because each letter had to be cut out three times: once for the regular side, once for the reverse side, and once in chipboard. (Multiplied by two for two mothers.) That was before I was really using the Silhouette much, but these days I would have shortened the work by cutting everything with the Silhouette.
I hope you enjoyed this project! It made me happy seeing these pictures again.
UPDATE 4/20/2015: See my updated blog post for cutting and assembling this grandma album {here}. It includes all the links to download the template or cutting file, plus links to make your own word album from scratch. Click the image below.


You created treasures for the heart. I have tears in my eyes. What a beautiful thing to do. Can I adopt you?
Then I'd have three mothers to make these kind of gifts for, Barbara! I'm afraid that would put me over the top for my time allotment for handmade gifts. Ha-ha! 😉
What a fabulous little album Kelly!
Thanks, Shawna! I should probably do another something like this to add three years' worth of grandchildren. 🙂
That is very cool! My mother in laws b-day is coming up in a few weeks and she would love something like this!
Is there an easy way to help all of us know how to do this with a Silhouette? I just got one for Christmas and I only use it for small projects because I don't know, yet, how to mess with the settings on it. 🙂 Thanks!! Very cute idea!!!!
I used Photoshop to merge the letters with rectangles and add pattern paper as a clipping mask, but you could use the Studio software's "Weld" function to do the same thing. I'll put that on my tutorials-to-write list. 🙂
Can I use the Cricut Machine to cut out the letters???
These letters are "welded" to the rectangular extension, so the Cricut isn't going to be able to do this exactly. But you could certainly use a Cricut to cut out letters and attach them on top of rectangular pieces. If you have a deep-cut blade you can cut this out of chipboard, then cut out identical pieces with your regular blade out of pattern paper to "sandwich" it all together. One side will need to be cut out in a mirror image.
If you use the Cricut Craft Room application on the computer you can definitely do it. All you have to do is have the shape and letter and just overlap them where you want and it'll automatically weld them together 😀
This project is absolutely wonderful!
Thanks for the info! I'm not familiar with Cricut Craft Room, but it's nice to know Cricut users can do this easily as well. It's been a while since I've used a Cricut, and the designing options and shape/size manipulation was sadly lacking at that time.
You should sell this on Etsy, but where people could put their own photos.
I would consider it, but I stole the idea from Maya Road and some other companies who make chipboard word books. 😉 Although mine can be custom made.
Would you consider making and selling one to me? I have my first grandbaby due in May 2016. Would love one that spells out Grandson ?
I love this and would love to do it for family members for Christmas. I do have several questions, if you happen to have a spare moment… What do you cutout the chipboard with? Did you use print and cut for the letters (with digital papers) or are those just fancy cardstock for the letters? What did you use to attach the letters to the chipboard? Did you seal them afterwards?
Thank you soo much!
Hi, Erin. Originally I cut the chipboard by tracing a thin paper cutout and using scissors. Now I cut it with my Silhouette Cameo machine (use a blade setting between 5-7). You can definitely choose to do print & cut with digital papers or to cut it with pattern paper and adhere it to the chipboard. I used a liquid glue to attach them to the chipboard, and no I didn't seal them.
I am in the process of making a full video tutorial for this project and should have it up in the next week or two. I'm teaching three classes in the next 6 days and need to get those out of the way first! 🙂
Have you made the tutorial for this project yet? I'd love to see it, but would love to have a link to it so I can find it. Thanks so much!
Hello Kelly I was going to try to email you but it wont allow me to… is there a way I can so I can ask you a few question about this Grandma Craft! 😀 Looking forward to hearing back from you.
Brittney
Hi, Brittney! There's no link to your email, either, but you can find my email address by going to the "About Me" Tab at the top of my blog.
You can ask me any questions you want, and I will also be posting a video tutorial soon for this project.
I've added a video tutorial for creating this project in my new post HERE. If you still have questions, please let me know!
Wonderful! Thanks so much for posting your completed pages.
Makes the album more fun to look at.
And thanks for all your inspiration.
I would love to make this!! I have photoshop elements but i do not have a machine to bind it together. What will I need to get to bind this? I want to use this idea for a "smash book/ scrapbook" in memory of my 3 yr olds dog that has went missing that he loves oh so much. Thank you, Billie Jo
Billie Jo, you don't need anything fancy for binding this. You can use a strong hole punch (that will cut through chipboard if you use it–like a "Crop-a-Dile") and some metal rings. I've seen plenty of albums like this that use rings, which you can find at scrapbook stores and maybe office supply stores.
I like using the "Bind it All" since I have access to one, but it's absolutely not necessary.
And I'm sorry your son's dog went missing. I think he would love a scrapbook to remember it.
Love this! How do you get the cute quotes onto the paper? Do you use digital paper? I made the album with scrapbook paper so I don't have the cute little sayings.
One album I made had rubons (K & Co. I think) on top of the paper, and the other I just typed in on top of the digital paper before cutting. If you like your handwriting, you could certainly just write the quotes on top of the scrapbook paper.
OK, I really want to make these but I don't have that little crafty machine that you keep talking about. So do I just print out the words that you posted on here and cut them by hand on my own cereal boxes? Also, how did you get that nice paper on top of the cut out after you were done? Is that scrapbook paper? So I would have to cut that out as well in the letters? Sorry so many questions
You can download the PDF to print here. You'll need to cut each letter three times–once from a cereal box, once forward-facing from scrapbook paper, and once in reverse from scrapbook paper. Then glue the three layers together for each letter.
That's why I like my crafty little machine so much! 🙂
Thank you so much for posting the video on how to make this using a silhouette. My parents baught one for me a few months ago & have not really figured out how to use all the different aspects it has. I am one of those people that do much better with visuial instructions instead of written ones. I just finished making this for my son to give to my grandma his great grandma & I know she is going to love it. The only thing I did a lil different was I brushed mod podge over each page to seal it a lil better & make the pages a lil stronger. Do you have any other projects with video? Thank you again:)
I do have several videos on You Tube and a few on my online class website. If you click on my Tutorials tab at the top of my blog you can find quite a few tutorials, some of them obviously videos. If you click on the label for Classes, you can find links to the recordings from my Silhouette Online Live classes.
Here are all my You Tube tutorials, although they don't all reference the blog post. It's probably better to start from my blog.
What is the font?
Cafe Rojo
Just finished making three of these beauties. Thank you for the idea! I don't have a cameo so I cut everything my hand, it was a lot of fun (no sarcasm here)! To bind my books I used a method called Japanese stab binding, but next time I'll look into the spiral binding like yours. Where did you get that done? Or do you have a puncher for that yourself?
Jane, I'm so happy to hear that! I have a few different punch/binding systems and did it myself. I'm pretty sure most local copy & print businesses also do bindings like this if you don't want to invest in a Cinch or Bind-it-All or other personal comb binding system.
What is the program you use to make the letters??
If you read the end of my post above, you will see that I use Silhouette Studio to create these letters and there is a link to another post that tells more details about that.
Ok. Thanks! Didnt see that post! I seen the utube video very helpful will be using it to help create mine. Is it possible to do grandkids instead of grandma? Or to big?
The word grandkids is probably a bit long for a word album, unfortunately. You could try similar words or different fonts, but in the end you need to be able to fit the last letter on the size of paper you have available and still keep the rest of the letters visible without looking awkward.
mothers day is coming, this article is very helpful for those who wanna wish mothers day to their moms,,,, happy mothers day
I looked at the pdf that you had on here to download. Why does it have the letter both ways? Do we need both sets or can I just print out one copy and put 3 layers (designed, cardboard, designed) together? How do I get the cute sayings on the letters to where they show throughout the other layer?
The letter both ways is in case you are using single-sided paper or printouts. You need one in reverse to put on the back side of the cardboard/chipboard (so the white side can be glued to the back of the chipboard).
If you are printing a colored design, you can also type a saying that you can place on top of the pattern. If you import a saying, it needs to be a PNG file so the background is transparent.
I used rub-ons when I made this album and just bought all those sayings to apply to the letters.
What did you do to create the darkened edge on the letters?
I ran a dark brown inkpad along the edges of the paper. See my tips & tricks post about inking edges.
How did you decorate the chipboard once you had it all cut out?
I cut it once from chipboard, and twice from decorative pattern paper (one in reverse) to cover the front and back of the chipboard pieces. I just used an adhesive tape runner to stick the pattern paper to the chipboard. Then glued on photos, added rub on quotes, flower embellishments, etc. I punched holes and added binding at the end.
Awesome thank you!
You're welcome! I have just made a couple more of these and will put an assembly tutorial on my blog within a week.
Could you send me the PDF file for the grandma album? I couldn't get it to download.
I sent a few emails off today with this PDF, so if you have not already requested it by email, please do so and I will email it to you. 🙂
Hey, is there a way to do this manually? I’m thinking of making one for my mum saying ‘mother’ for her birthday. It looks great!
Hi, Sarah. I have a printable download already made for “Mother” as a PDF. Click here for the direct download, OR see this post for designing your own word album from scratch.
Or you can use my contact form (hover over my “About Me” tab) to send me a request and I can send you the file directly.
How tall is the album?
The finished album is about 4″ tall and 8.5″ wide. You can see more details and assembly instructions here: Grandma Album Assembly Tutorial
Precious gift?
They won’t download for me. Could you possibly send it to me through email? alexgarza2322@gmail.com
Which version do you need?