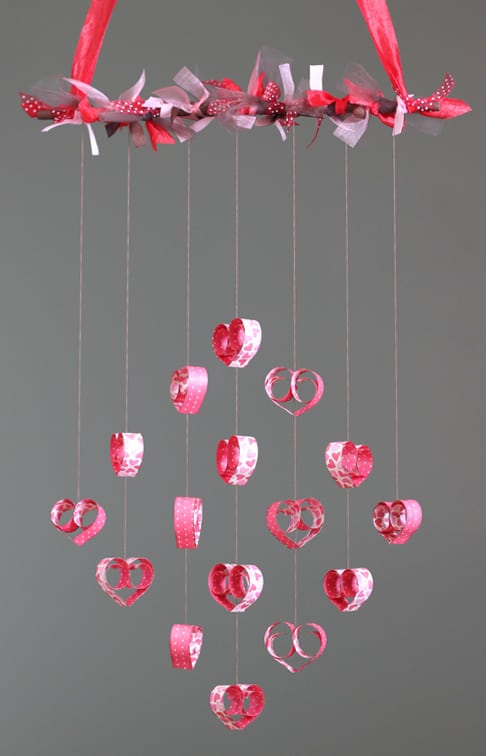
Heart Mobile Tutorial
I spent hours drooling over all the pretty mobiles I could find on Pinterest, and then I combined several of my favorites to create this one. This is another project I submitted as a design-team member for Heartland Paper Co. It only uses a single page of double-sided pattern paper, and no cutting machine needed! Here’s a tutorial for you.
Materials:
12” double-sided pattern paper: Pinecone Press Papers “Red Hots”
48” of ribbon for hanging
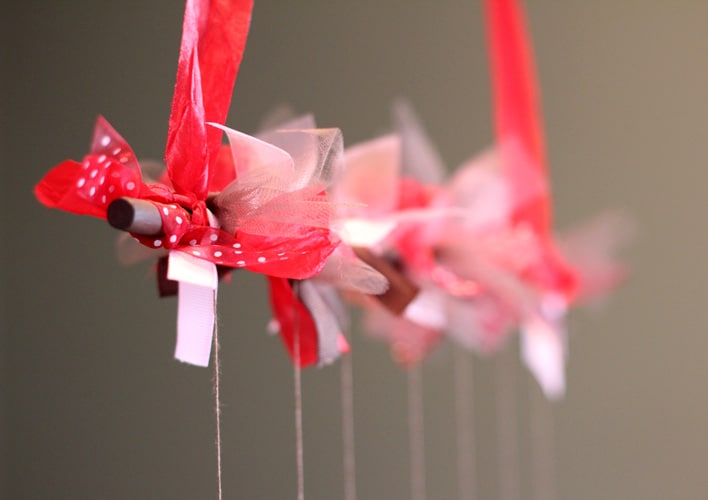
Several yards of coordinating ribbon and tulle to tie to rod, cut into 5″-6″ segments
Wooden dowel (3/8” thick), cut to 16” length
Acrylic paint
Thread
Glue Dots (1/8″), Scotch Quick Dry Adhesive
Fray Check (optional)
Ink pad (optional)
Instructions (click here for printable PDF version):
1. Cut a wooden dowel to about 16” in length. Paint it. (I used two coats of brown acrylic paint.)
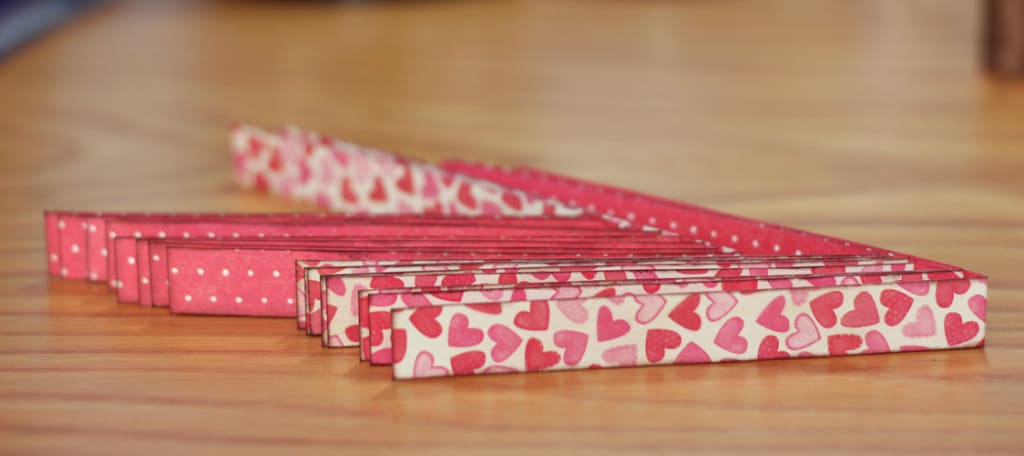
2. Cut one page of 12”x12” double-sided pattern paper into ¾”-width strips. (16 total)
3. Fold each strip in half, making eight with one side of the pattern facing out and the remaining eight with the other side of the pattern facing out. Ink the edges, if desired.
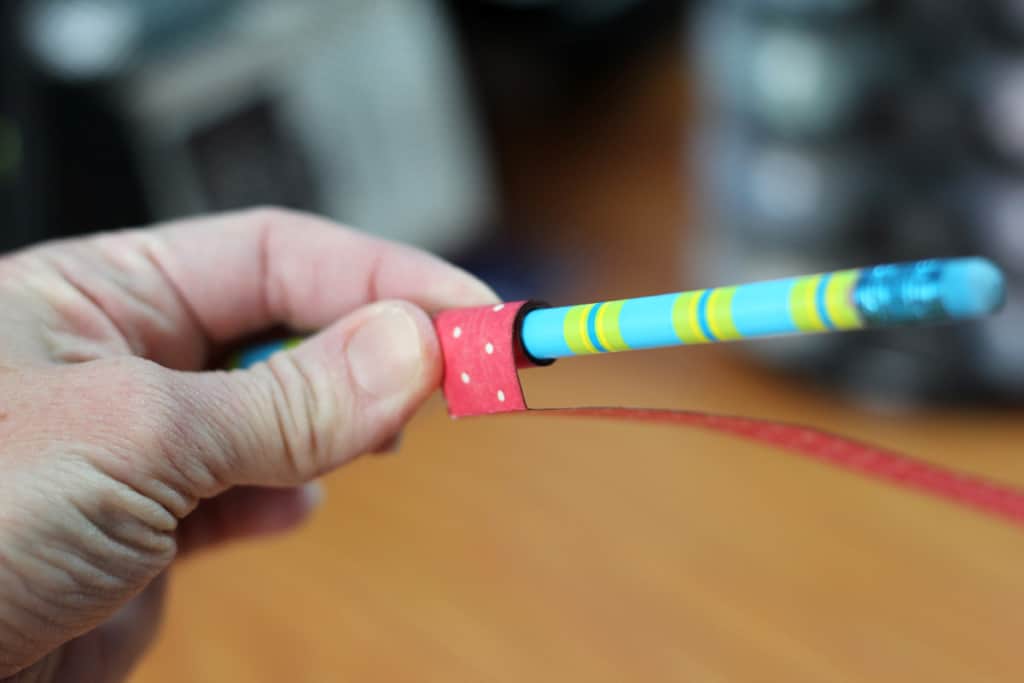
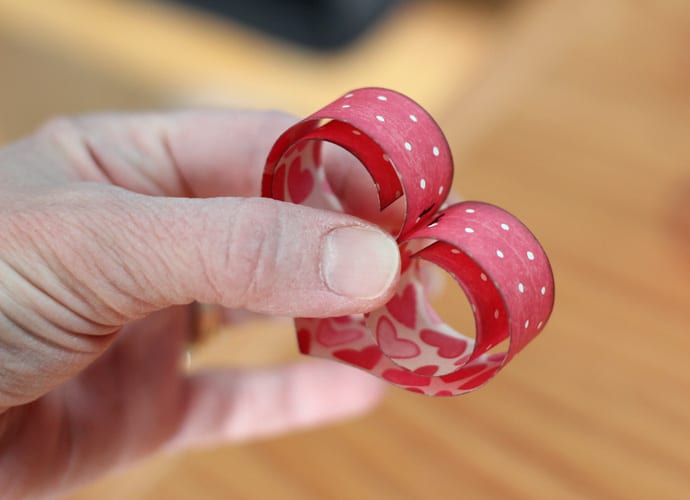
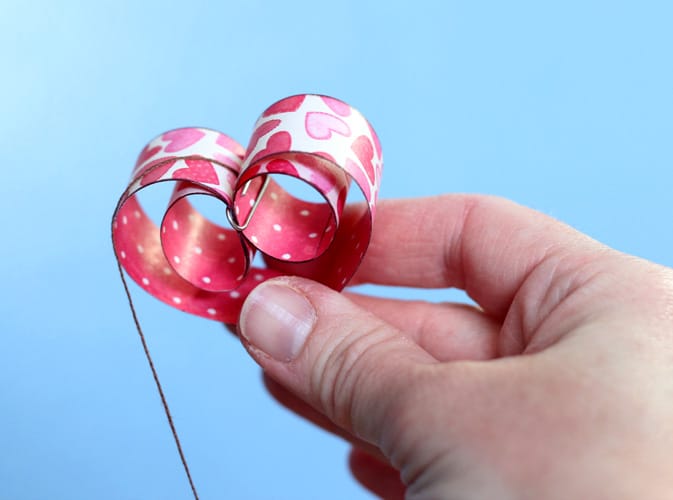
4. Use a round pencil to curl each side of the strip up to the fold line. Do this for all 16 hearts.

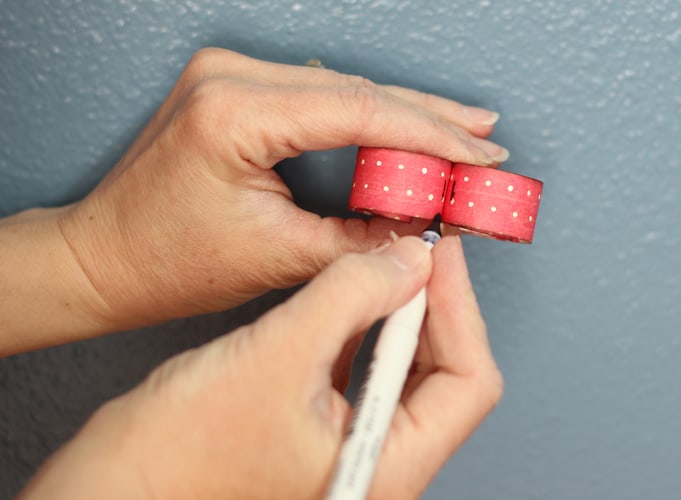
5. Mark the inside of each heart with a marker where the curled portions should meet.
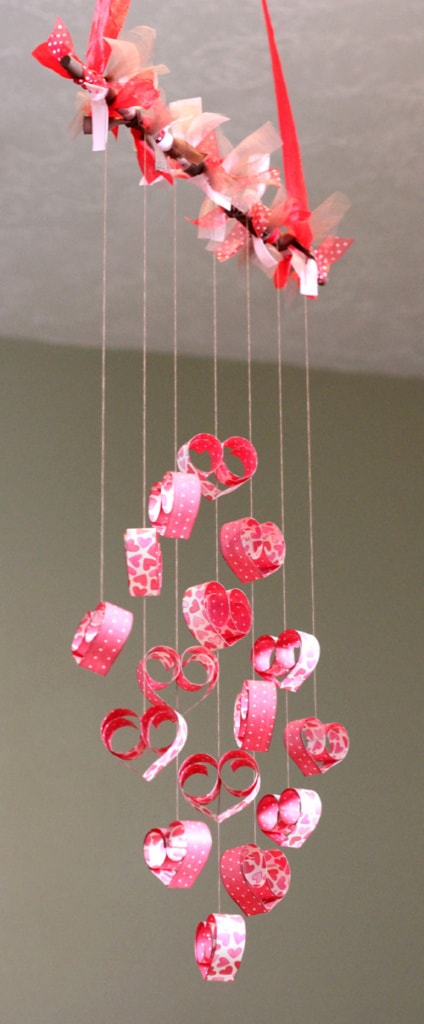
6. Place the hearts on a work surface and arrange them like this:
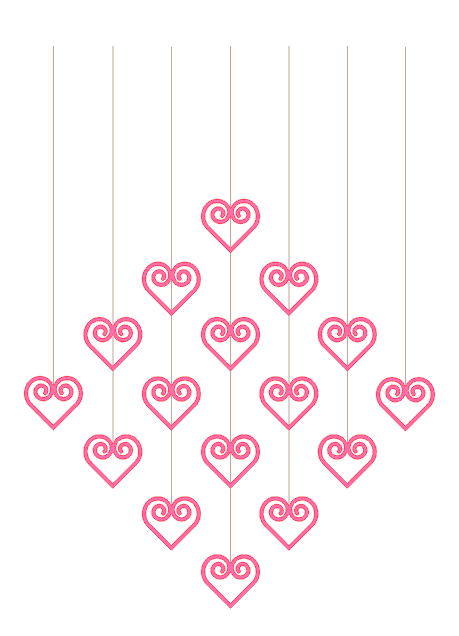
Four hearts make your longest column, three on either side of that, two in the columns further out, and one heart will hang on the outside two columns. The side of the pattern paper facing out should be the same within the column, so the center column with four hearts should all have one side of the paper showing, which would also be the same for the columns with two hearts each. The other side of the pattern paper should be in the columns with three hearts and one heart. Clear as mud? Here’s a picture of what I mean:
7. Cut seven strands of thread (I used brown because it’s neutral and matches my wooden rod). Two should be about 20”, two should be about 23”, two should be about 25”, and one should be about 27”.
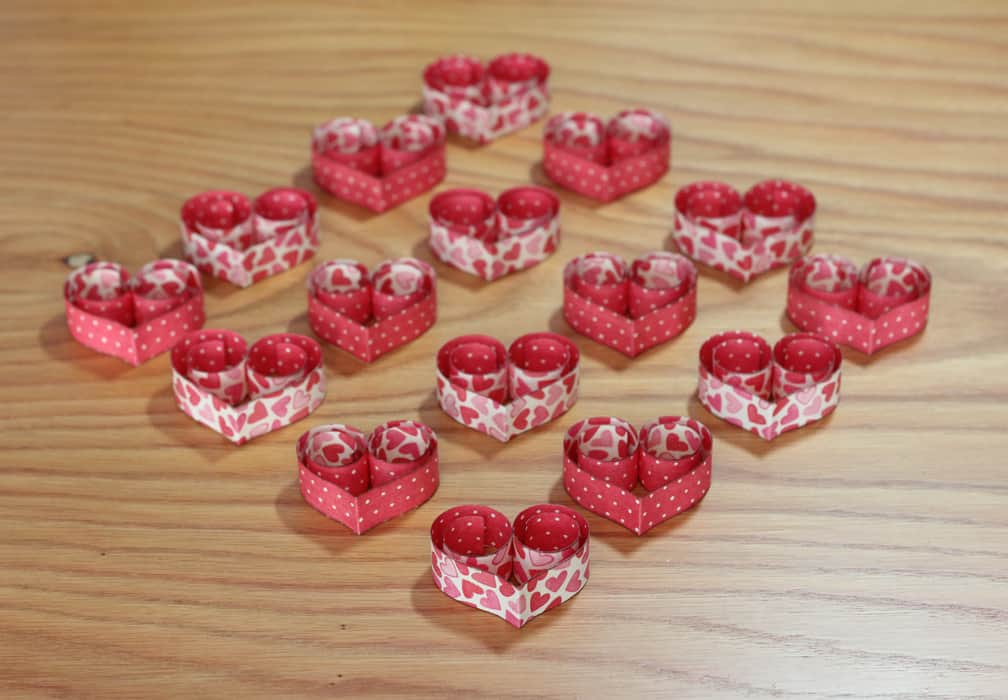
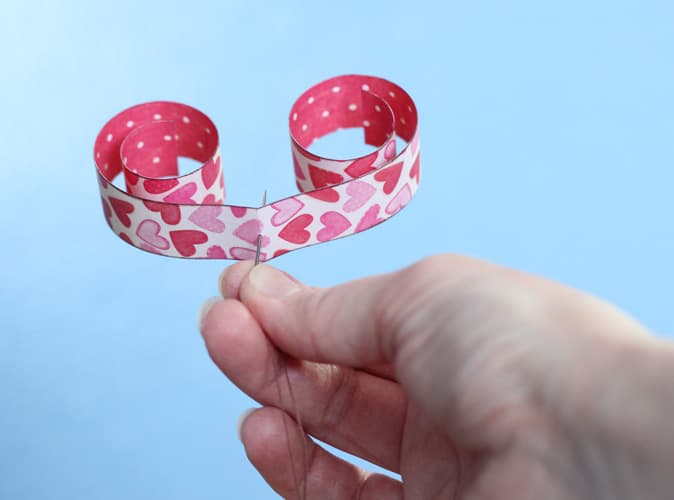
8. Start with the lowest heart in the longest column. Use a small glue dot or approx. ¼” strip of double-sided tape (and/or your favorite fast-drying glue). Place it on the mark you made in step 5. Put the end of the thread against the glue dot and pinch the heart together so the marks seal against each other with the thread in between. Hold it with a small paper clip until it sets.
9. Use a needle and thread to bring the thread from the lower heart up through the center of the heart above it.
10. Place the tape or glue dot on that heart’s mark. Make sure the bottom of this heart is three inches above the curls on the heart below it. Place the thread so it will run between the curls again, and pinch closed. (see diagram below) I used a scrap piece of paper with 3” marks as a guide.
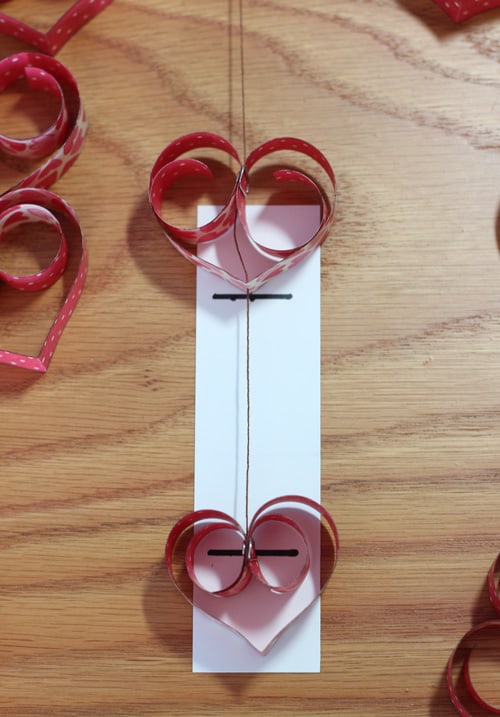
The point where the curls touch should measure 3” from the bottom of the heart that hangs above it. The center point of each column measures 2” from the center point of the column next to it. (The more accurate you can get it, the better, but there’s room for error.)
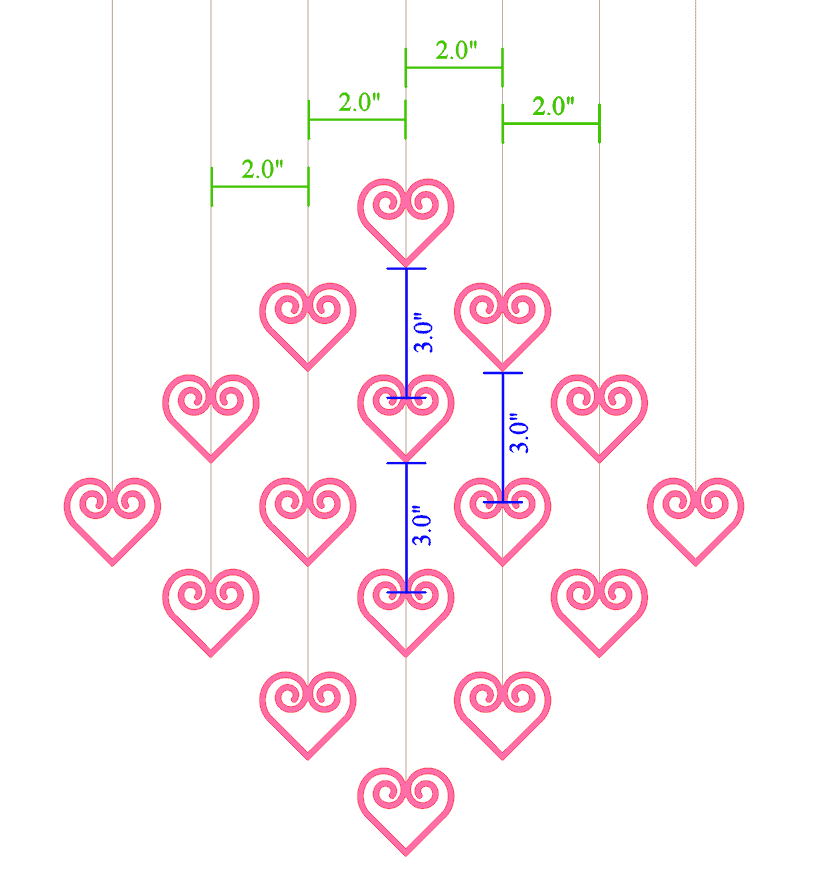
11. Repeat for all the columns of hearts.
12. Hang the center strand (with four hearts) from the middle of the rod so the top of the highest heart is 8” down. Tie it on to the rod.
13. Tie the remaining strands on as shown, with each thread spaced 2” apart.

14. Tighten the curls of the hearts as necessary with your fingers or tweezers. You may wish to add a dot of glue or Fray Check to each knot in the thread where it is tied to the rod. Trim off the excess thread.
15. Add ribbon or bows along the rod to dress it up.
16. Hang with approx. 48” of ribbon.

Wow! I like it and nice clear directions for making it. Thanks for sharing the directions for making it.
Oh, this is so sweet Kelly! I love those little hearts!
cute…cute…cute! thanks for sharing your pdf instructions.
You're welcome!
Kelly, so pretty, your home must always look gorgeous with the pretty projects you make. This is one I can make too, I have the dowel and found some pink papers the other day that I had forgotten about.
Hugs, Lori m
I hope you do make one, Lori! I've made two already myself. 🙂
THis is so Cool! I just love how the hearts look with the curly q's inside of them! It takes alot of patience to create this, that's for sure!!! Great job, you are so talented and creative.
Thank you! The hearts are the easiest and most fun part of this project.
Another great project, love the dp you used for the hearts! And a little confession…looking at the picture of the hearts being held with the paper clips reminded me of those pink curlers my mother used to put in my hair as a little girl…lol!
That's so funny! I hadn't thought of that, but it does remind me of those little pink curlers. 🙂